 |
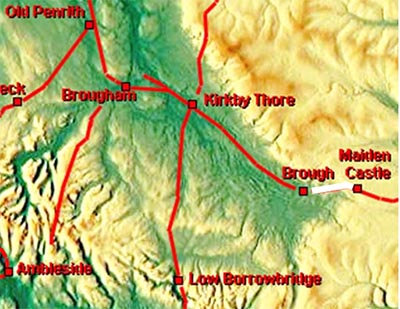
The Roman Road from Maiden Castle to Church Brough, Margary 82This section of the Stainmore road was mapped only partially by the Ordnance Survey in the nineteenth century and then largely forgotten. Work by Hugh Toller, Bryn Gethin, Mike Haken and David Ratledge using Lidar, aerial photographs, drone imagery and old fashioned walking enabled the southern route to be reasonably well located. But it was the arrival of Series 2 Lidar in 2021 that finally enabled the full complexity to be finally revealed.
This has one of the most complicated road networks in the country! There appears to be 3 Roman routes plus many other both probably pre-Roman and many post-Roman. Untangling them all was no easy matter!
The southern route had always been a puzzle as it seems to branch off and then rejoin the A66. Thanks to that series 2 Lidar it became obvious there was also a northern route which must have been the earliest Roman line. Its proximity to the early signal towers is a strong indication that it must have been the original Roman line. The middle part of the northern route was known as Low Street. The southern route via Brough clearly branched off the original northern line and probably replaced it. |
NEW Lidar video flyover from Brough Fort to Rey Cross and return
|
||
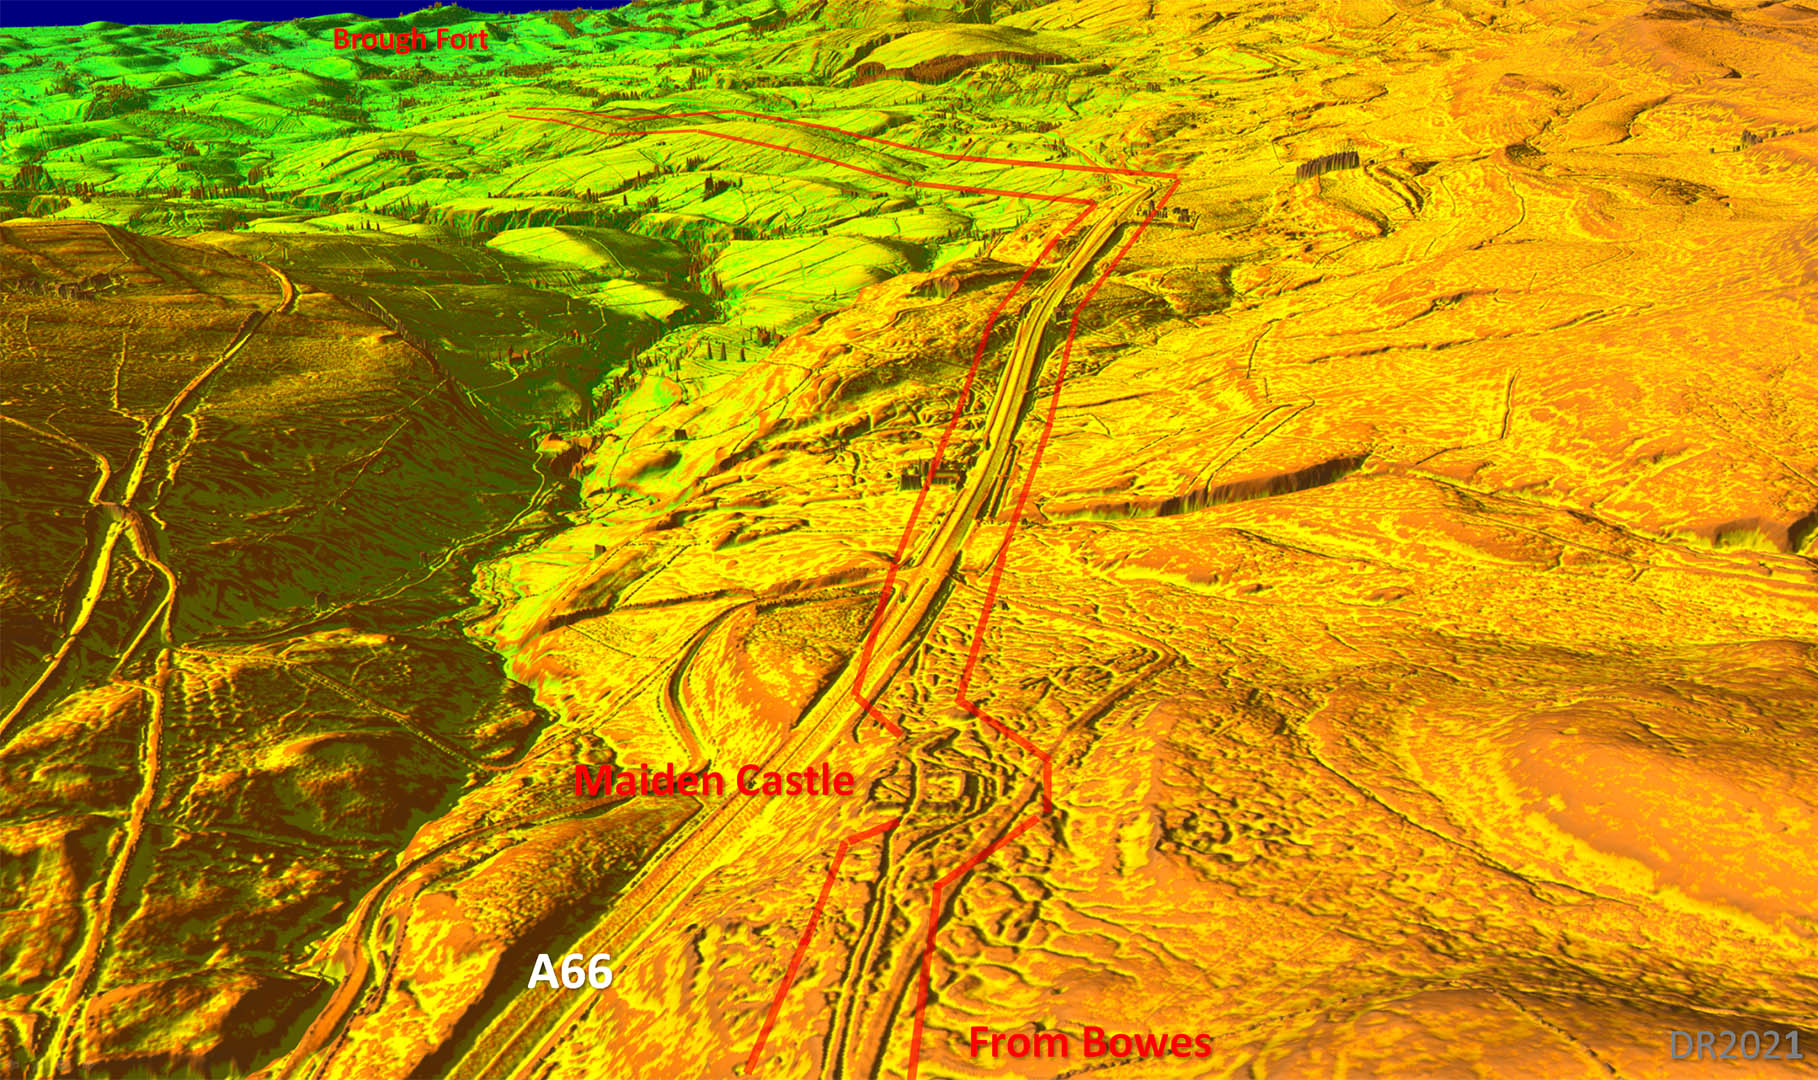
Oblique Lidar Image - Maiden Castle The route was assumed to have passed through the centre of the fortlet. This was overlaid by a later packhorse track just to confuse matters. However that series 2 lidar seems to indicate the road was diverted around the fort. Margary believed the prominent dogleg road bypassing the fort on its east and north represented the line but this appears to be the early turnpike. The direct alignment before and after the fort is very supportive of this being the correct Roman route. |
Click for larger view |
 |
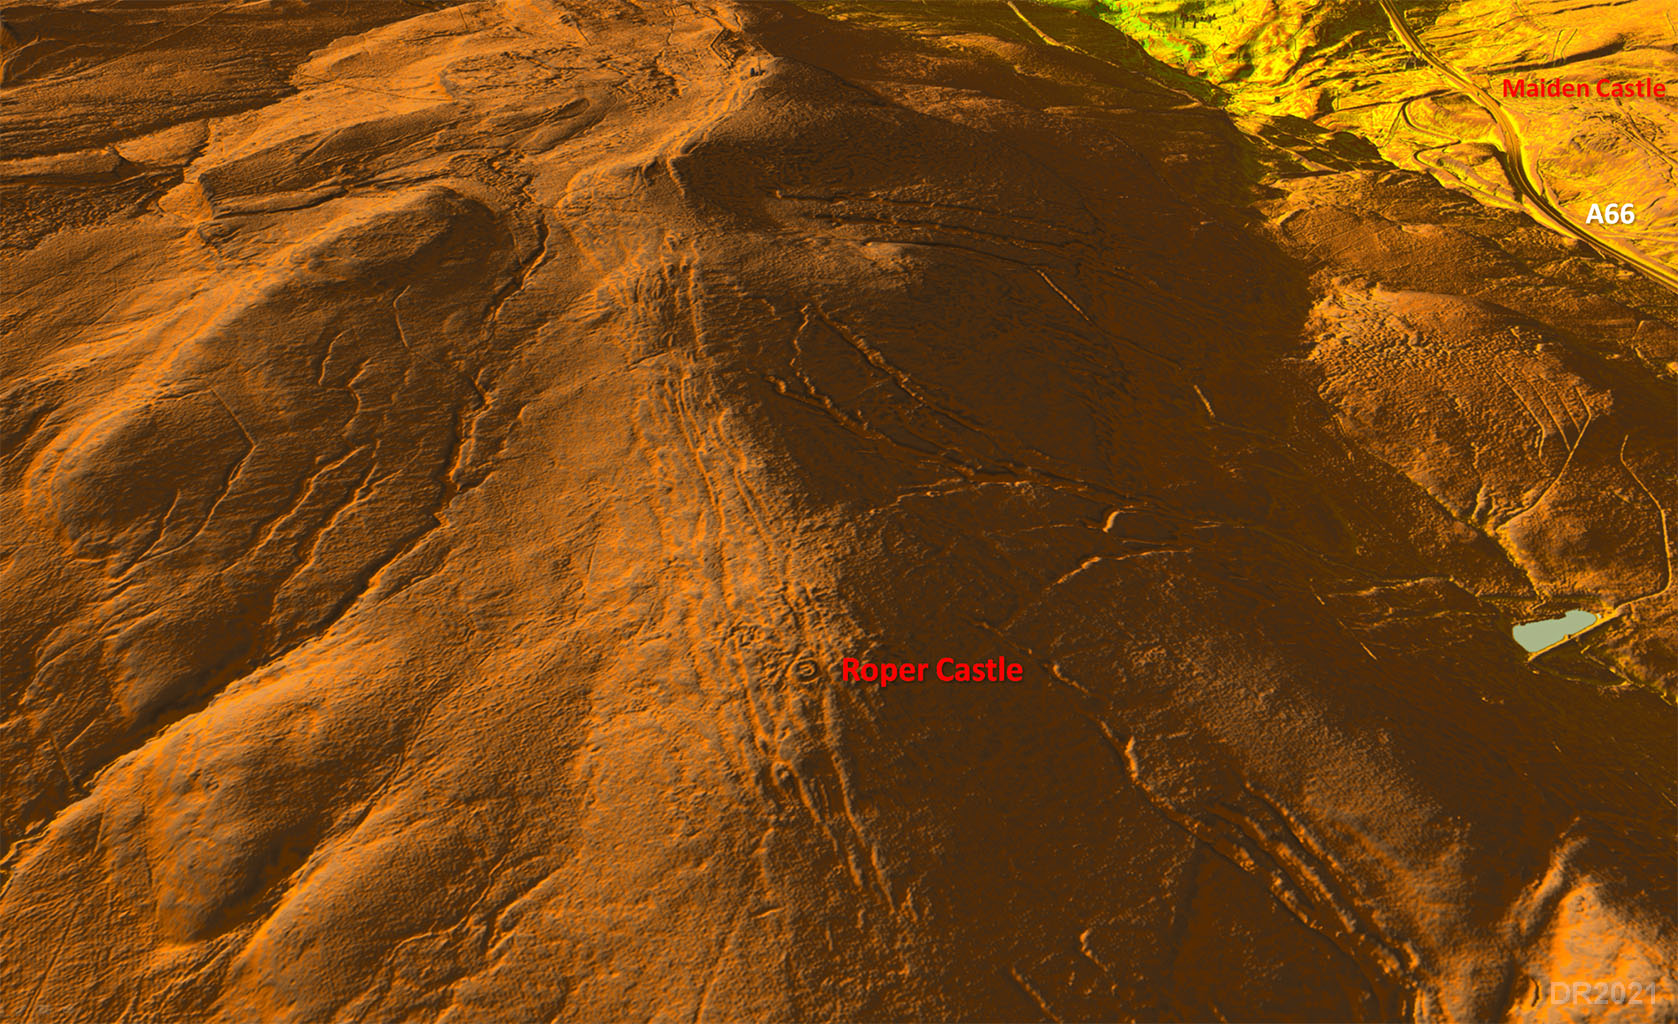
Oblique Lidar Image - Roper Castle Roper Castle Roman Signal Station at first glance looks in an odd position ie not on the crest of the ridge. But its position satisfies 3 obviously essential requirements for the Romans:-:
So no accident at all!
|
Click for larger view |
 |
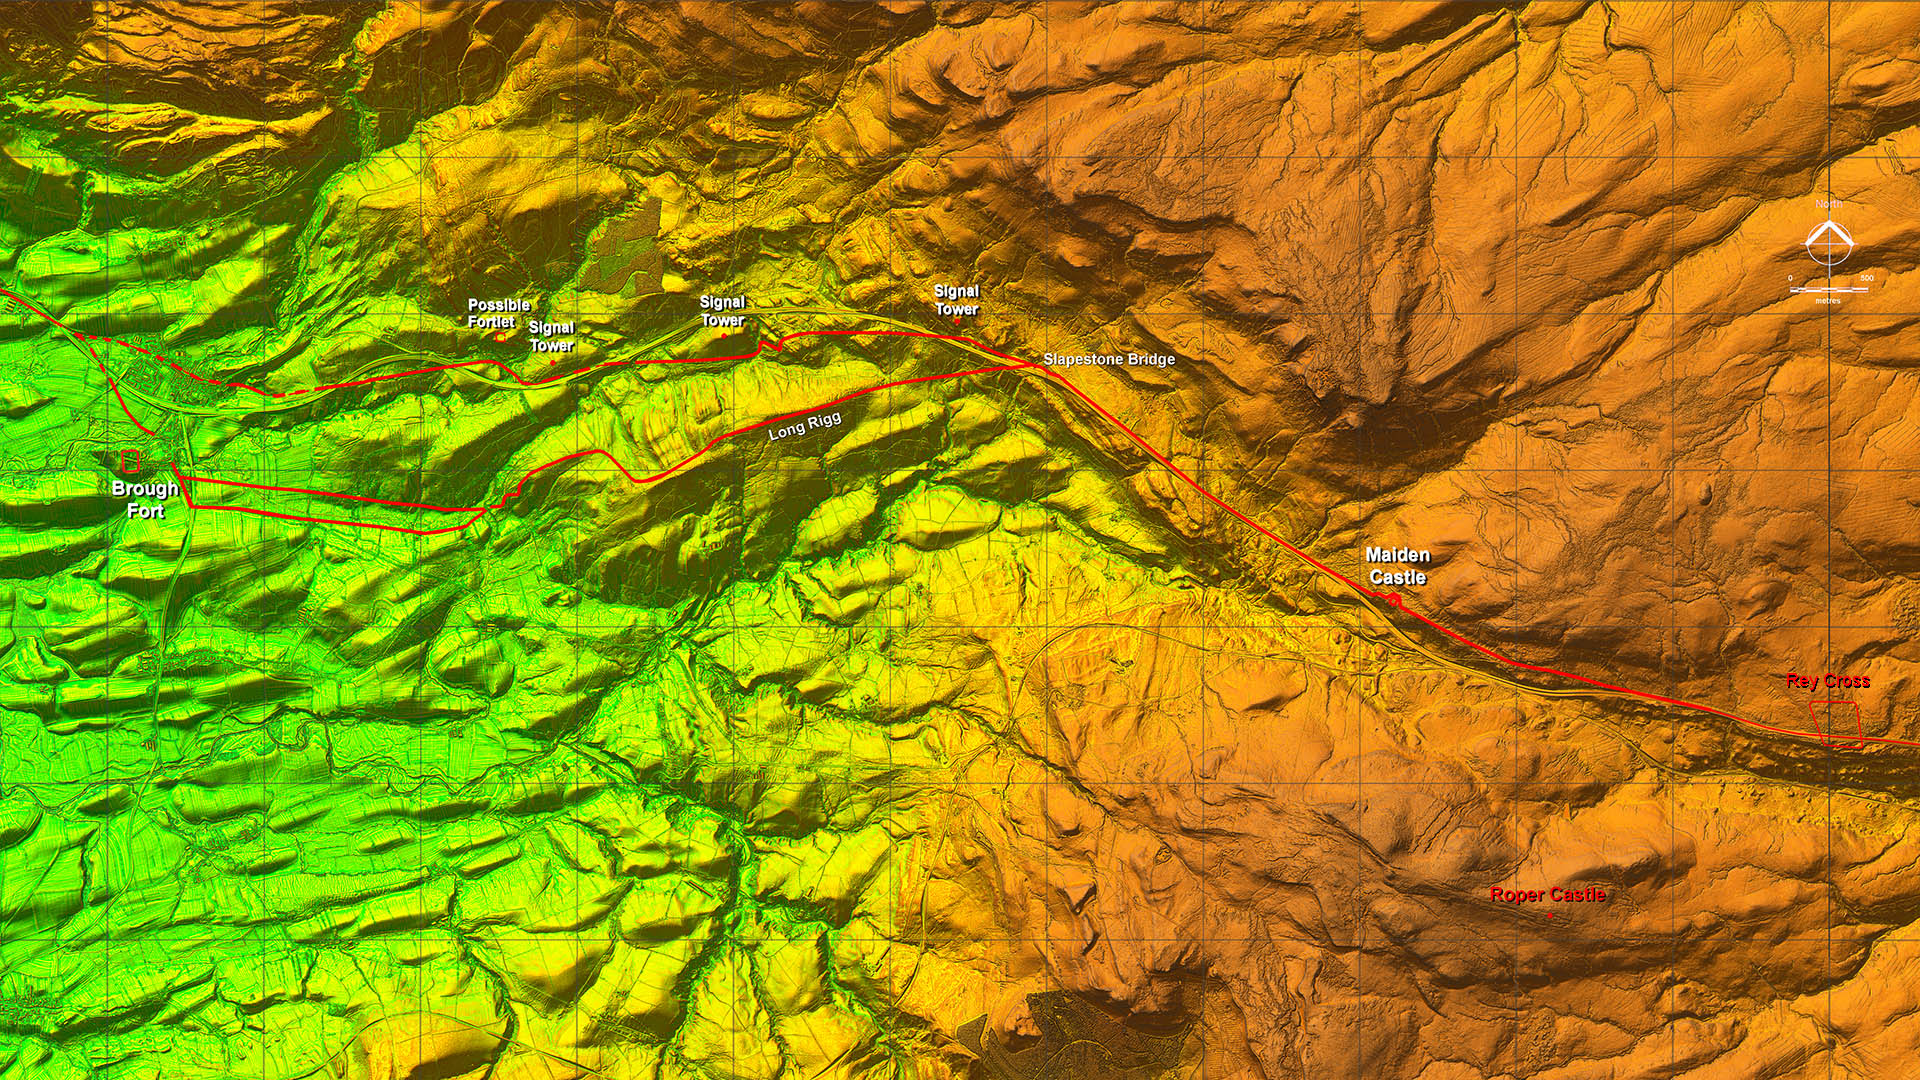
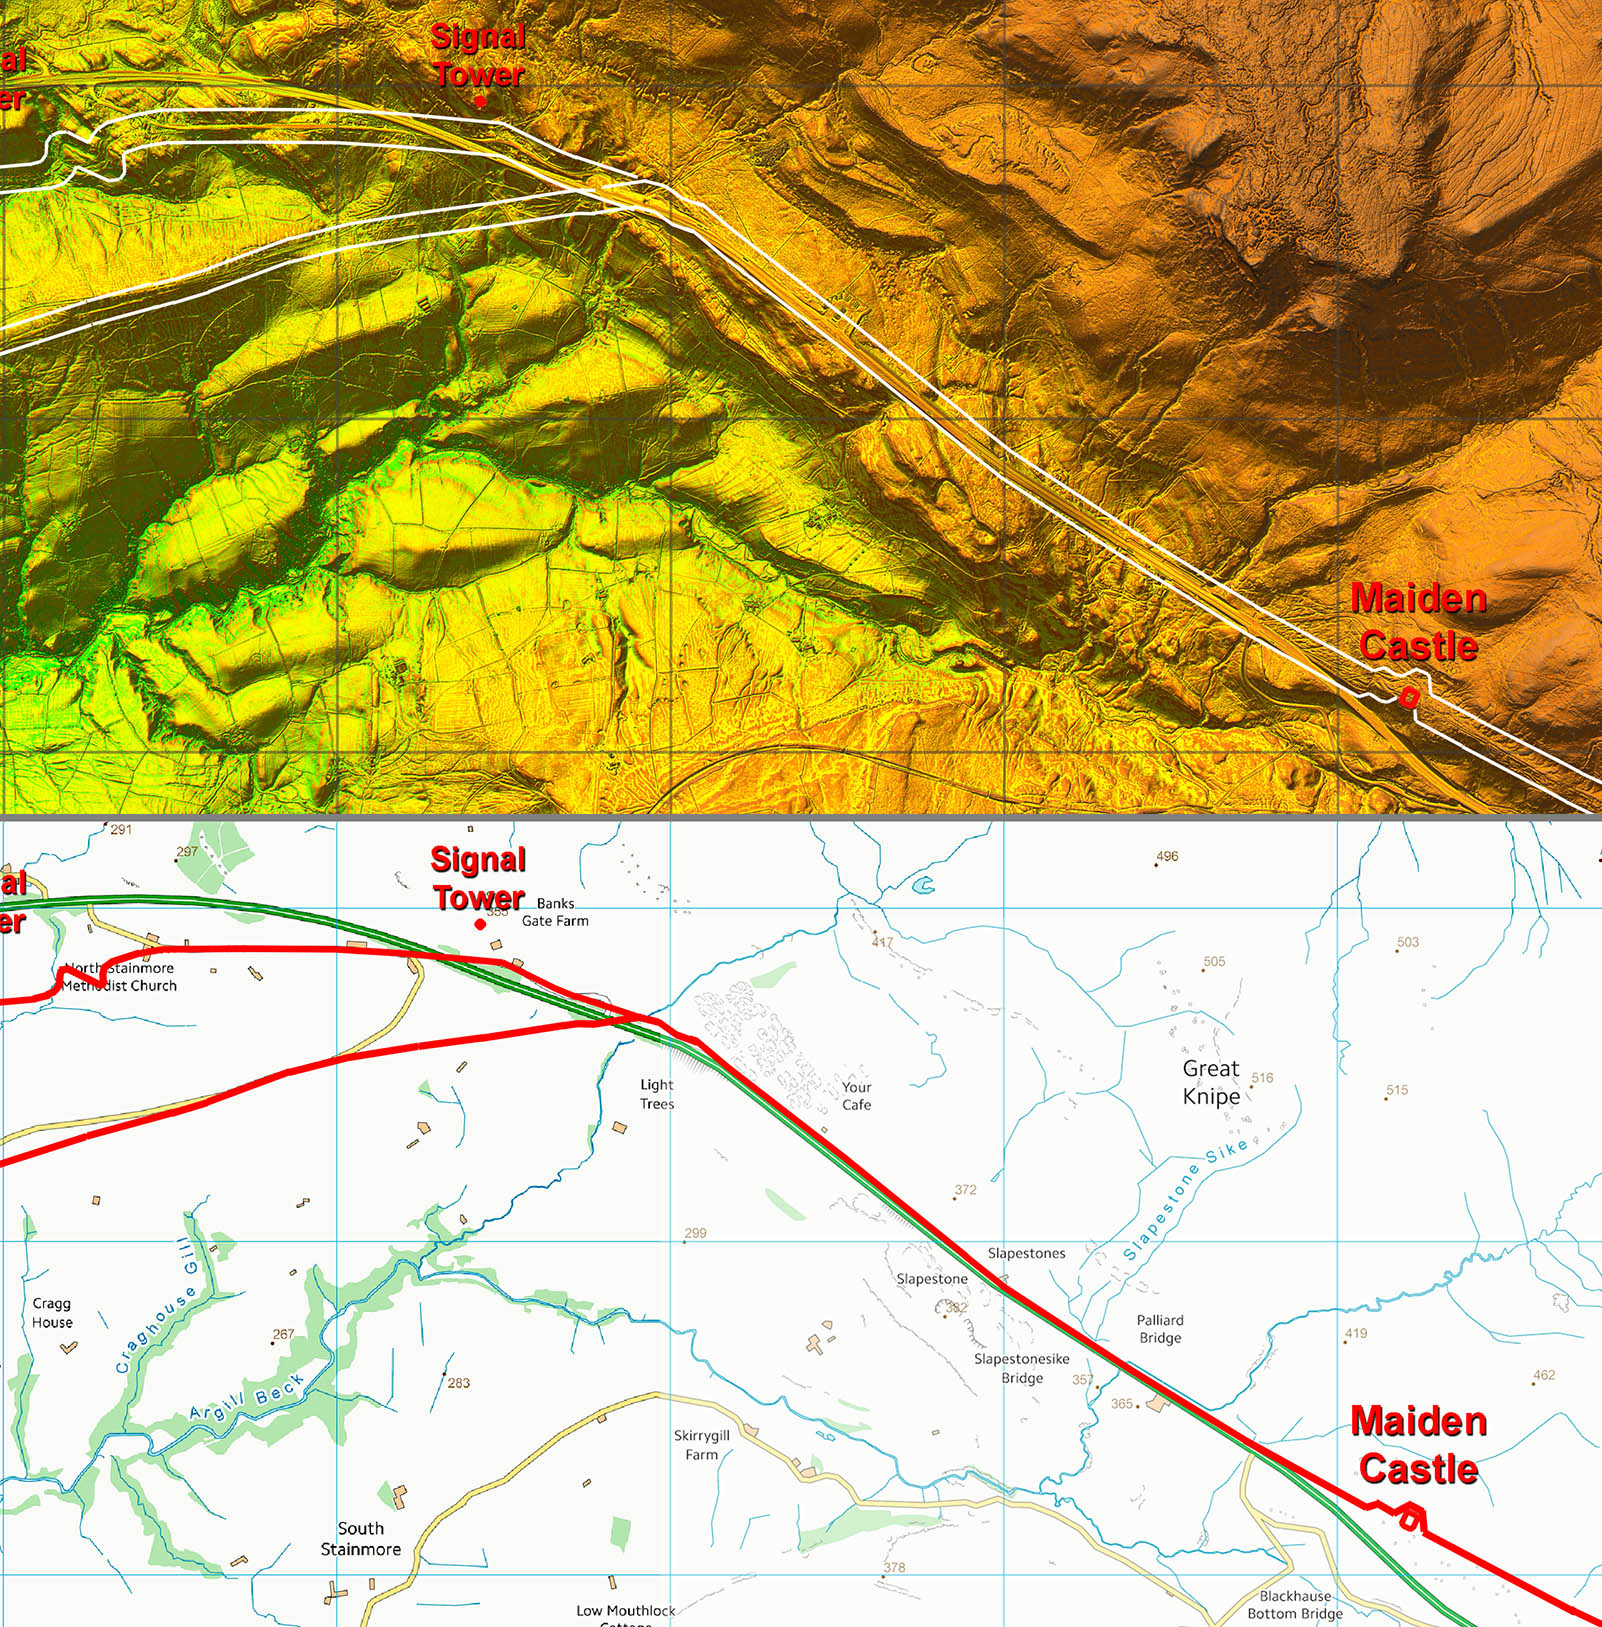
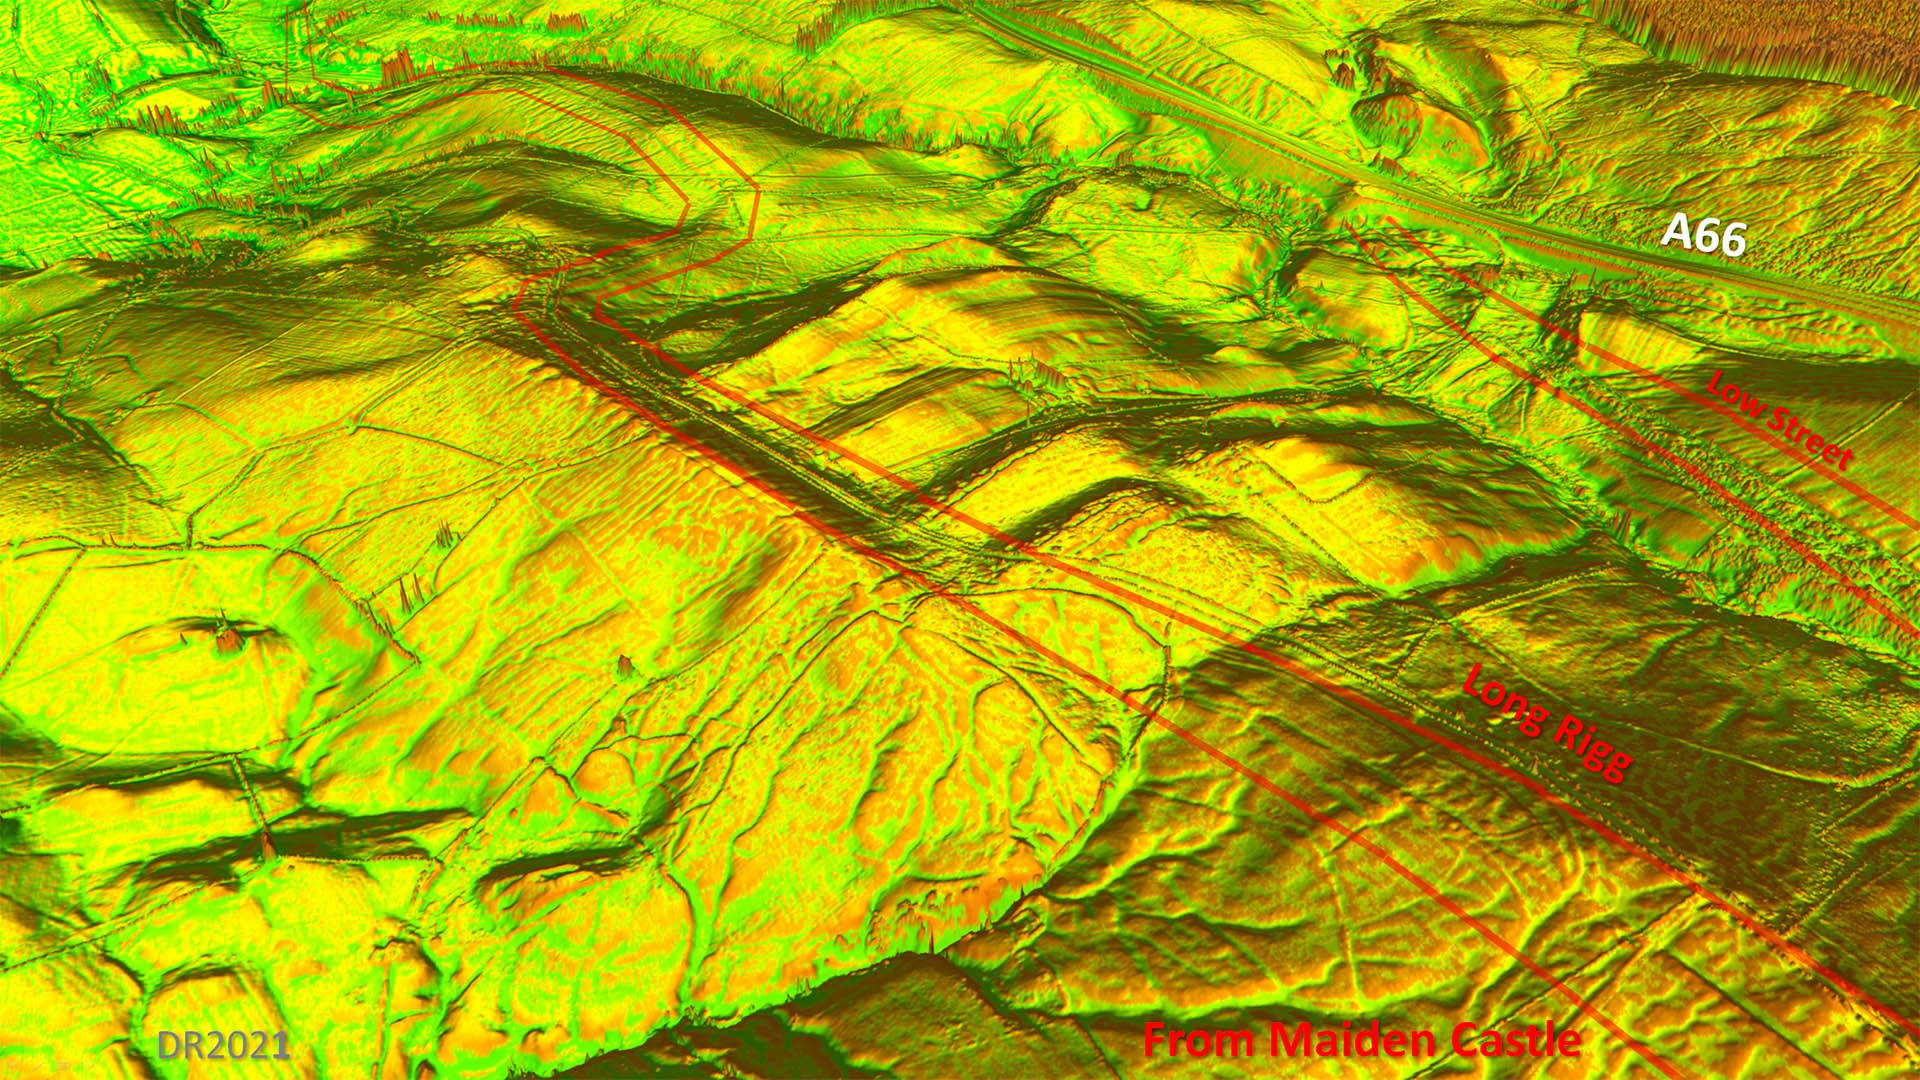
Route Map 1 - Maiden Castle to Long Rigg The turn off at Slapestone Bridge gives a clue that the route over Long Rigg was amost certainly a later route, the original being the northern option via the signal stations or more logically watch towers.
|
Click for larger view |
 |
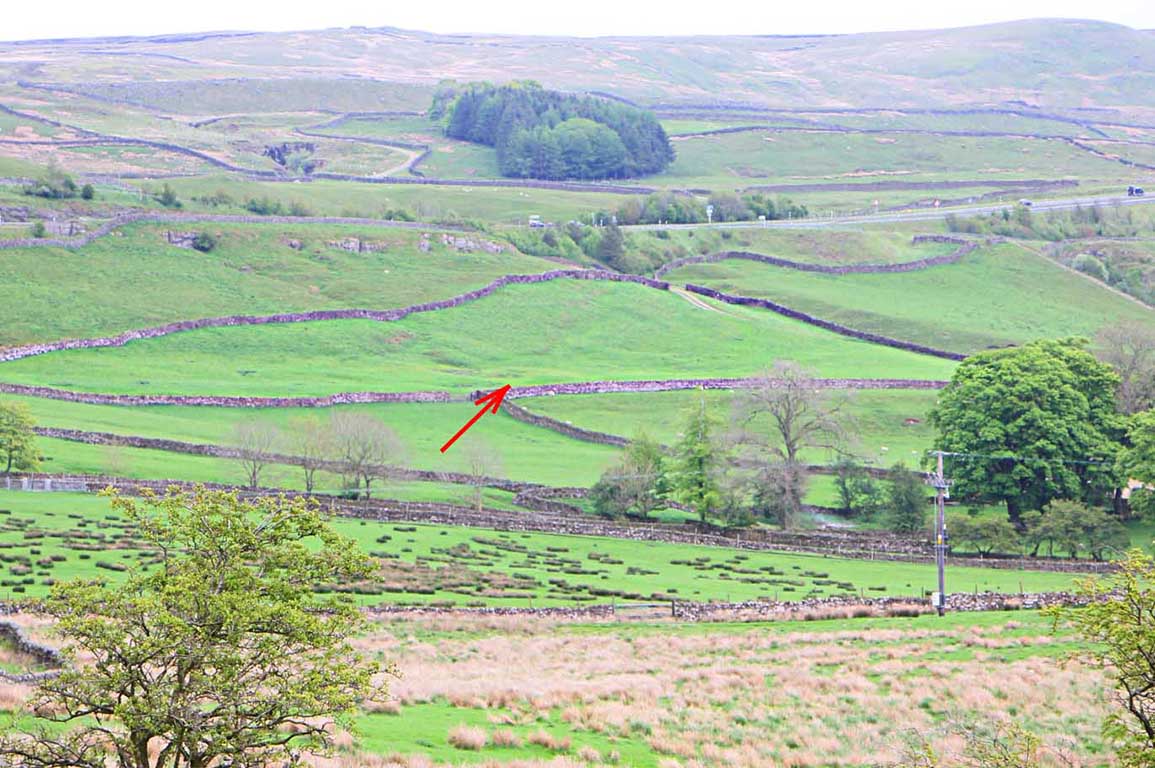
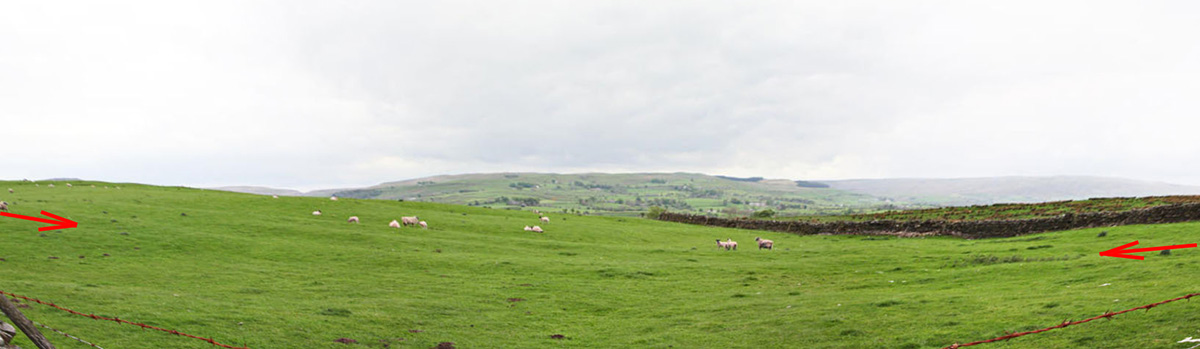
View to Slapestone Bridge from Long Rigg This is the view looking east from Long Rigg where the Roman road slants across the slope from Slapestone Bridge in the direction of Long Rigg. This is confirmed by the series 2 lidar.
Image: David Ratledge |
Click for larger view |
 |
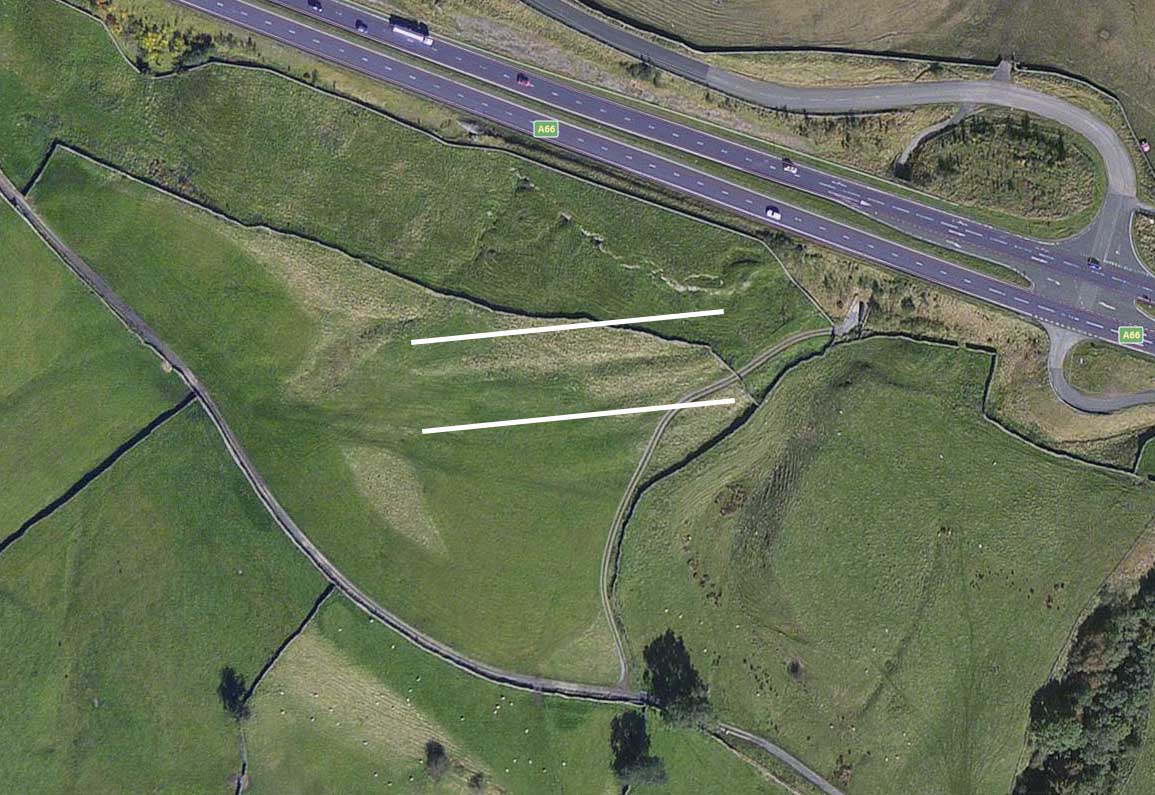
Agger from Slapestone Bridge 1 I had spotted this stretch on aerial photos before lidar became available. It was very reassuring that lidar did confirm it as correct. |
Click for larger view |
 |
Agger from Slapestone Bridge 2 This was the other piece of aerial evidence which was confirmed by Lidar when full coverage became available. |
Click for larger view |
 |
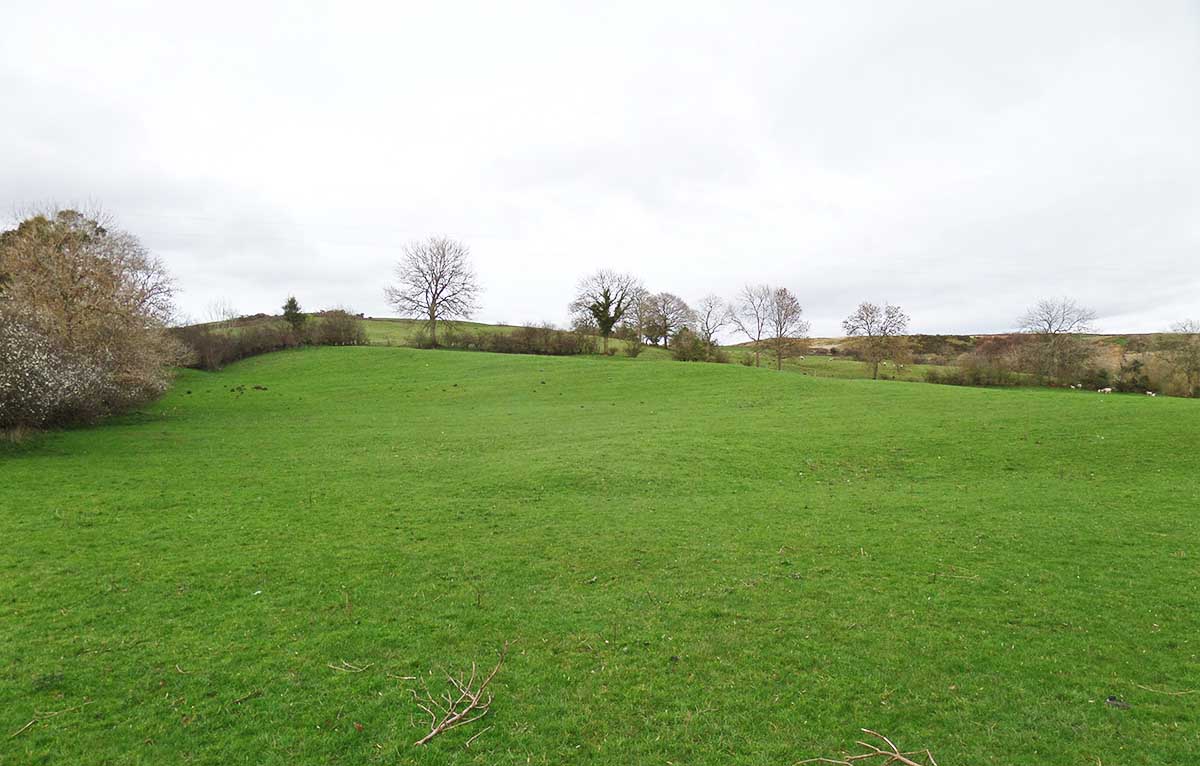
Long Rigg. Here the Roman road is around 30 metres south of the modern road and shows clearly in the fields. This stretch is recorded on OS maps but modern ones seem to now place it on the modern road which is incorrect here. Image: David Ratledge |
Click for larger view |
 |
Oblique Lidar Image - Long Rigg The Roman route is first south of the road as shown above but eventually merges into modern road passing Limes Head. It then does a big swing to the north to get down the slope before another swing to the west and heads for the zig-zags - see later.
|
Click for larger view |
 |
Descent from Limes Head. There are several alternative tracks in the vicinity presumably marking many diversions of the route over the later centuries but this descent from Limes Head is so obviously Roman . Limes Head is just off the top of this view. Drone image courtesy of Mike Haken
|
Click for larger view |
 |
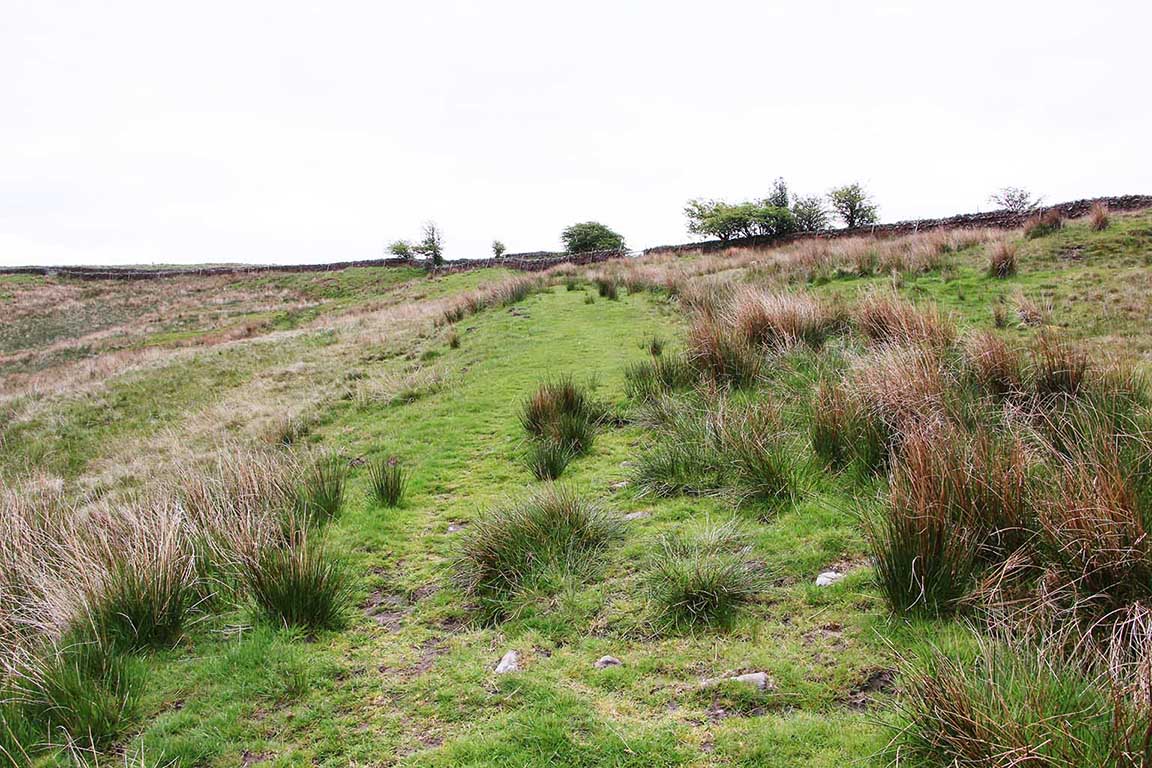
Descent from Lime Head - ground level view. This is looking up the slope to Limes Head. The road (with stones) and ditches is very clear and substantial but much damaged, presumably by water action. Image: David Ratledge
|
Click for larger view |
 |
Turn at the Acute Angled Wall, NY822141. Here the road turns from the descent from Limes Head to head west and is very obvious where it passes under the wall. Image: David Ratledge
|
Click for larger view |
 |
Agger NY820142. This is the slightly curving stretch approaching the top of the double zig-zag descent and was recorded on early OS maps. Image: Hugh Toller |
Click for larger view |
 |
3D Lidar image Double Zig-zag descent. Fabulous piece of Roman engineering to drop down to Powbrand Sike. Again there are several later diversions evident which presumably bypassed the Roman route when it became no longer serviceable. . |
Click for larger view |
 |
Zig-zag and agger of the descent to Powbrand Sike NY816137. A little more subtle than the Lidar image above but still very evident. Image: Hugh Toller
|
Click for larger view |
 |
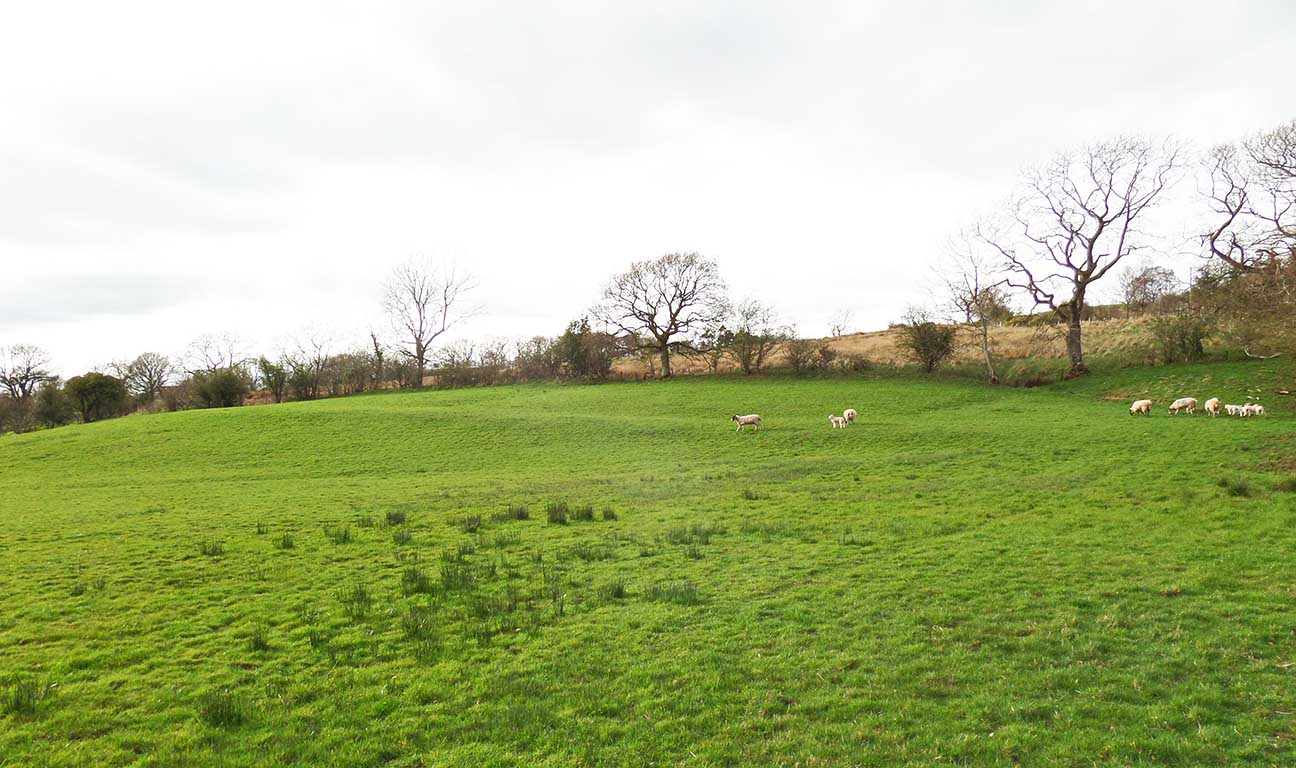
Agger North East of Park House, NY814137. Visible from the public footpath is the agger crossing the fields and heading towards Augill Castle and Brough. Image: Hugh Toller
|
Click for larger view |
 |
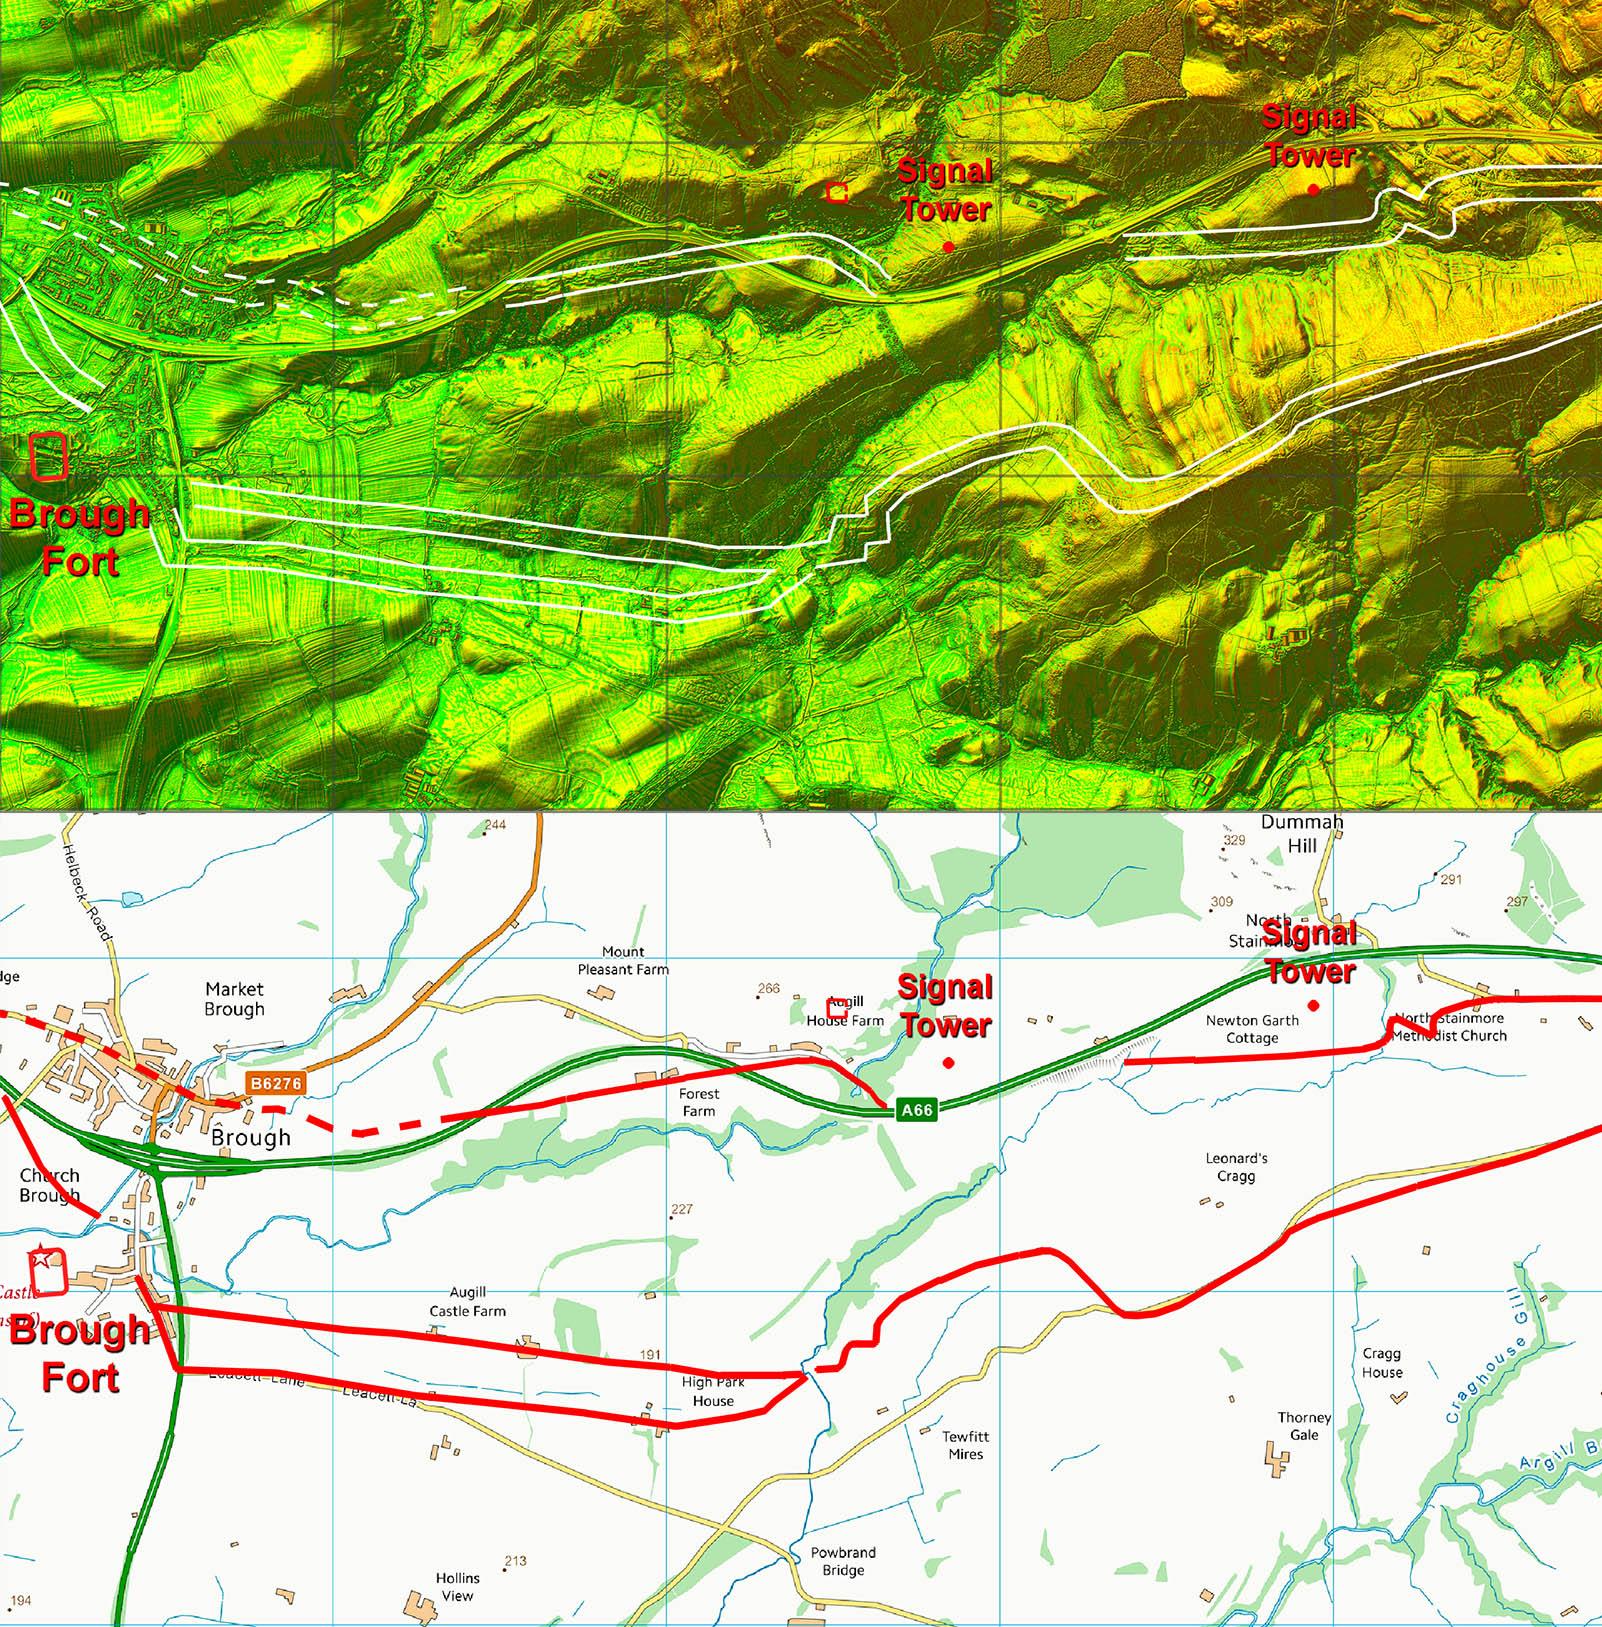
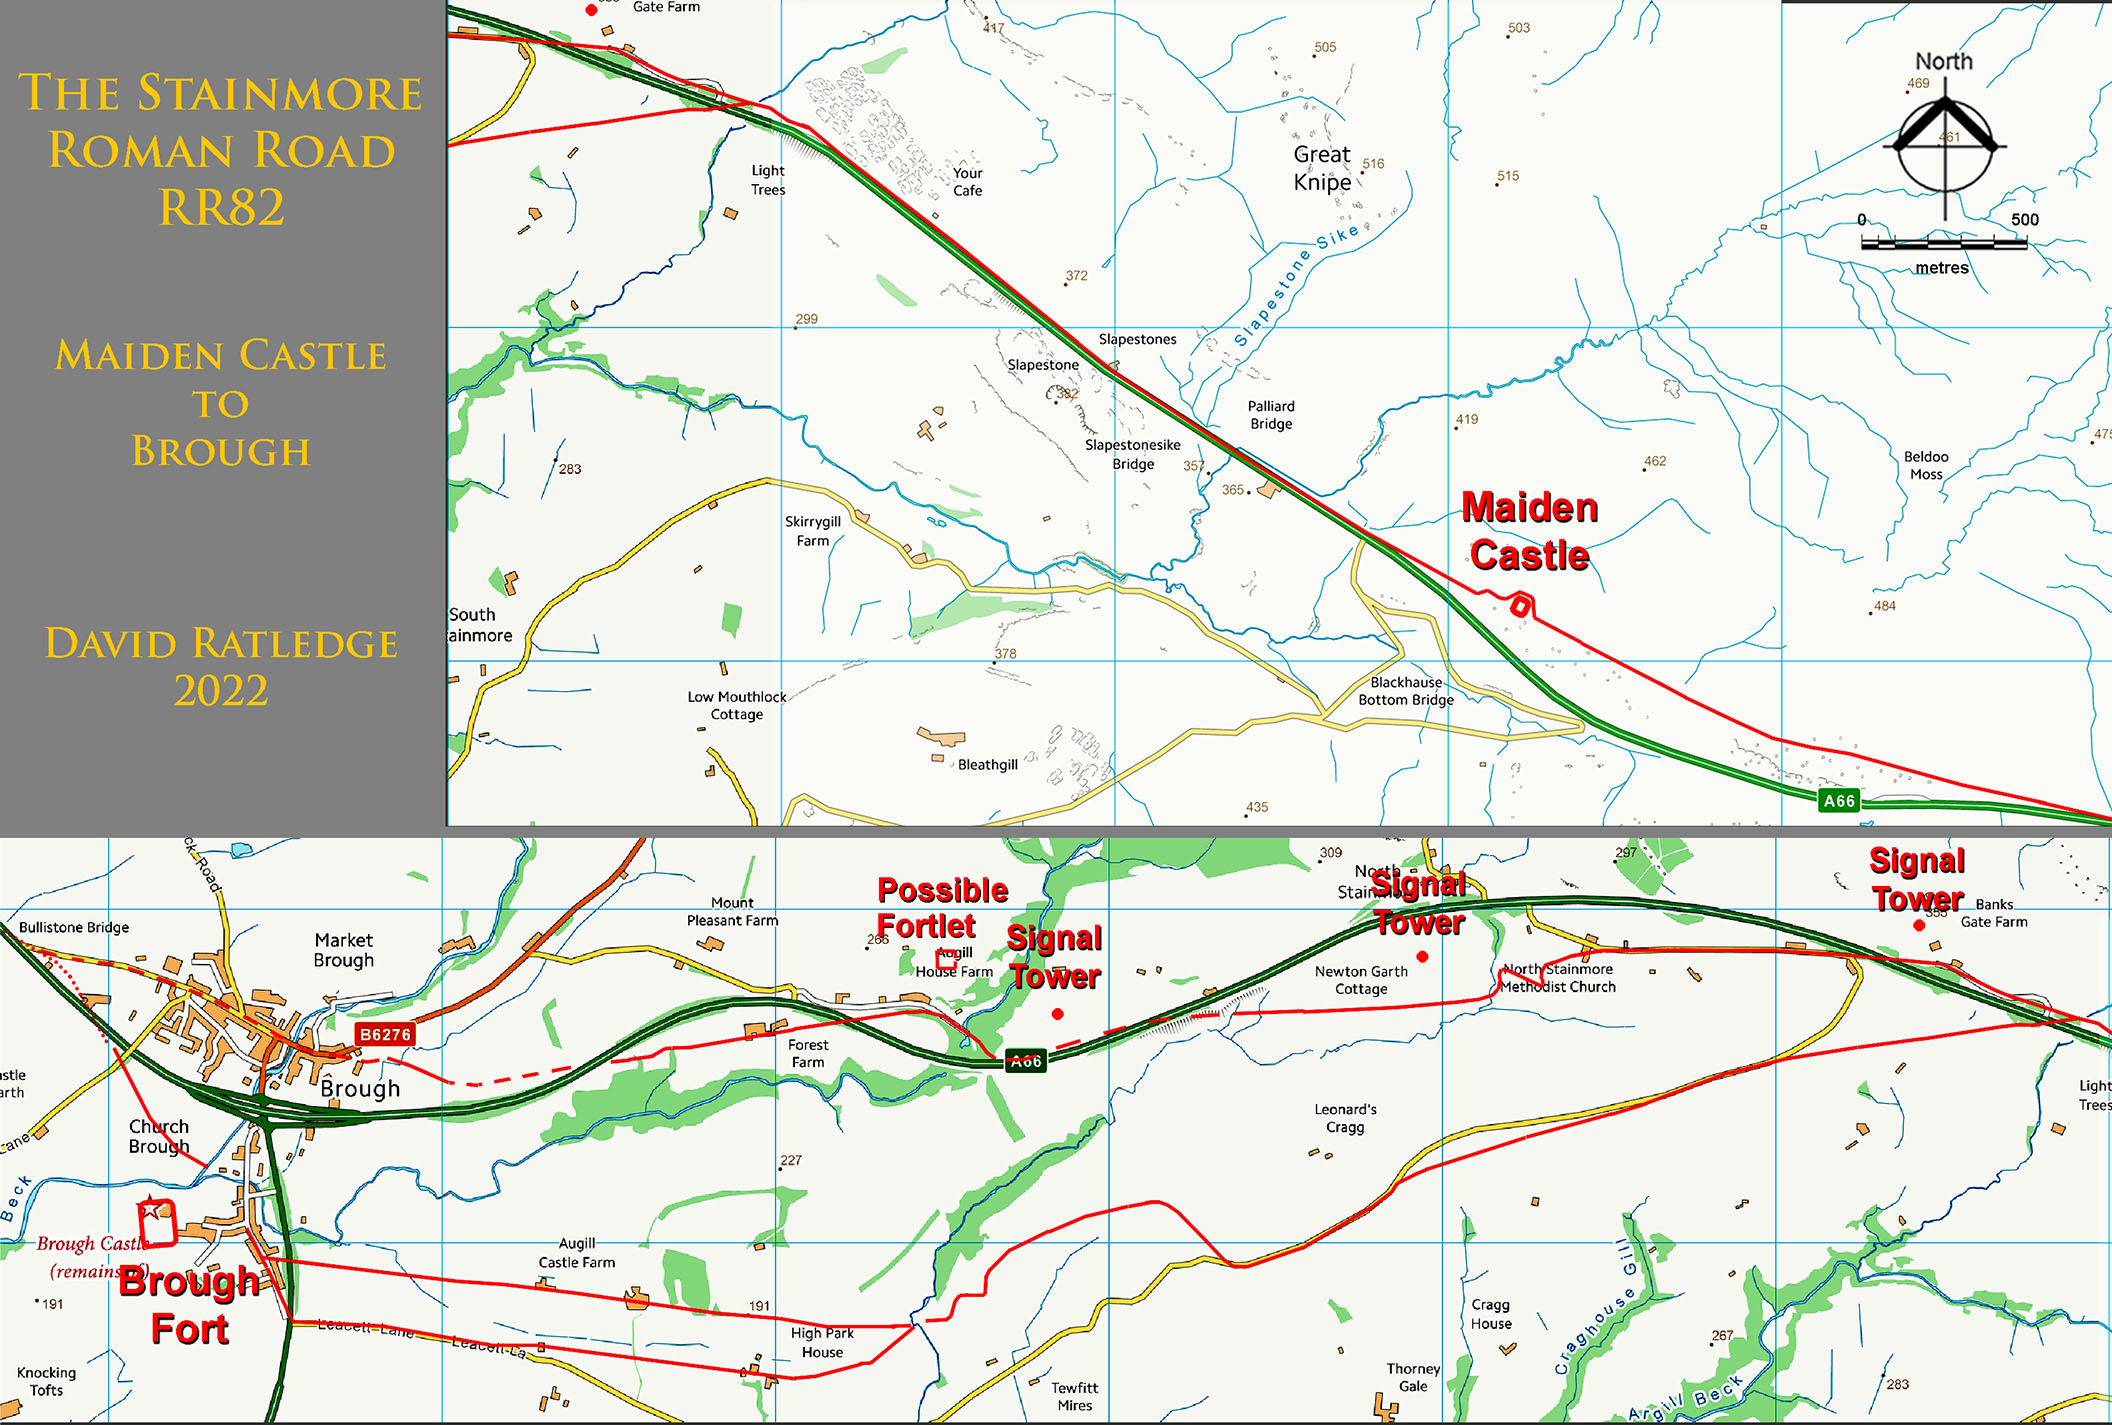
Route Map 2 - Brough Approach First spotted by Bryn Gethin, the direct approach to Brough passes under Augill Castle and surprisingly crosses rather low lying marshy ground. This area still floods today and it is no surprise the Romans decided a replacement on dry ground was needed taking a more southerly course. The northern route is also plotted showing its proximity to the signal towers and fortlet. Note although referred as signal towers perhaps watch towers would be a more appropriate name. They were clearly to guard the road. |
Click for larger view |
 |
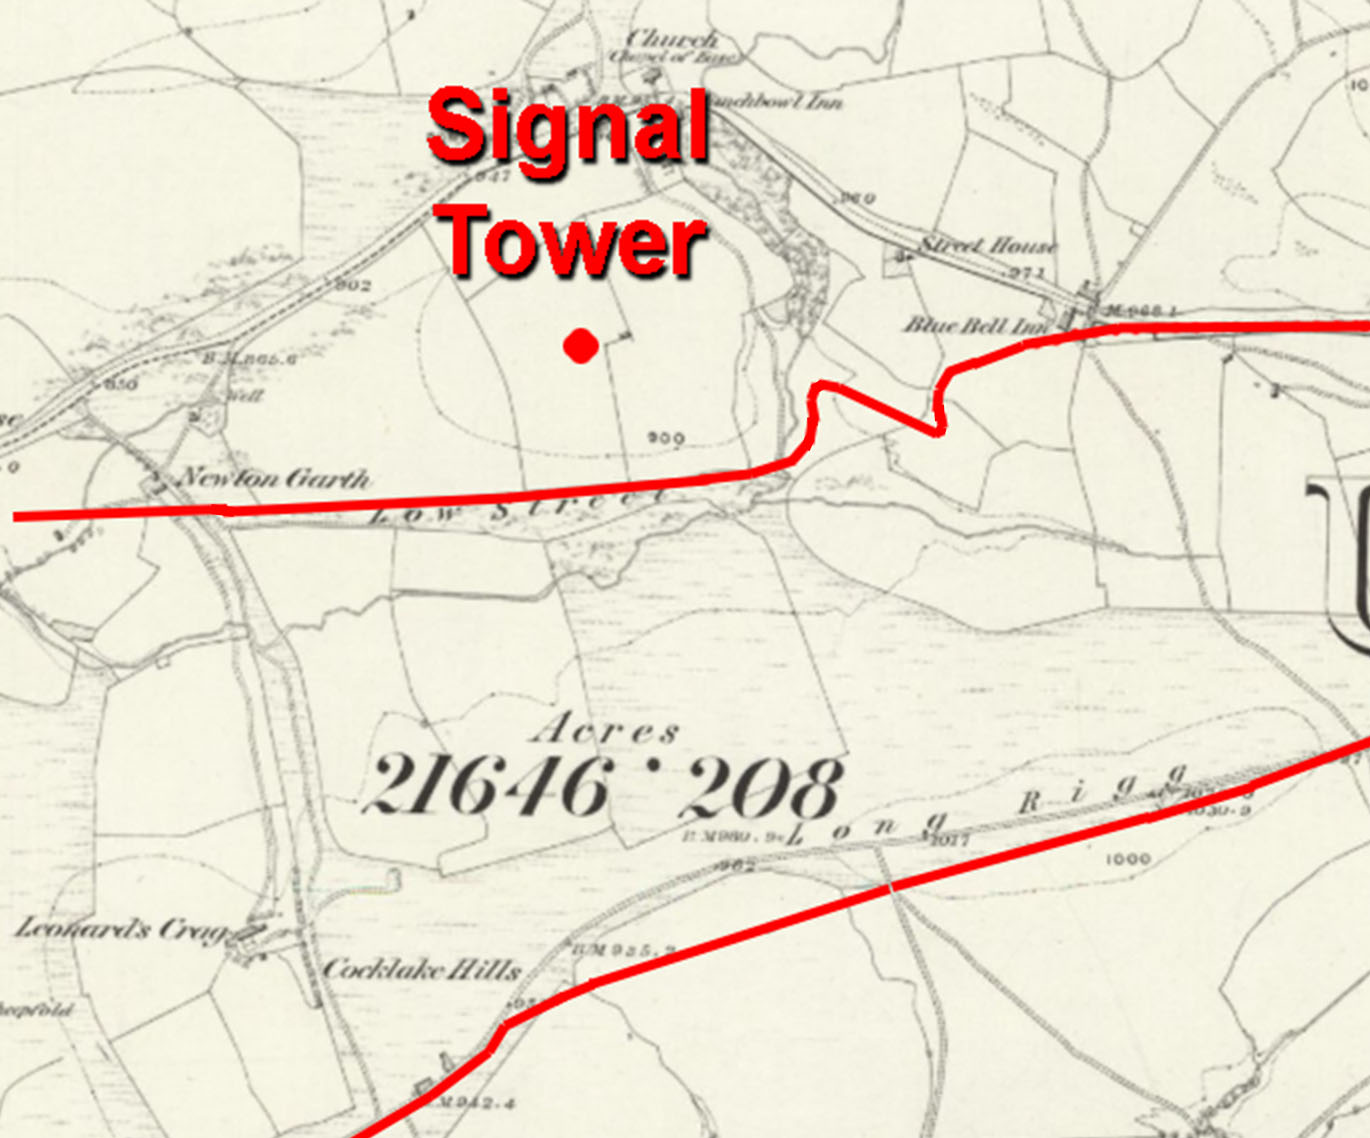
Northern Route - Low Street Notice the name "Low Street" on this Westmorland first edition map. The signal tower at South Stainmore is known as Punch Bowl.
|
Click for larger view |
 |
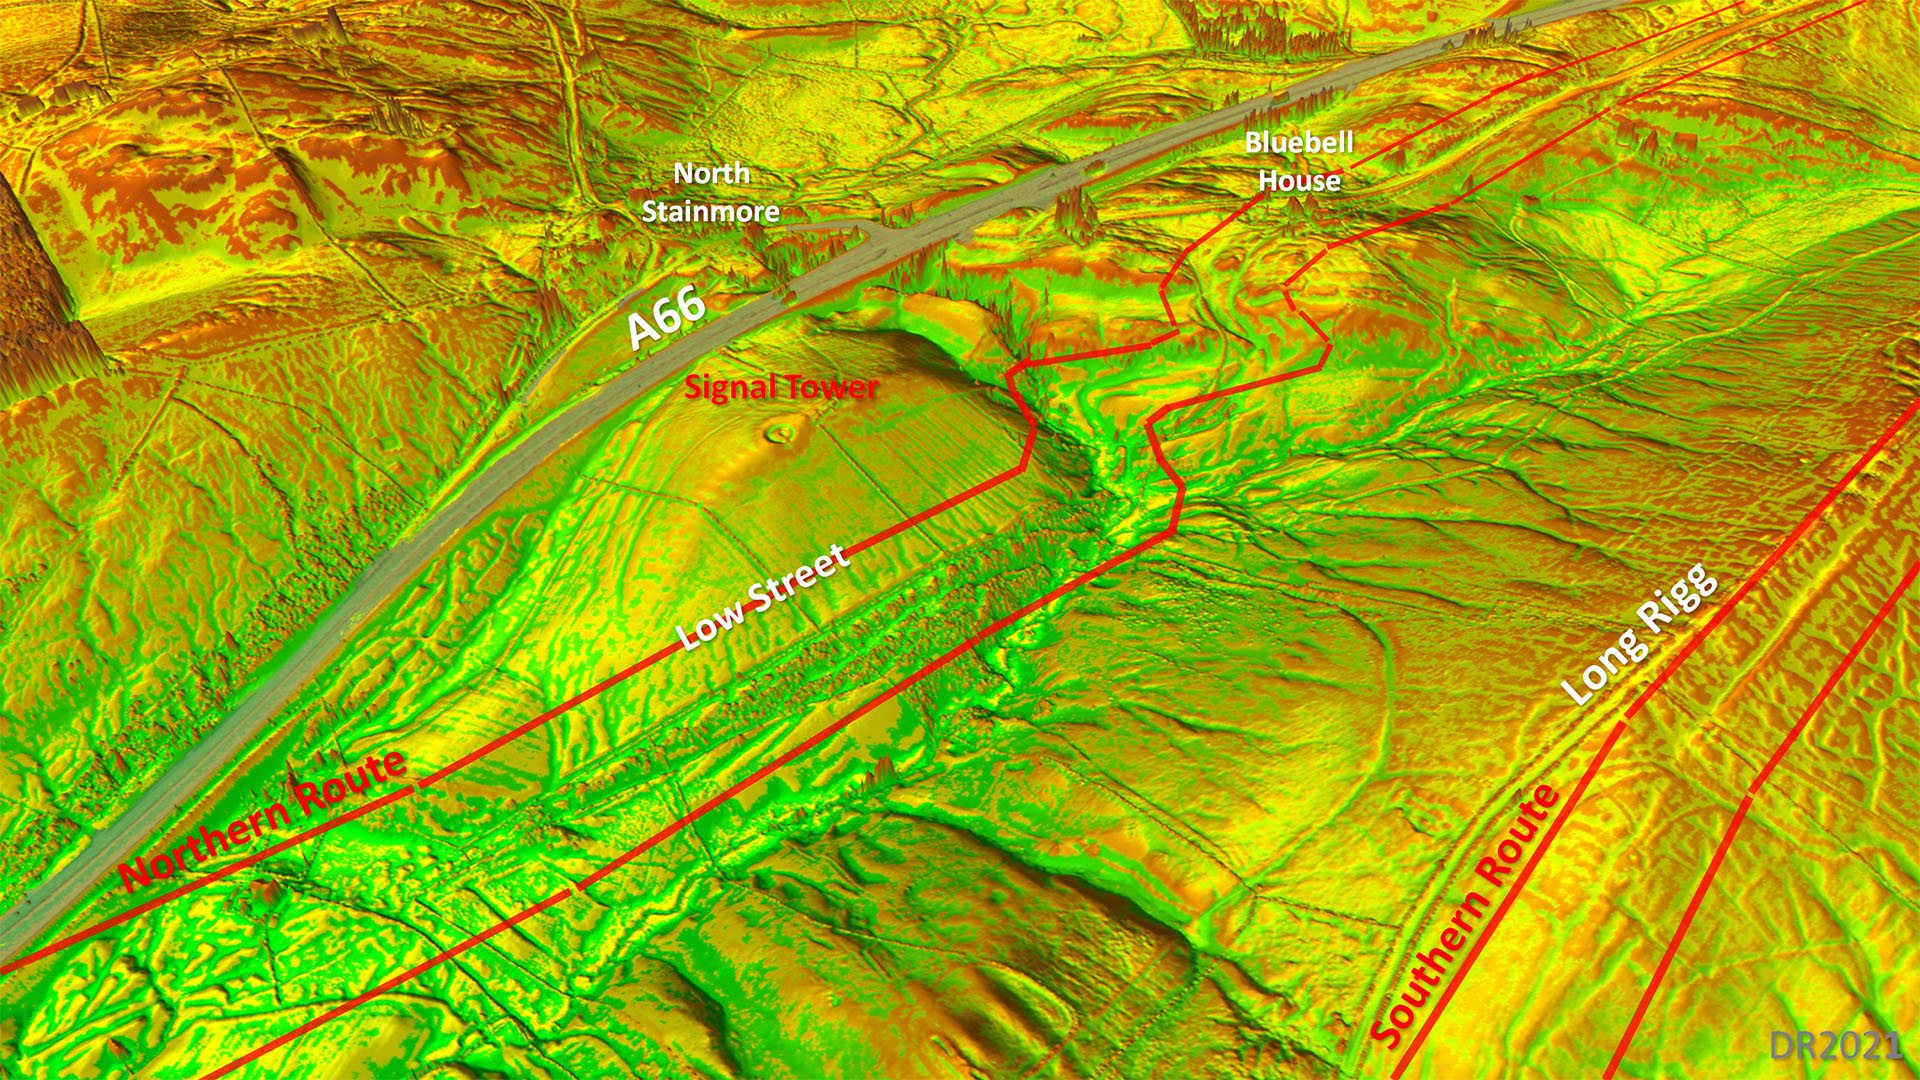
Northern Route - 3D lidar Low Street Seeing those superbly engineered zigzags is immediate confirmation that this is Roman engineering. The name Low Street was another big clue and this alignemnet can be traced all the way to the A66 dual carriageway. This view also shows how apt the Low Street name is given the proximity of the high Roman route over Long Rigg.
|
Click for larger view |
 |
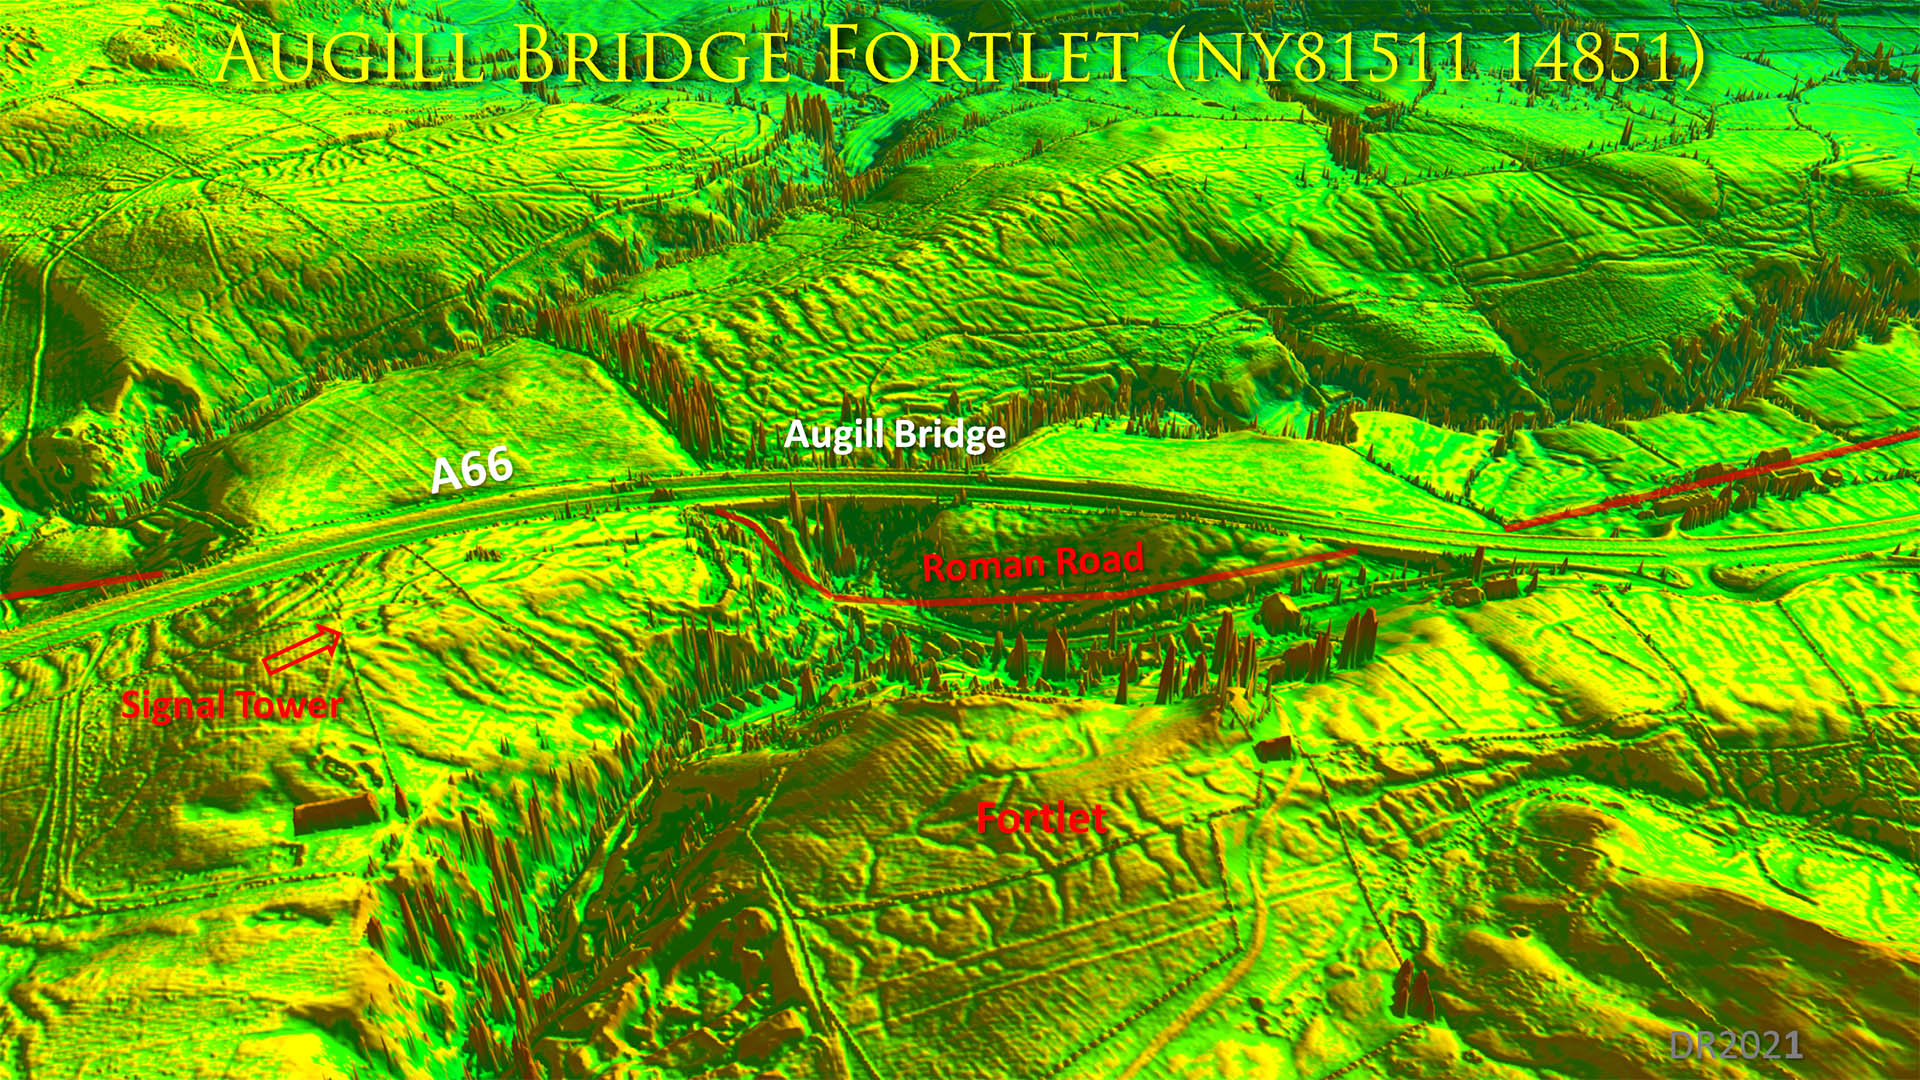
Oblique Lidar Image - Northern Route at Augill Bridge and newly discovered Fortlet Beyond the A66 Dual Crriageway the evidence resumes. The road chicanes through a natural valley and then begins a another straight alignment passing Forest Farm Also visible is a probable Roman fortlet.Presumably the fortlet would have supplied manpower to the 3 signal towers.
|
Click for larger view |
 |
Oblique Lidar Images - Forest Farm to Brough The Forest Farm alignment targets another natural valley where where the agger can be seen turning towardsr a stream crossing (right). The road then heads up into Brough on or very close to the modern road.
|
Click for larger view |
 |
Brough - Probable Road Sequence Why did Brough end up with 3 roads? The evidence of the alignments strongly suggests the northern route was the first. This was followed by a route to the fort (probable second route). However this route crossed low lying ground subject to frequent flooding. I gave a talk at Brough and was informed of this. The final, third, route was obviously a detour on to higher drier land to avoid the flood prone area.
|
Click for larger view |
 |
Full Route Map Map showing the routes of the Roman roads, the signal (watch) towers and the forts.
|
Click for larger view |
 |
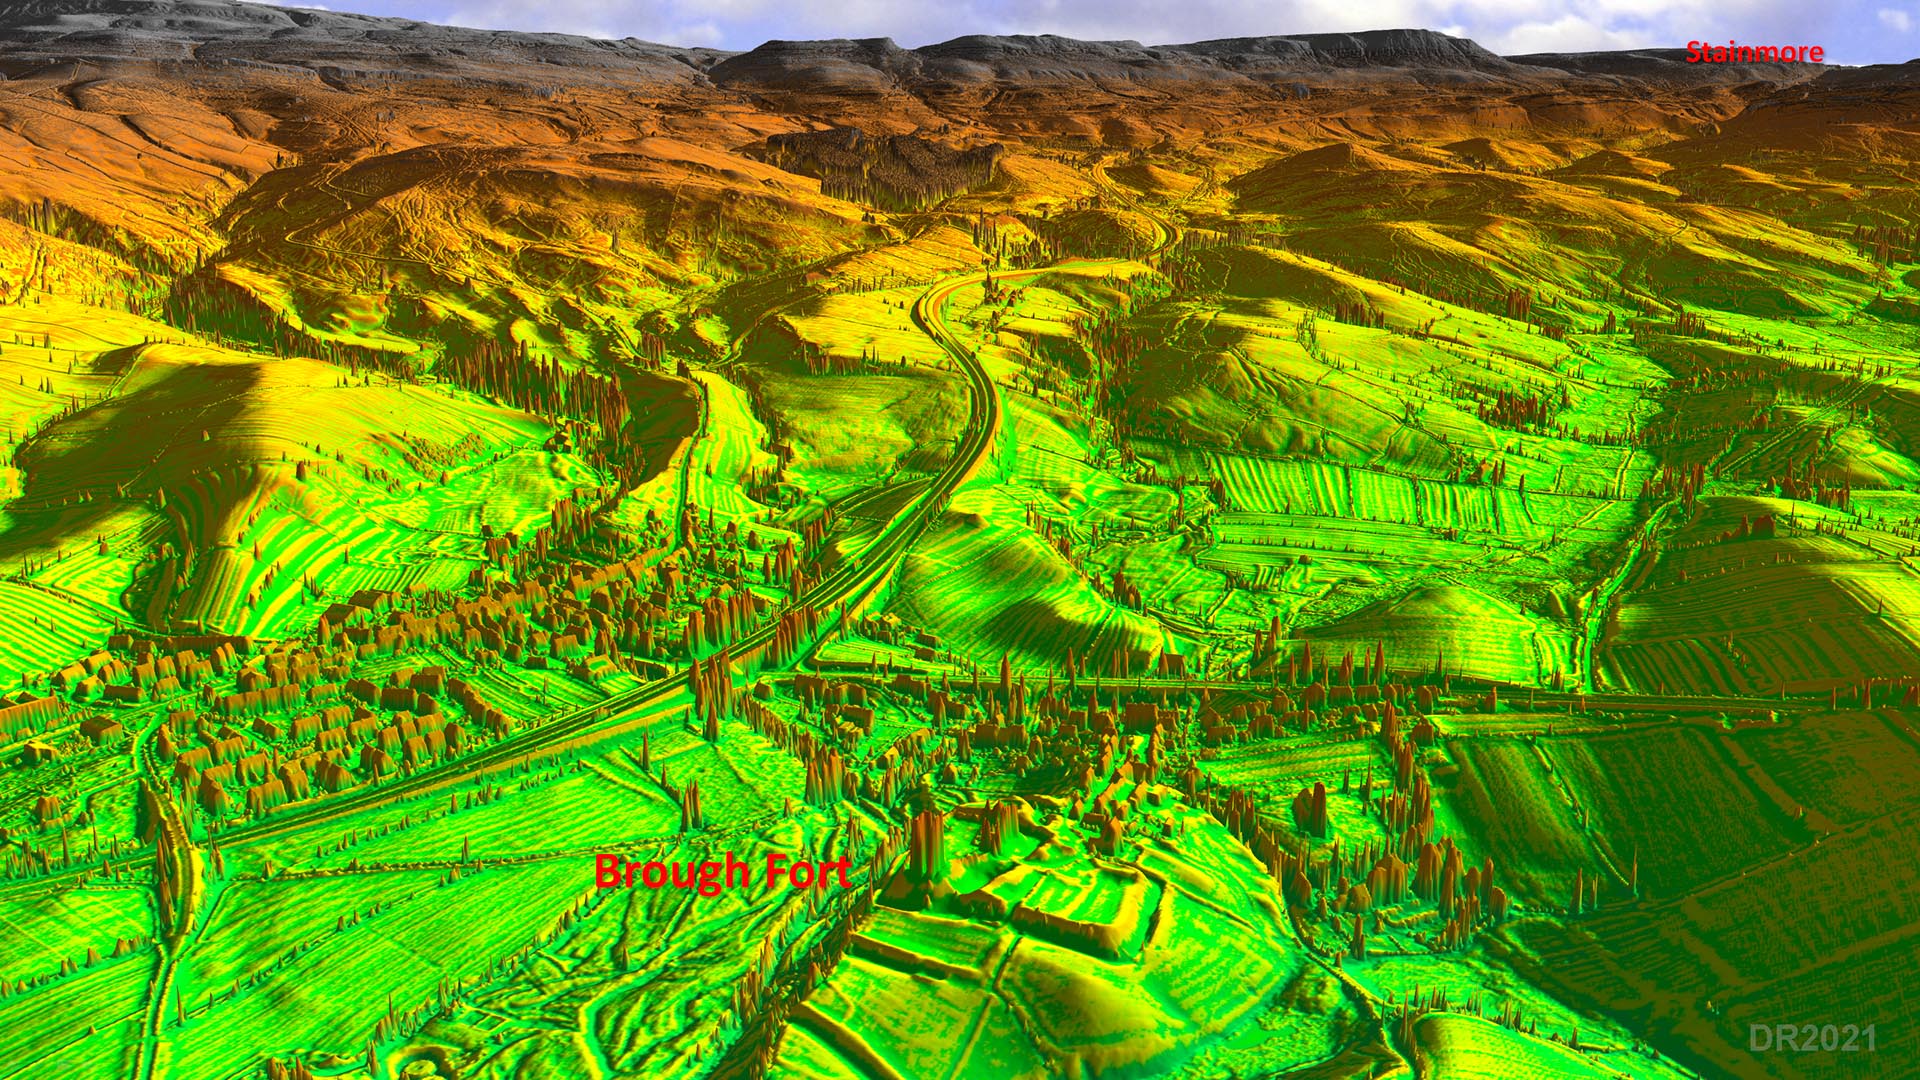
Oblique Lidar Image - Looking back to Stainmore from Brough This gives some impression how imposing a route over Stainmore was.... and still is!
|
Click for larger view |
 |
|
Return to Cumbria Roman Roads homepage Last update: January 2022 |
© David Ratledge |