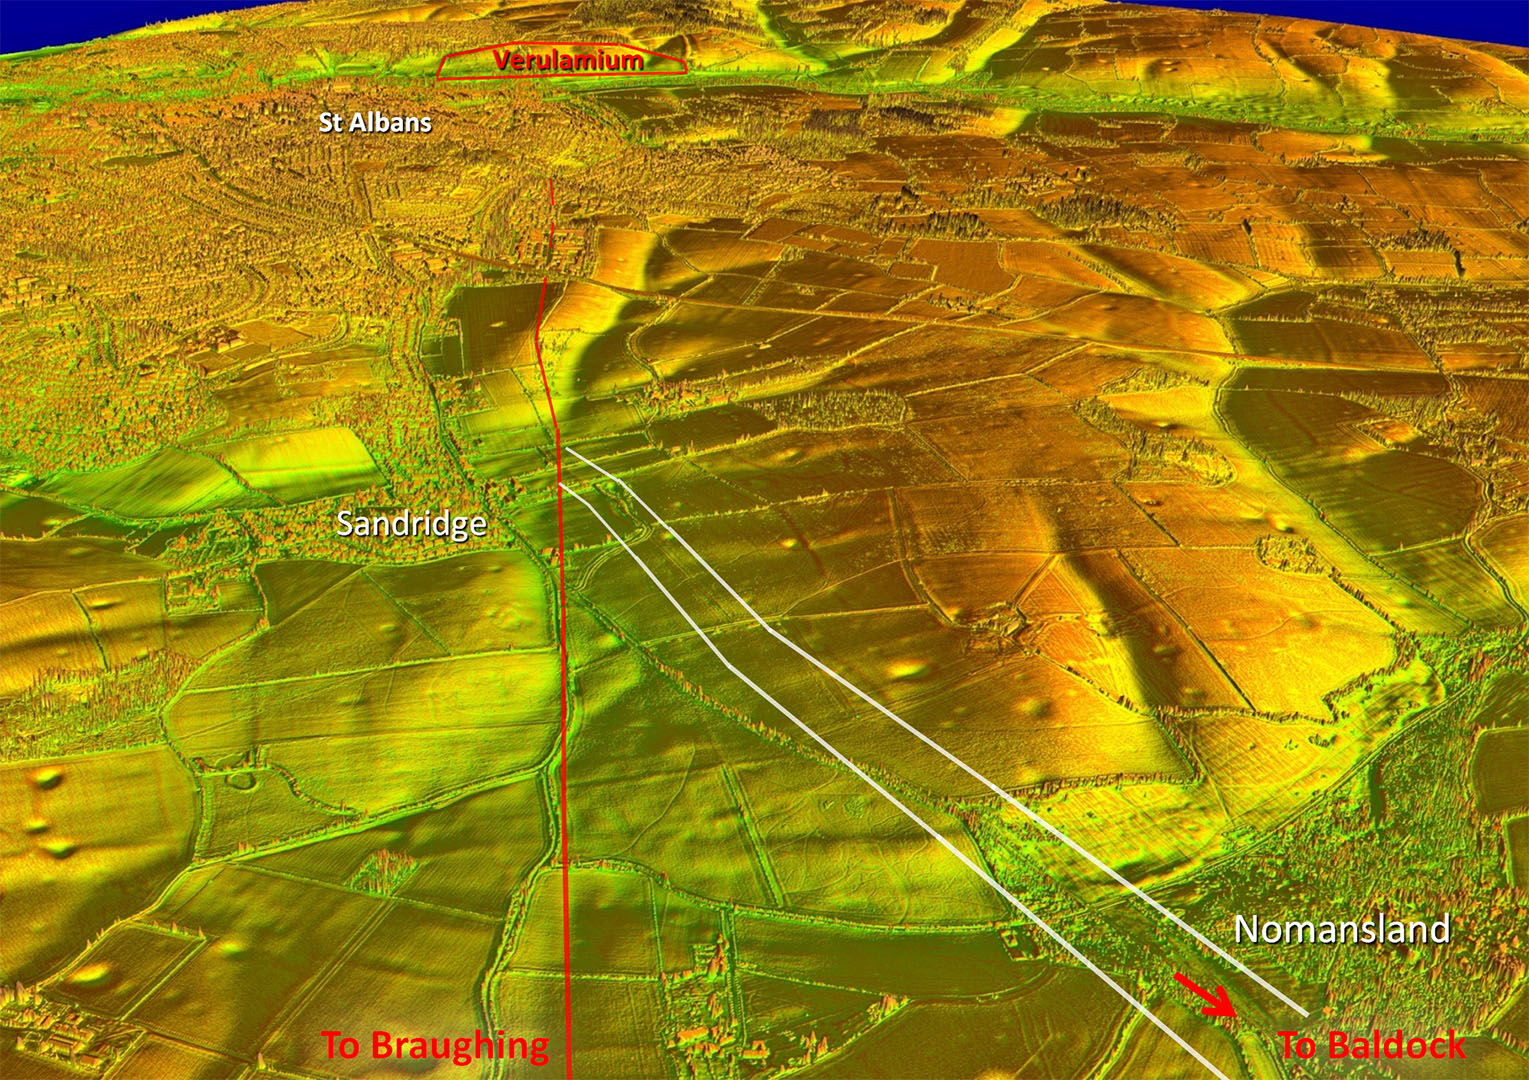
Lidar Image - Full Route from
The route appears to branch off the Braughing road so would appear to be the later one. It then takes a very direct line to Baldock, clearly not worried about going up and down hills. |
|
 |
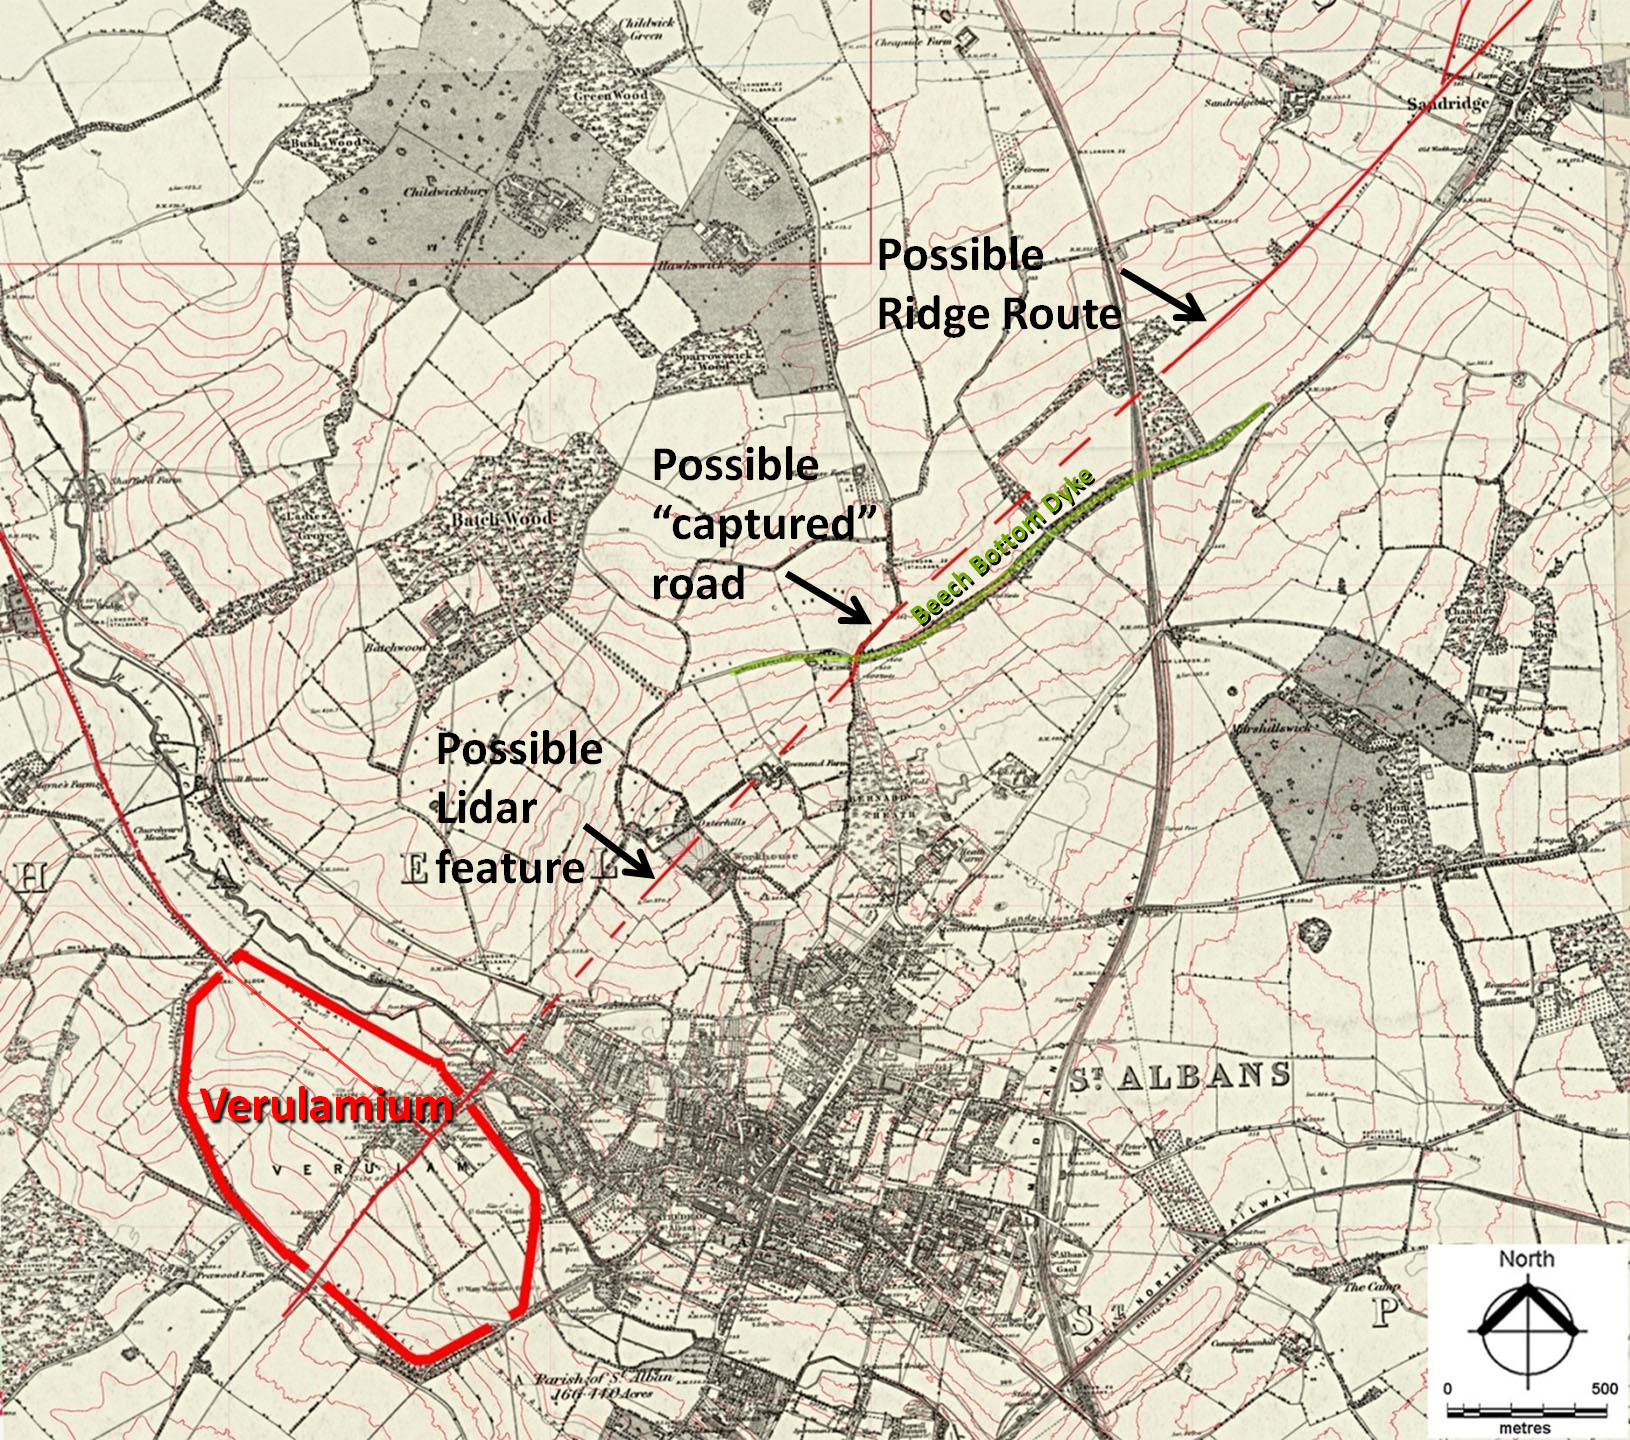
First Edition OS Map - St Albans
Across suburban St Albans we are reliant on old maps but the clues do fit together very well for a direct road from Verulamium. |
Click for larger view |
 |
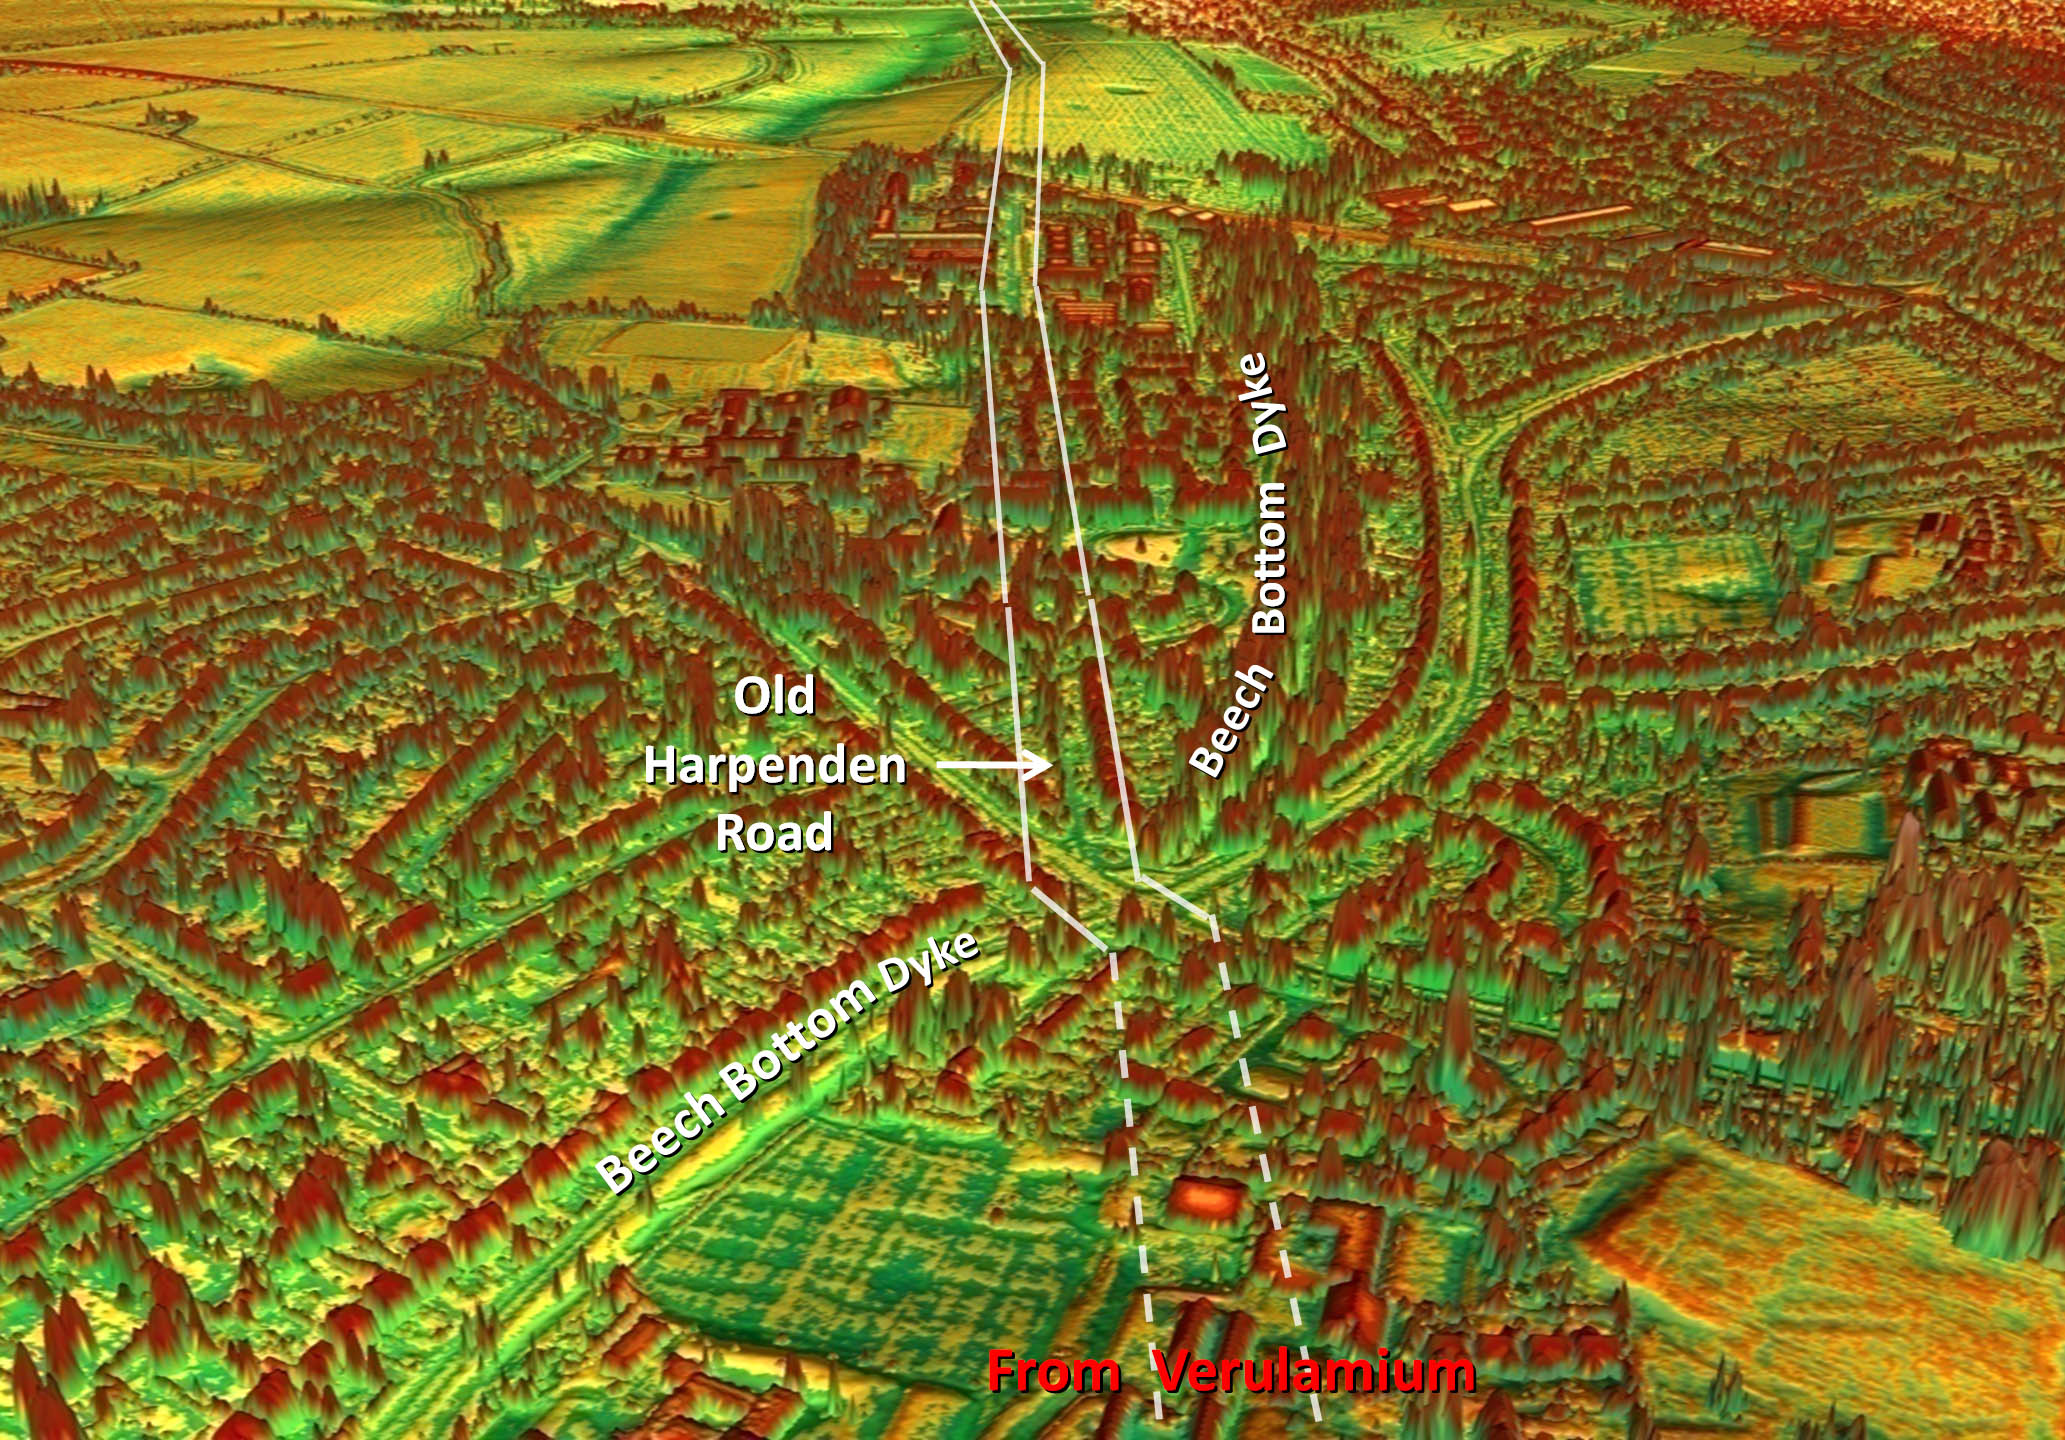
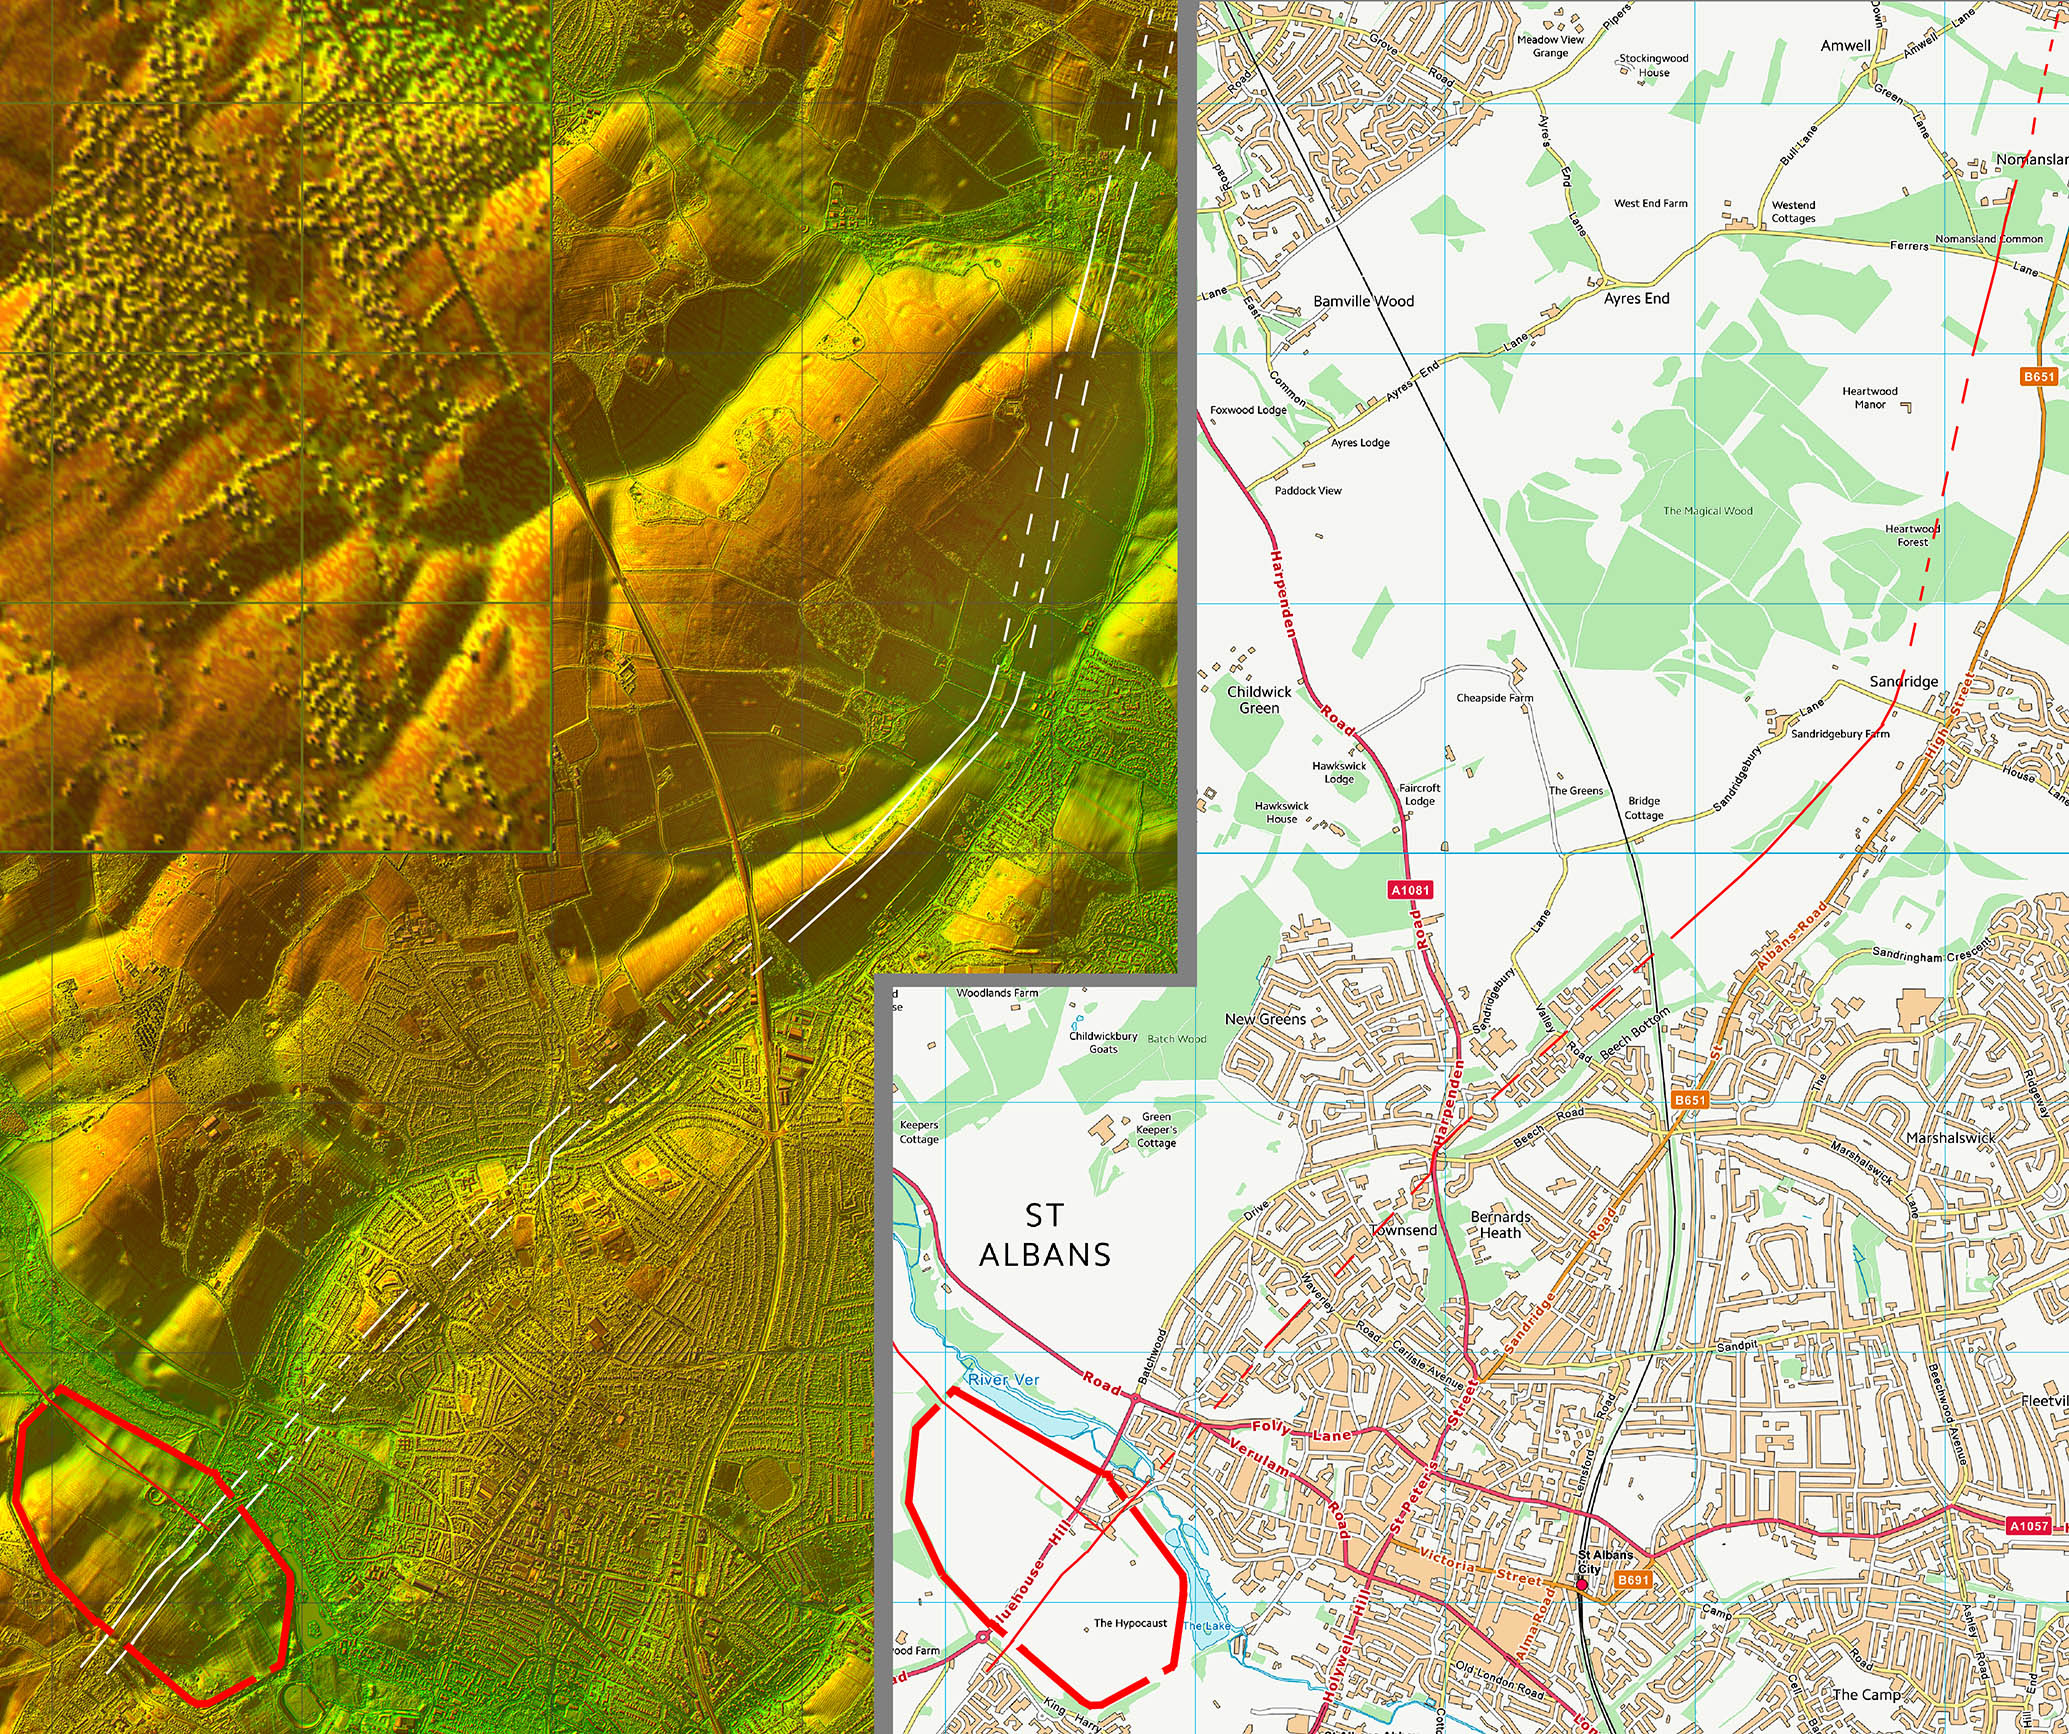
Oblique 3D Lidar Image - Beech Bottom Dyke
Our road would have to cross Beech Bottom Dyke, a massive iron-age pre-Roman ditch. The only possible evidence for a crossing of the Dyke was at Harpenden Road - no others are visible. This was therefore the most likely spot where the Roman’s crossed over. Aligning with this point is Old Harpenden Road |
Click for larger view |
 |
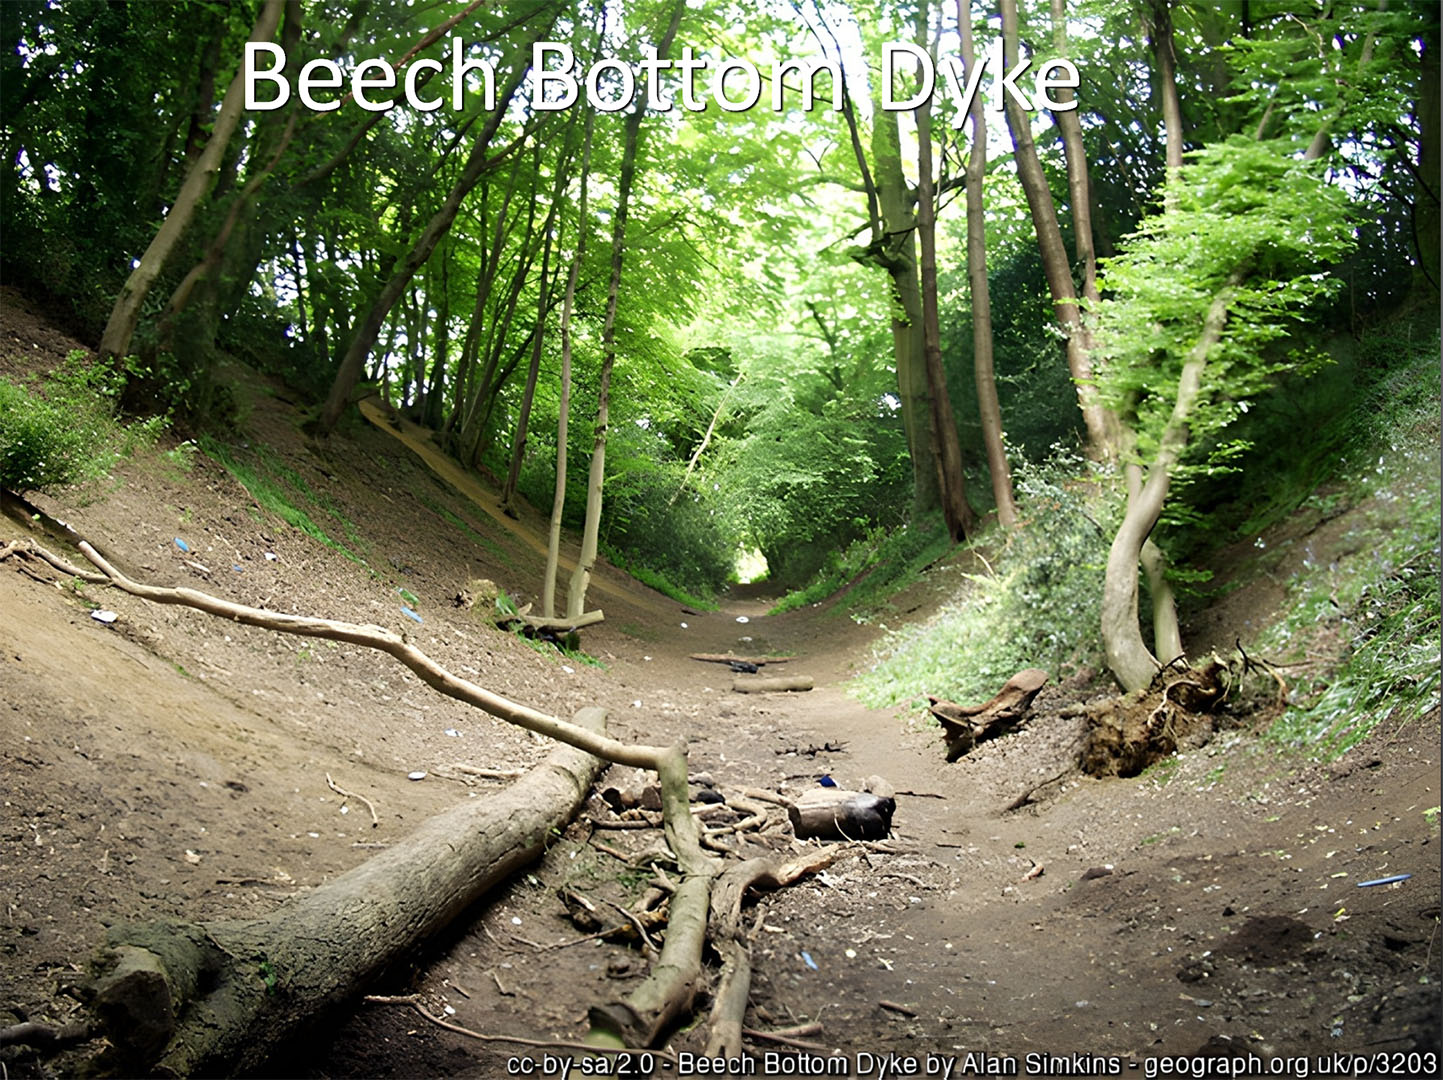
Beech Bottom Dyke
The massive pre- Roman Beech Bottom Dyke. The is evidence in only one place for a crossing point - Harpenden Road. |
Click for larger view |
 |
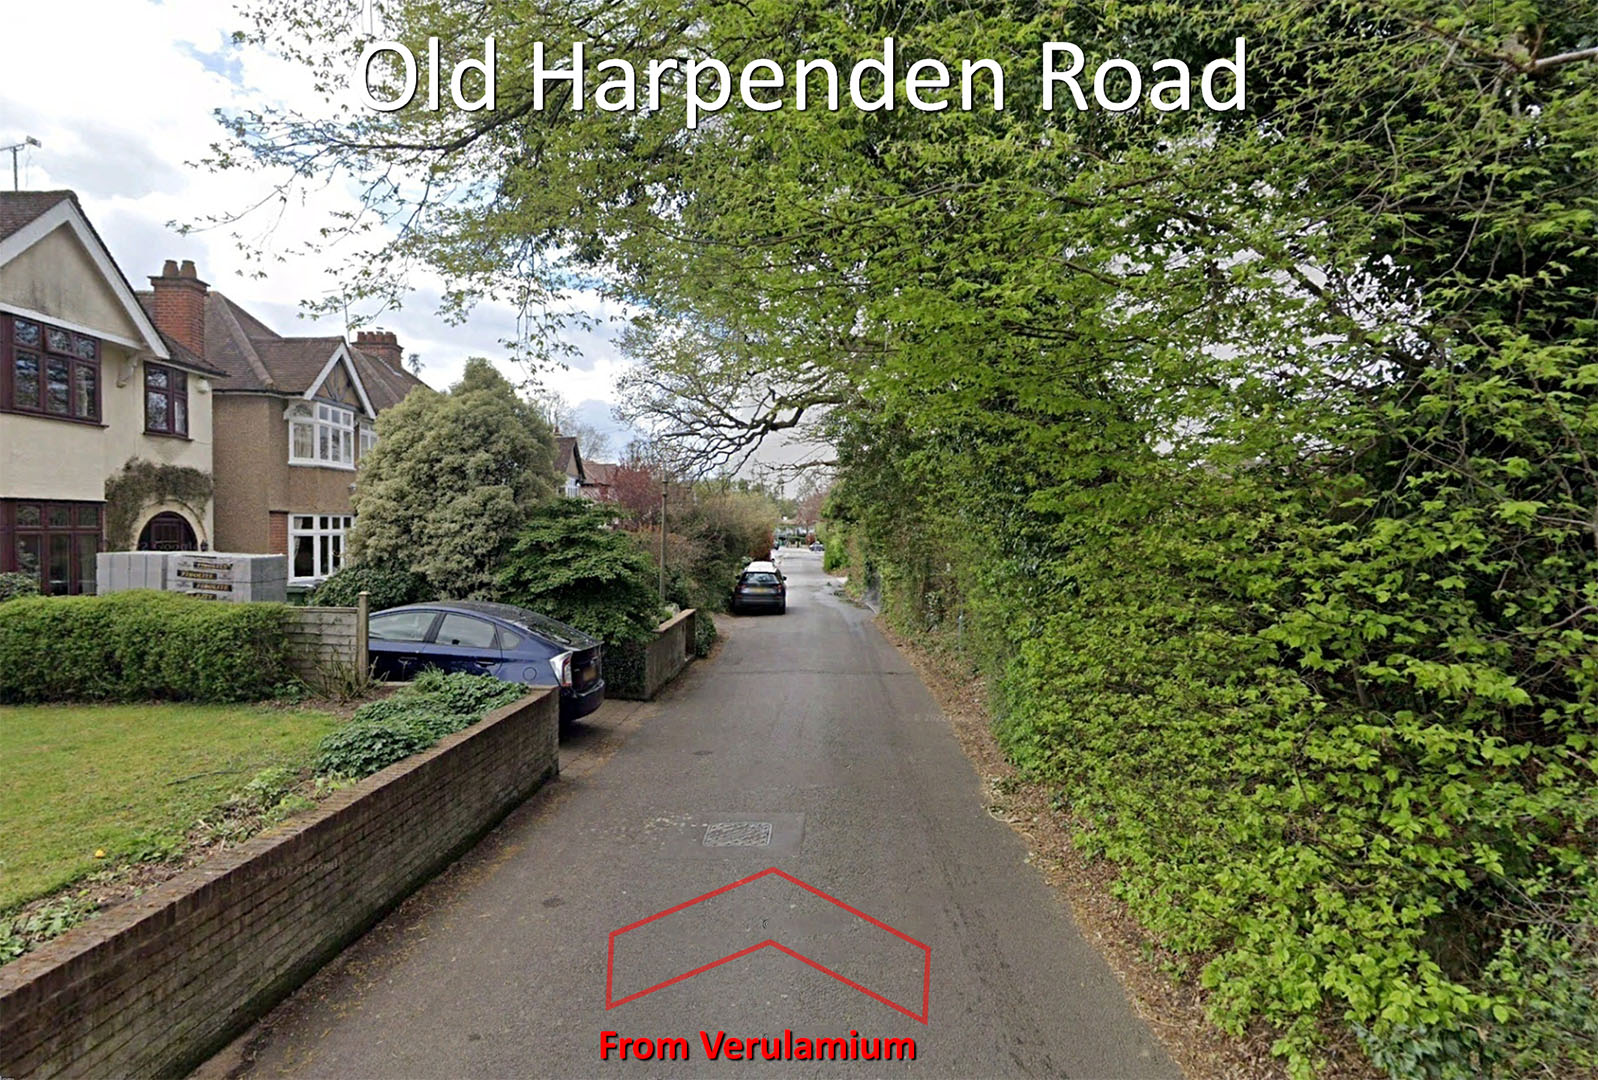
Old Harpenden Road - "Captured" Road
This is the old Harpenden Road before a modern bypass. It has all the hallmarks of a "captured" road. |
Click for larger view |
 |
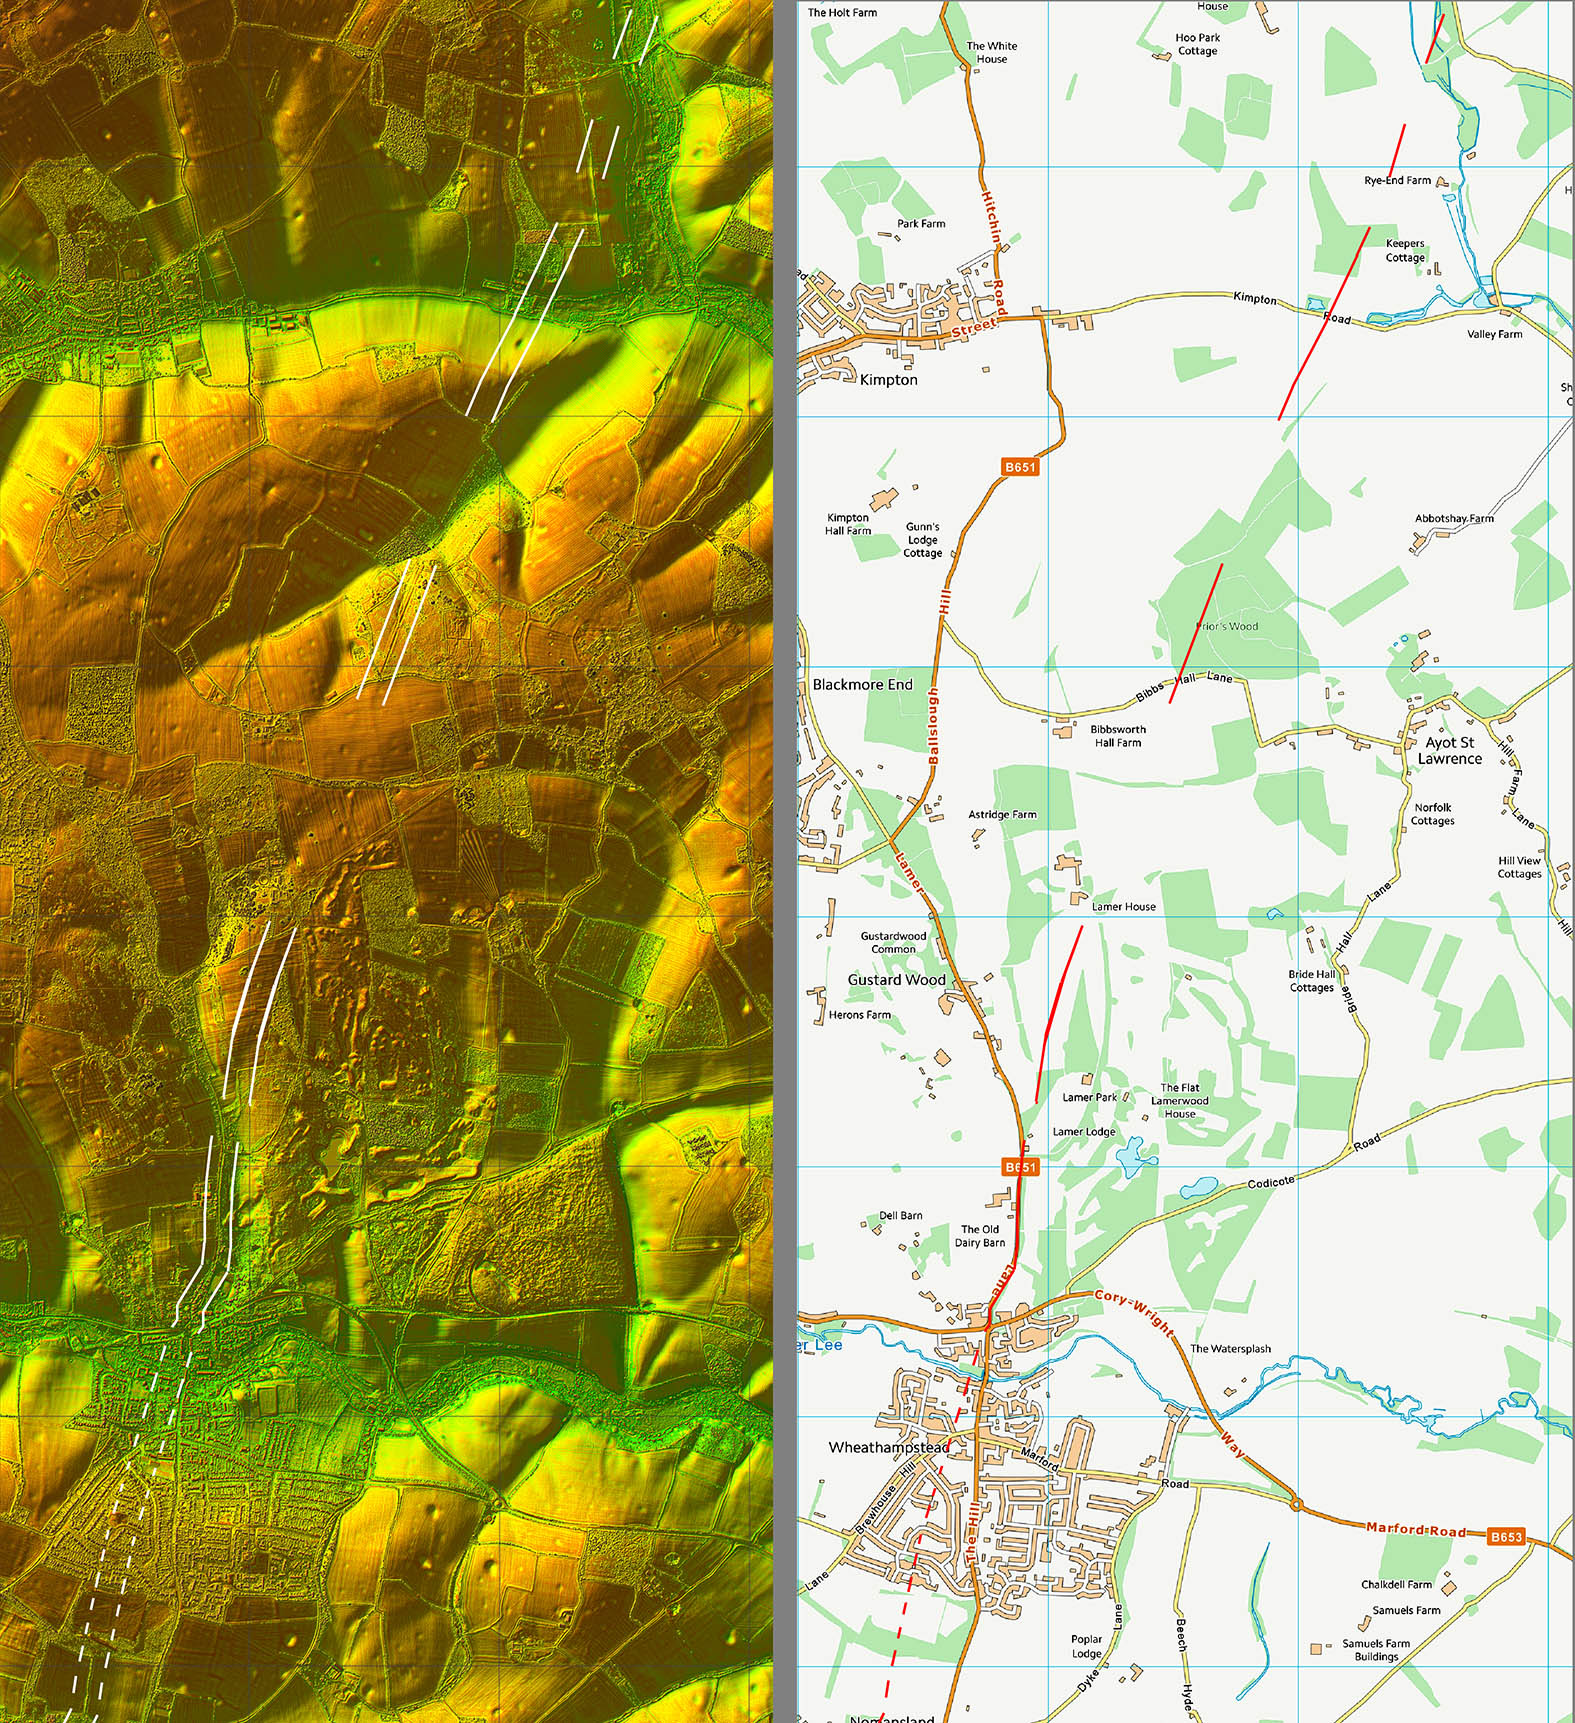
Oblique 3D Lidar Image - Braughing/Baldock Junction
It would appear that the road to Braughing was the earlier with the road to Baldock a later branch off it. The section between the actual junction and Nomansland Common is a bit vague but no reason not to assume a straight line. |
Click for larger view |
 |
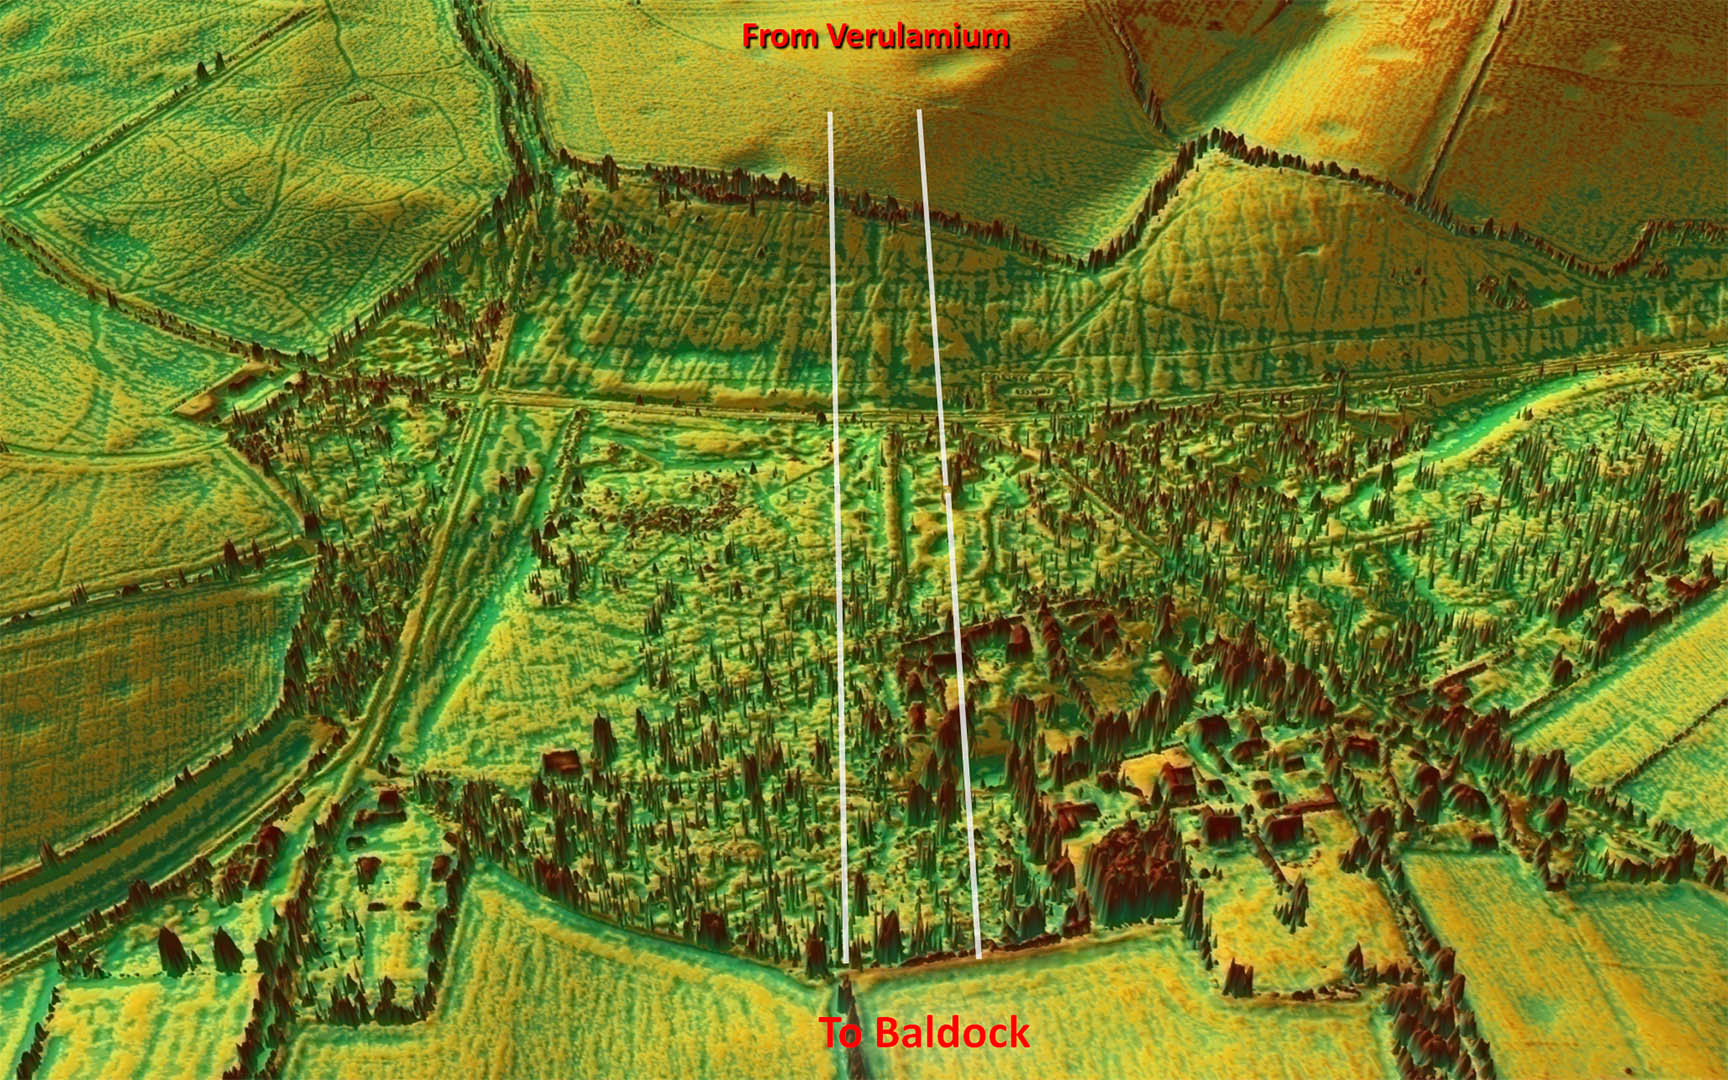
Oblique 3D Lidar Image - Nomansland Agger
Near Wheathampstead is an agger-like feature across Nomansland Common (TL17227 12477), which bears a striking resemblance to that agger in Prior’s Wood, although not quite as long. This feature would fit well with the extrapolated alignment from the north but Wheathampstead settlement now covers any evidence. This line would cross at a high point there (TL17481 13595), which would have been ideal for sighting the road alignments in both directions. |
Click for larger view |
 |
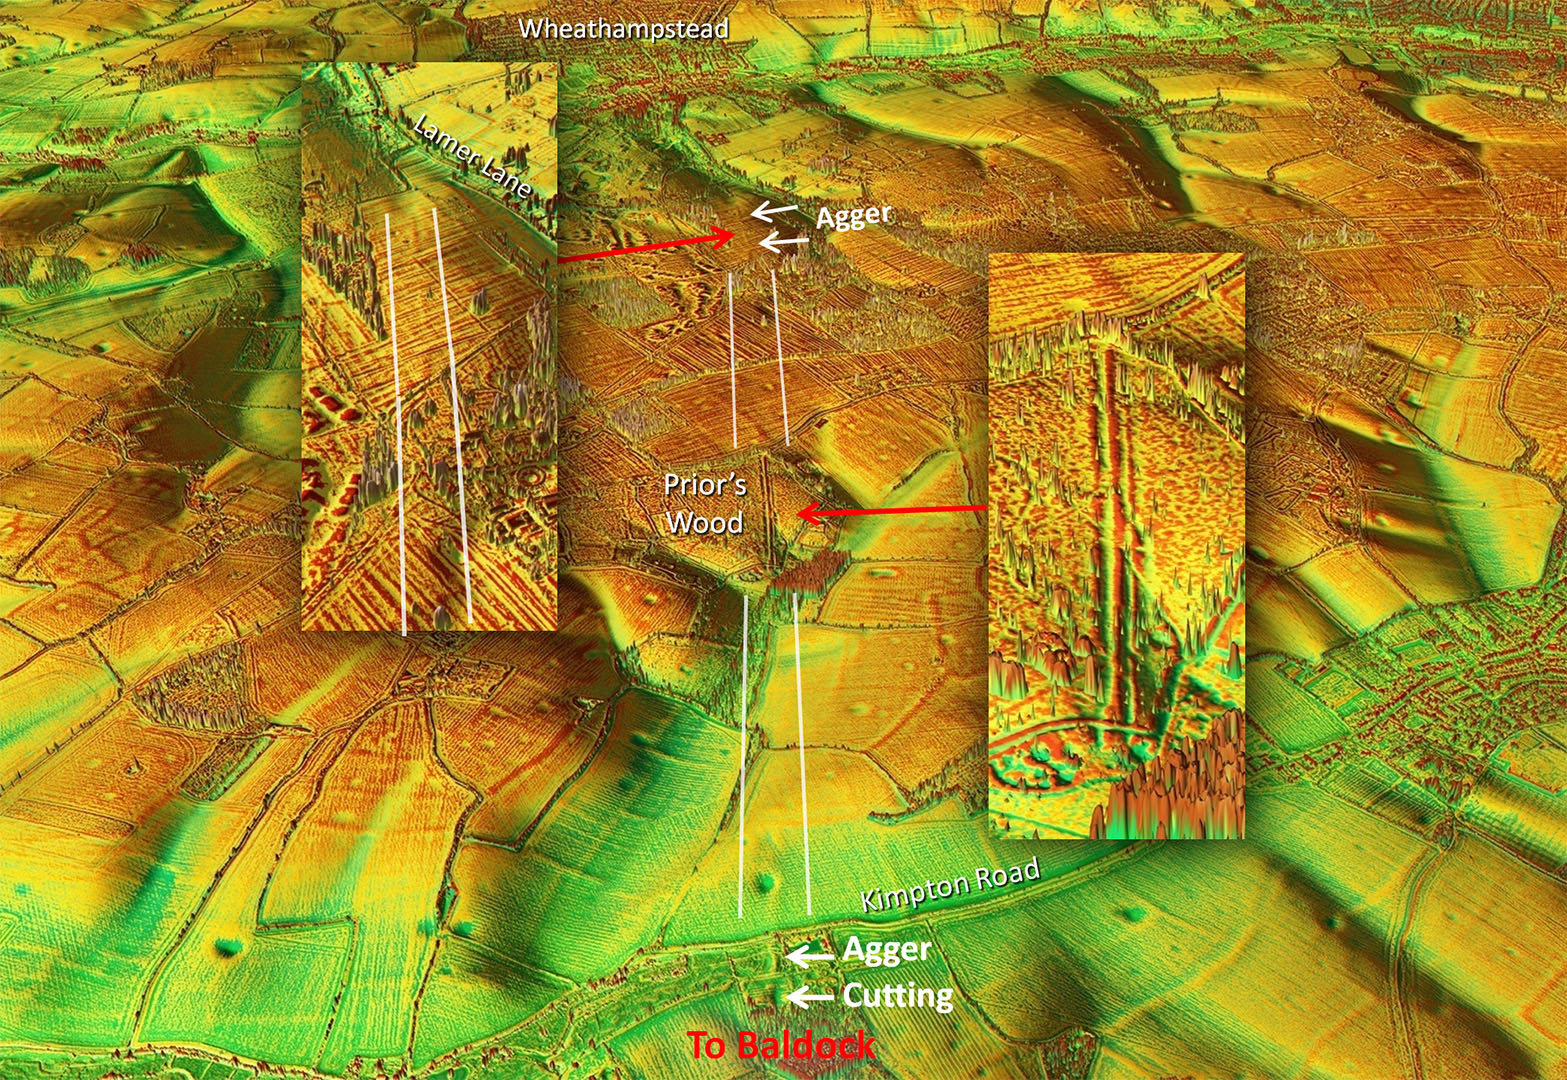
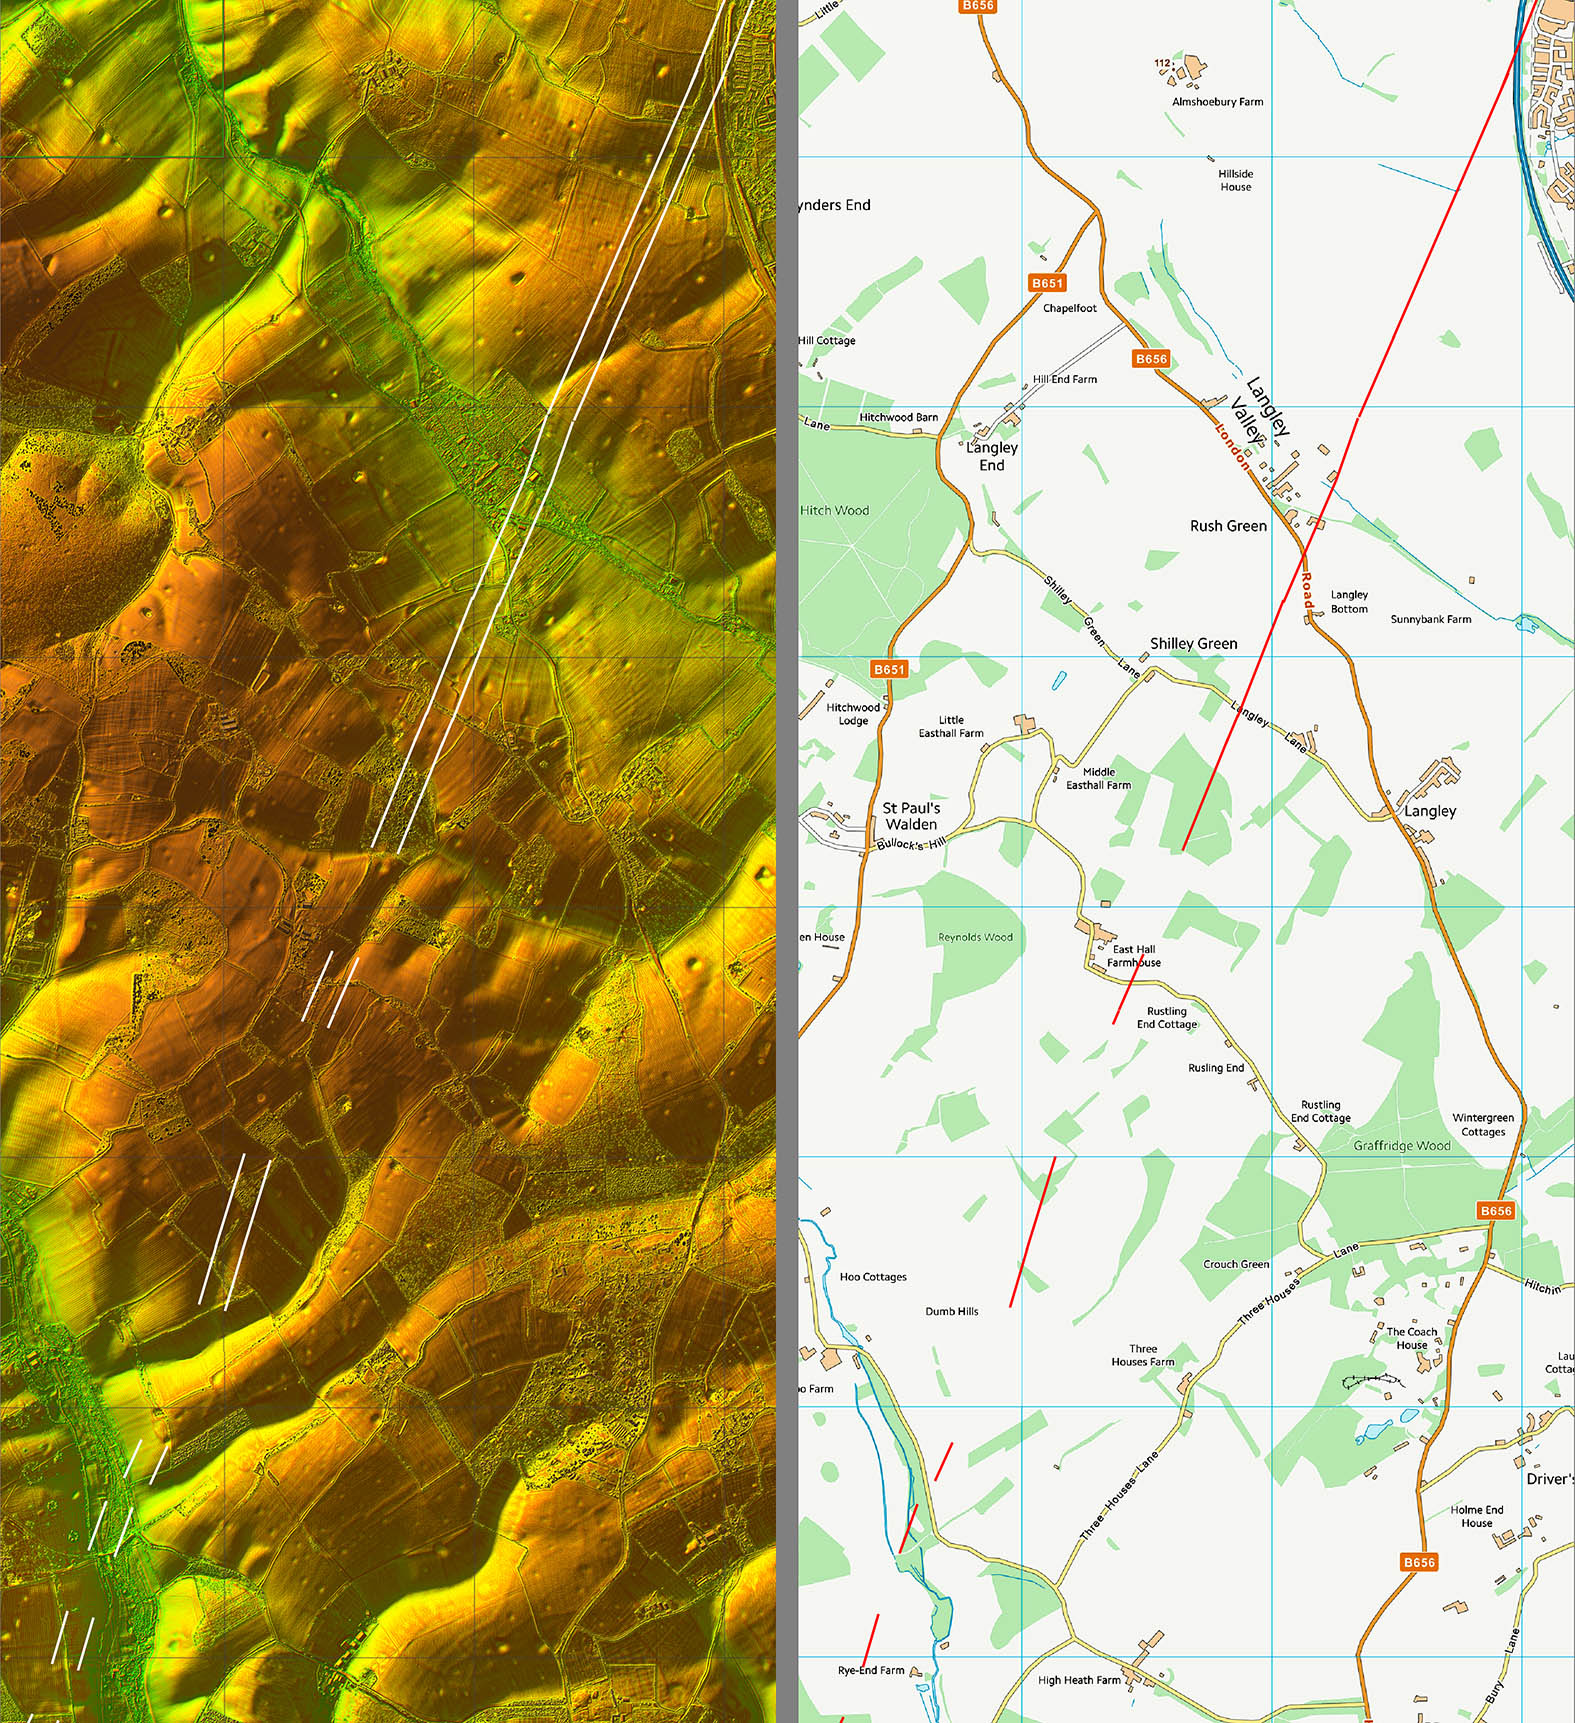
Oblique 3D Lidar Image - Prior's Wood Agger
In Prior’s Wood there is a remarkable length of surviving agger complete with side ditches. When I first saw this I initially thought that it had to be modern as it looks so pristine. However, when I spotted evidence either side of this section, both of which align with it, it is obviously genuine. |
Click for larger view |
 |
Prior's Wood Agger
What is obvious in Lidar is often much more subtle on the ground. This is the agger in Priors Wood looking from the south-east corner on Bibbs Hall Lane.
Image: Philip Sparrow |
Click for larger view |

|
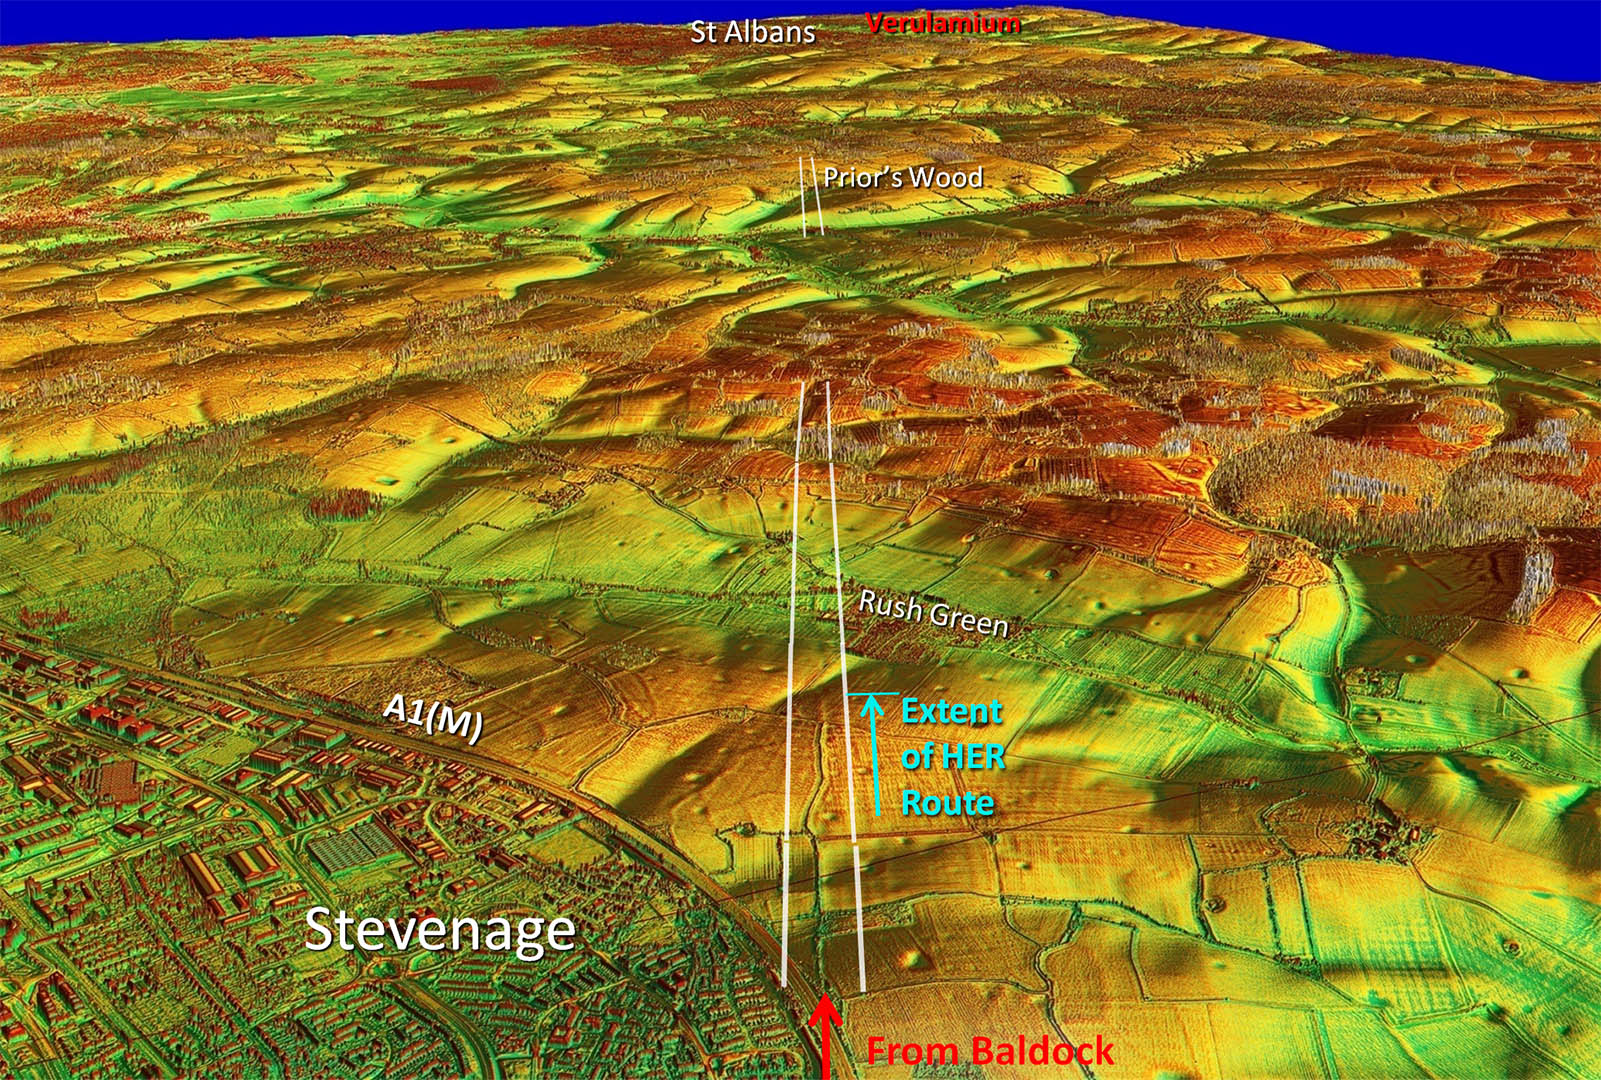
Oblique 3D Lidar Image - Stevenage looking south
From Baldock the old A1, now the B197, marks the course of the road. The modern A1(M) then obliterates a section passing Stevenage with the course then known across open fields approaching to within about 1km of the Langley Valley. Lidar does show it continuing for another 2 km albeit very subtly so not surprising that it was previously elusive. Evidence continues intermittently but sufficiently to show the alignment kept straight on to the Mimram valley. The route then crosses a side valley containing Kimpton Road where clues are more obvious This section is pointing clearly towards Prior’s Wood. |
Click for larger view |
 |
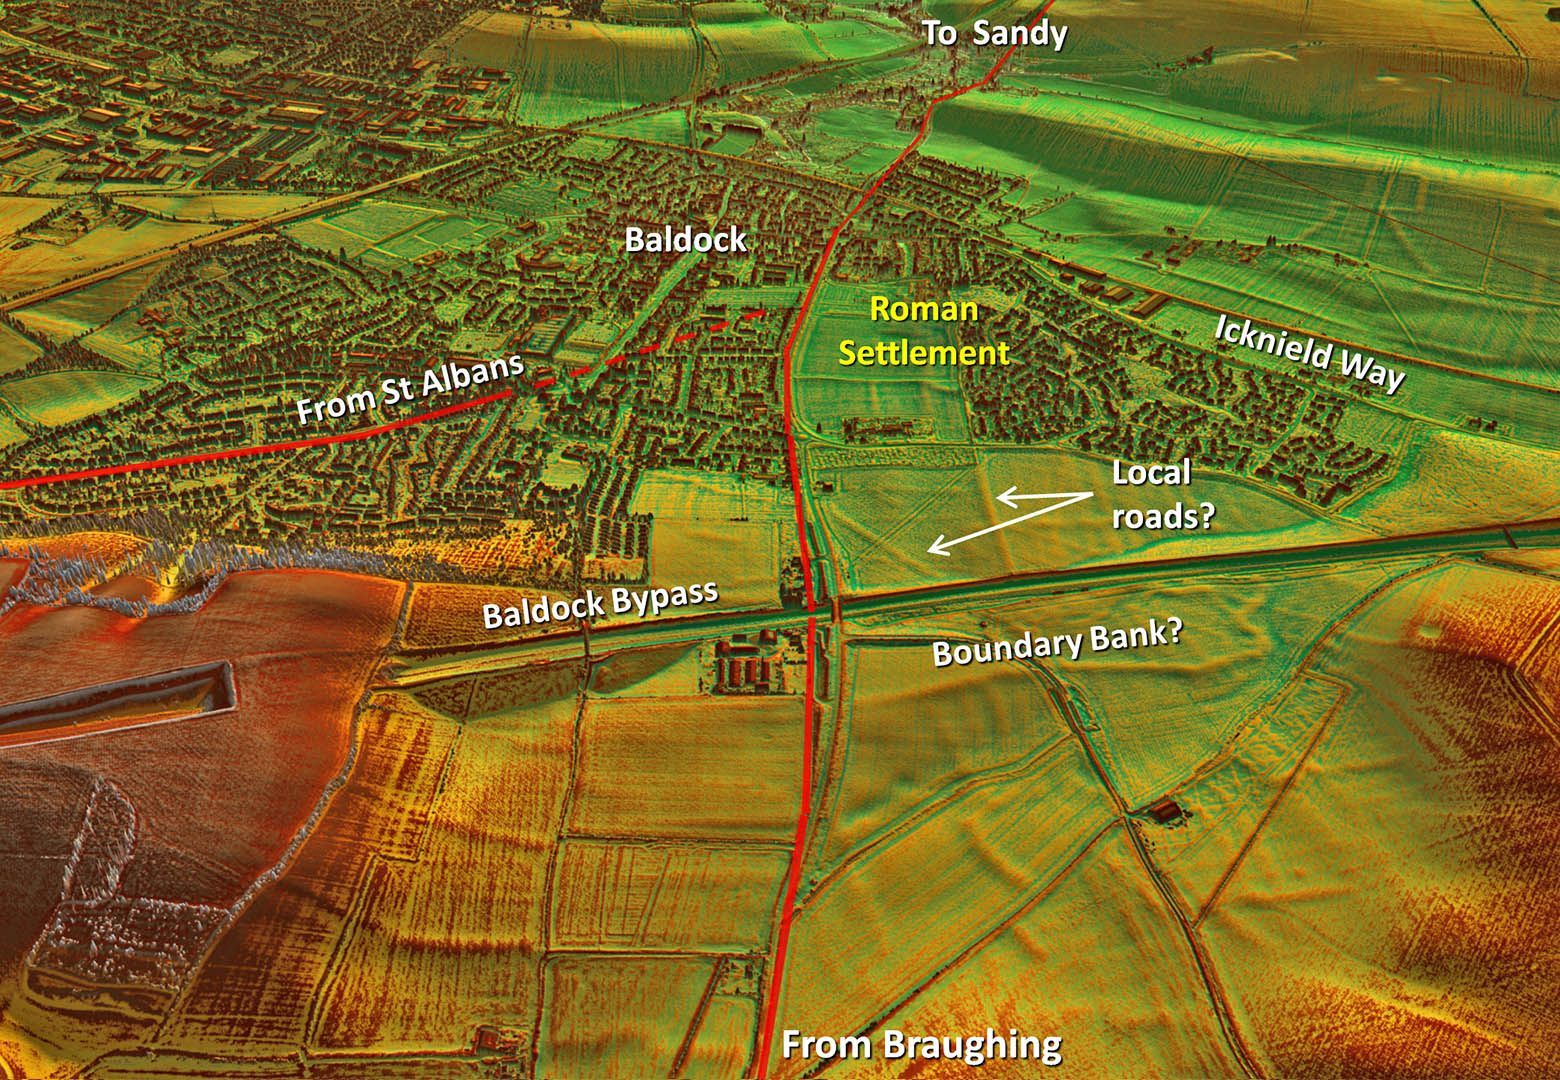
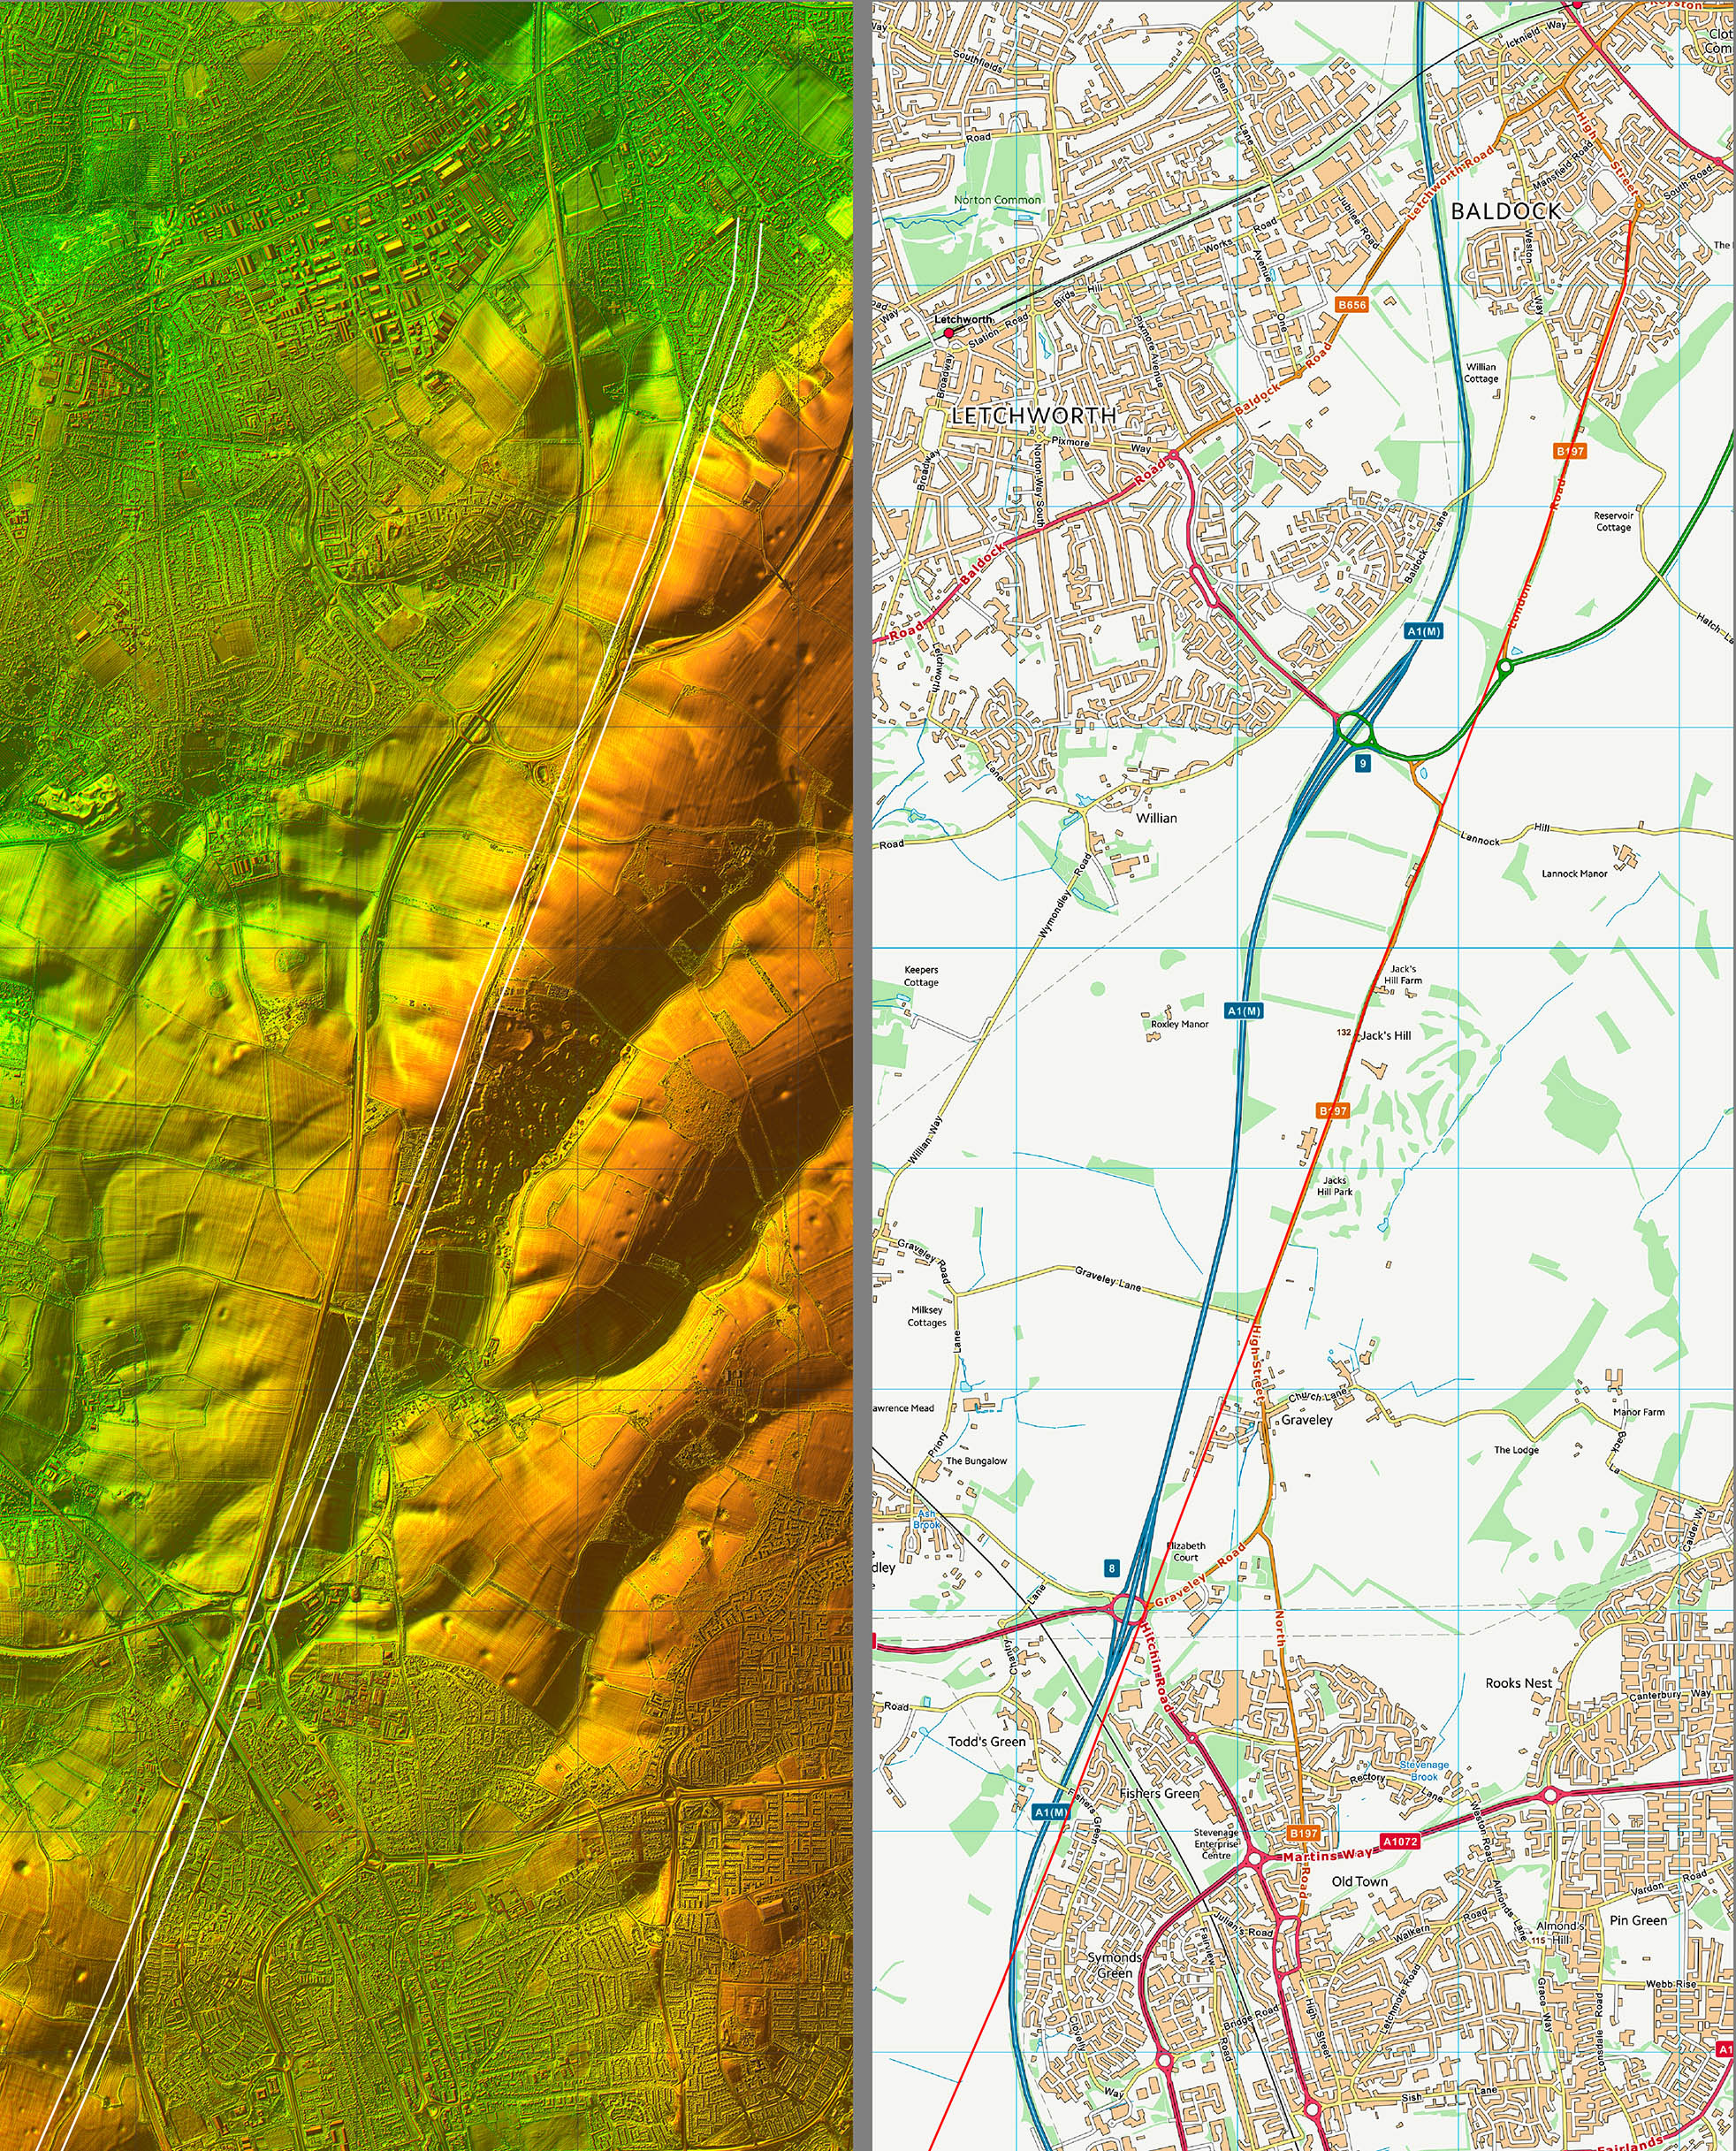
Oblique 3D Lidar Image - Baldock
Initially a pre-Roman Icknield Way settlement, Baldock developed into a small Roman settlement where 3 roads met.- 4 if you count the Icknield Way. |
Click for larger view |
 |
| Route Map 1 |
Click for larger view |
 |
| Route Map 2 |
Click for larger view |
 |
| Route Map 3 |
Click for larger view |
 |
| Route Map 4 |
Click for larger view |
 |