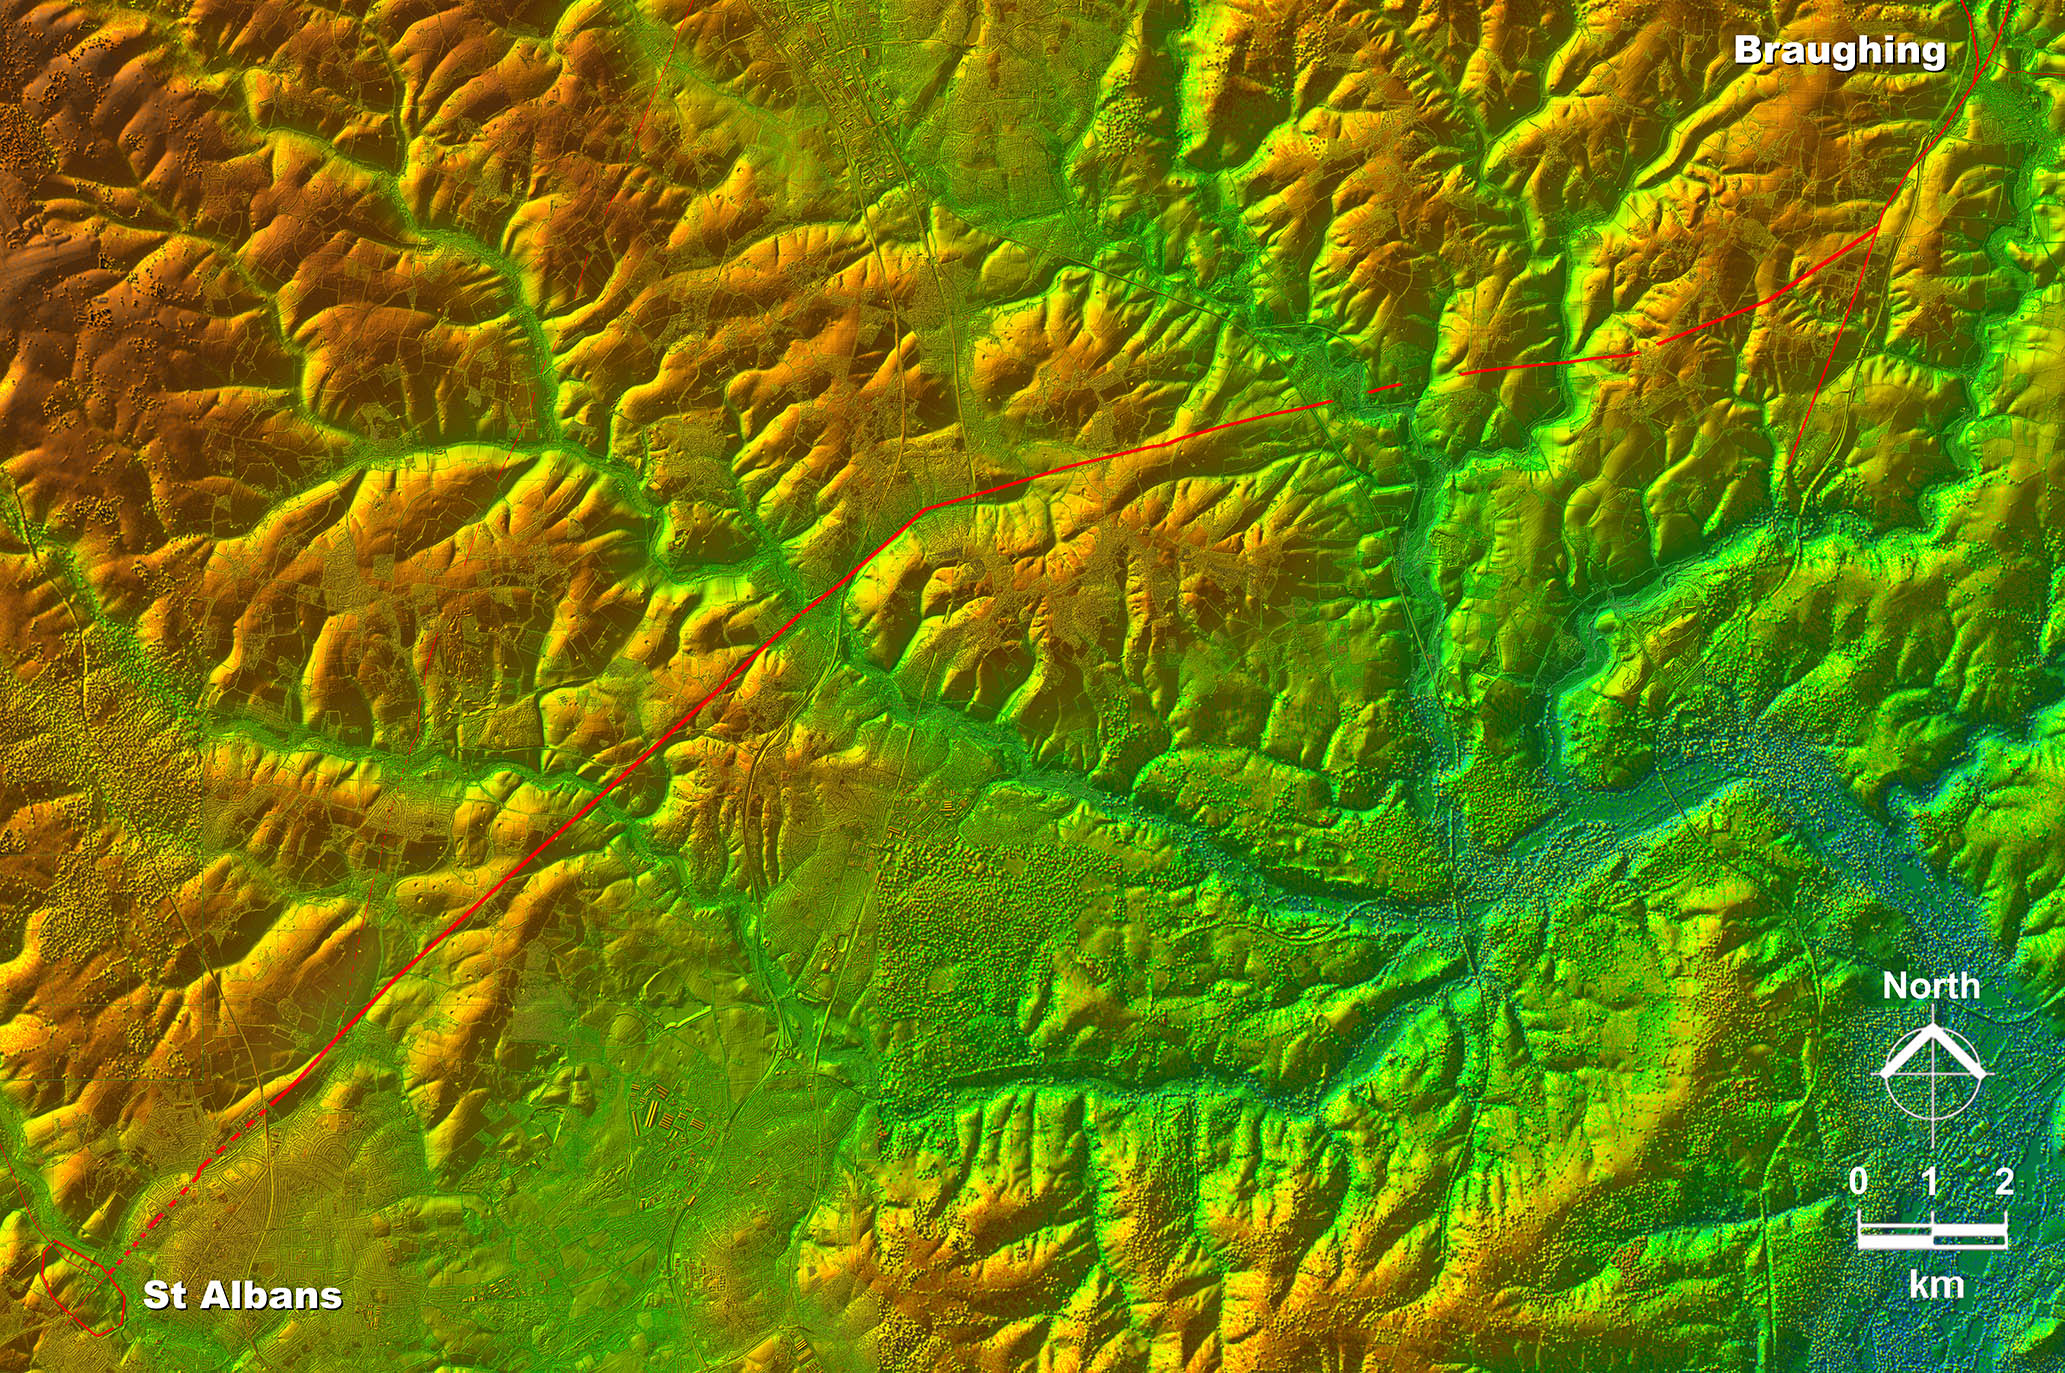
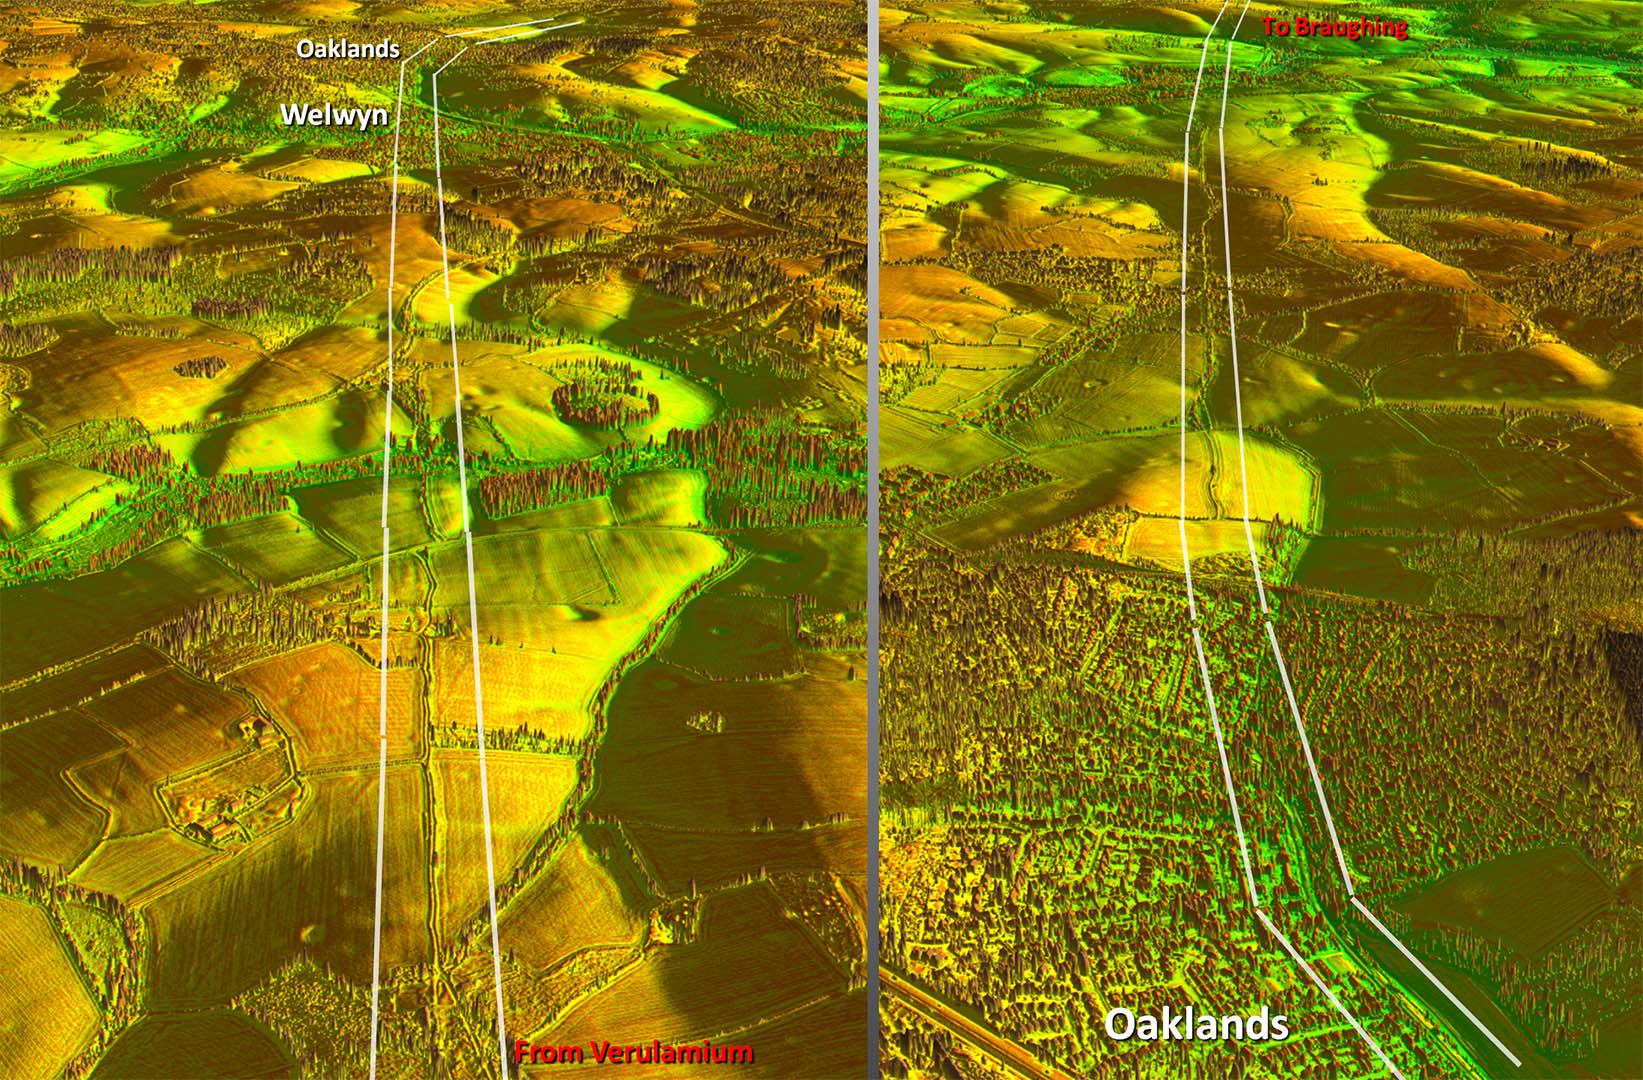
Lidar Image - Full Route from St Albans to Braughing
Two basic alignments with a small change of direction at Oaklands. |
|
 |
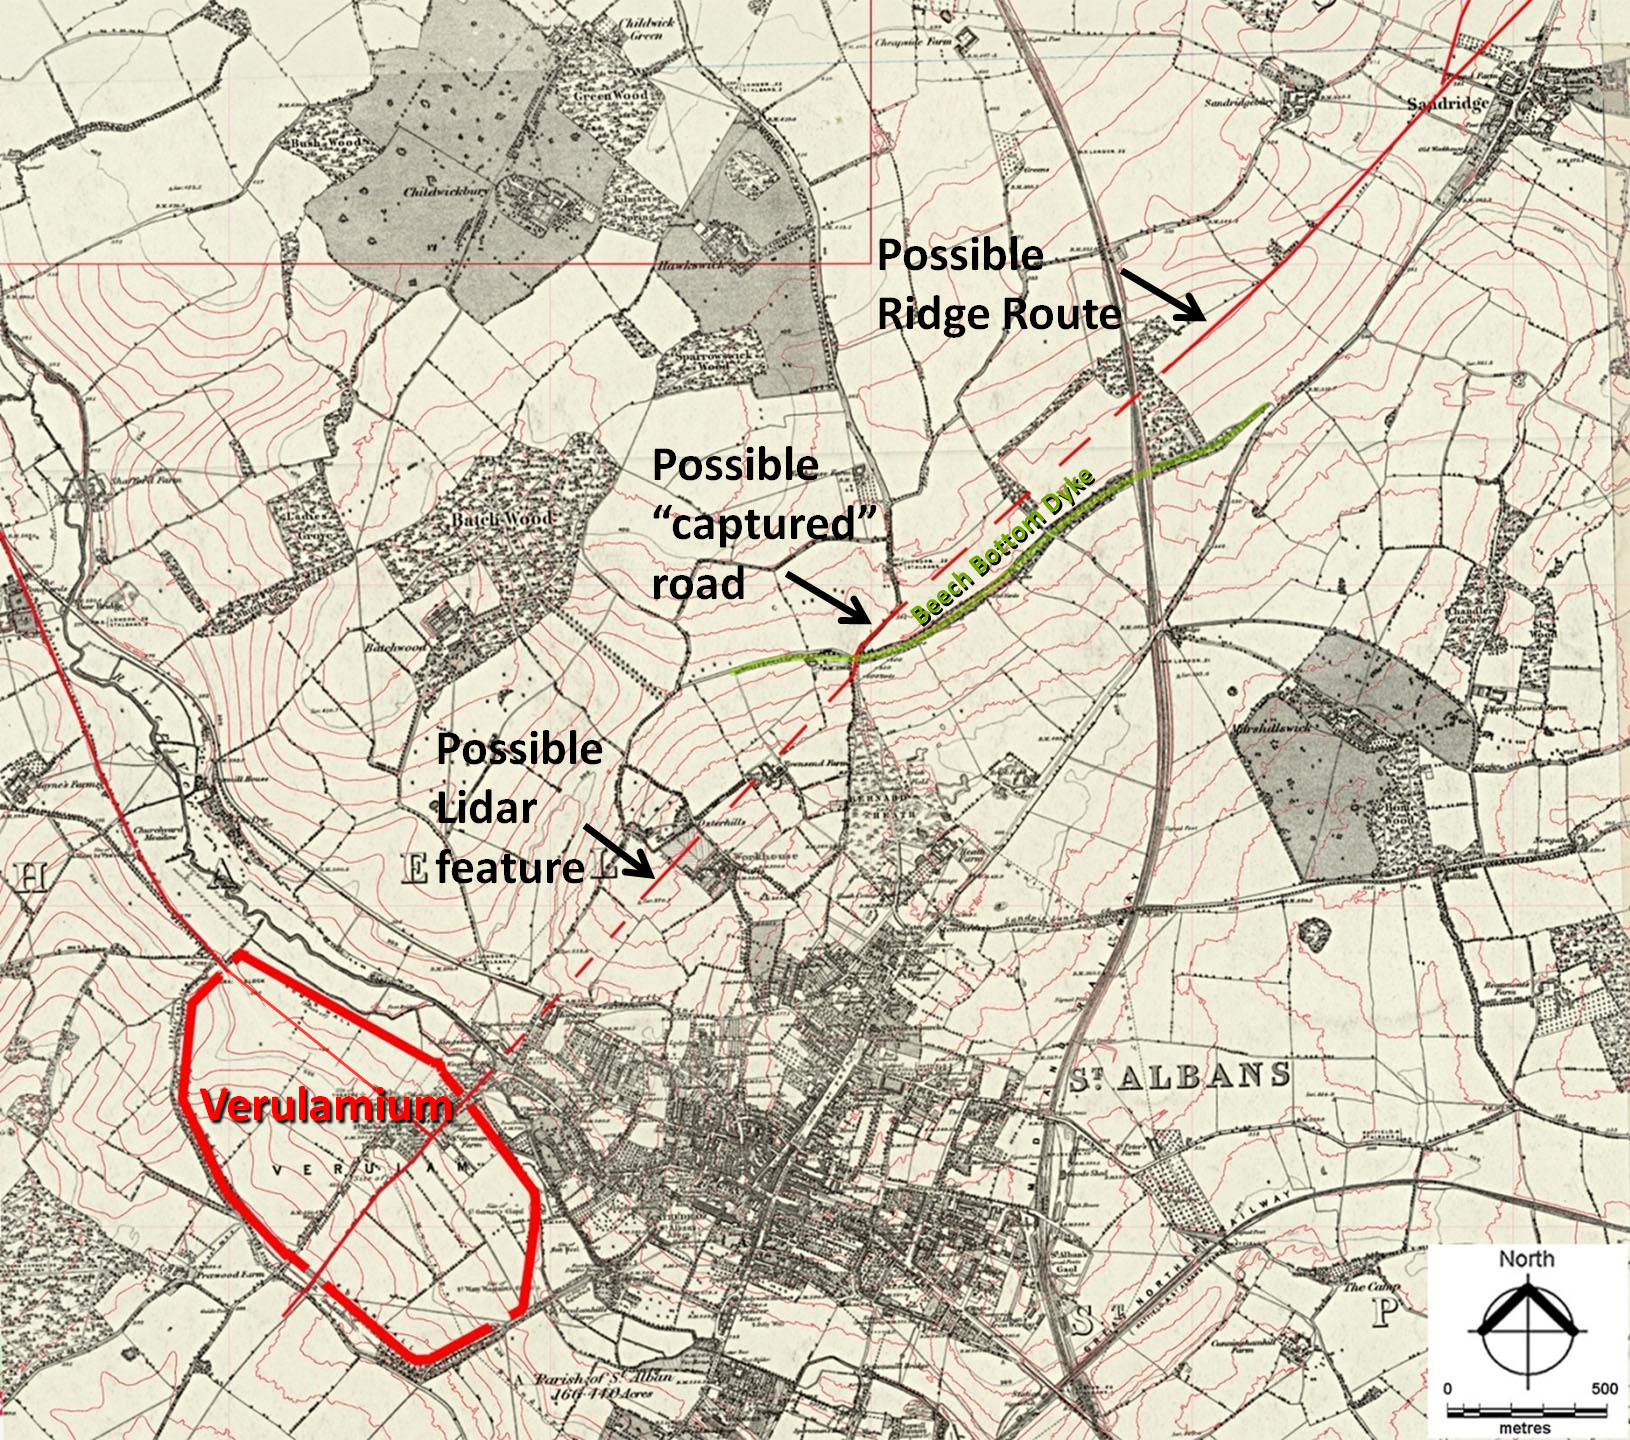
First Edition OS Map - St Albans
Across suburban St Albans we are reliant on old maps but the clues do fit together very well giving a direct road from Verulamium. |
Click for larger view |
 |
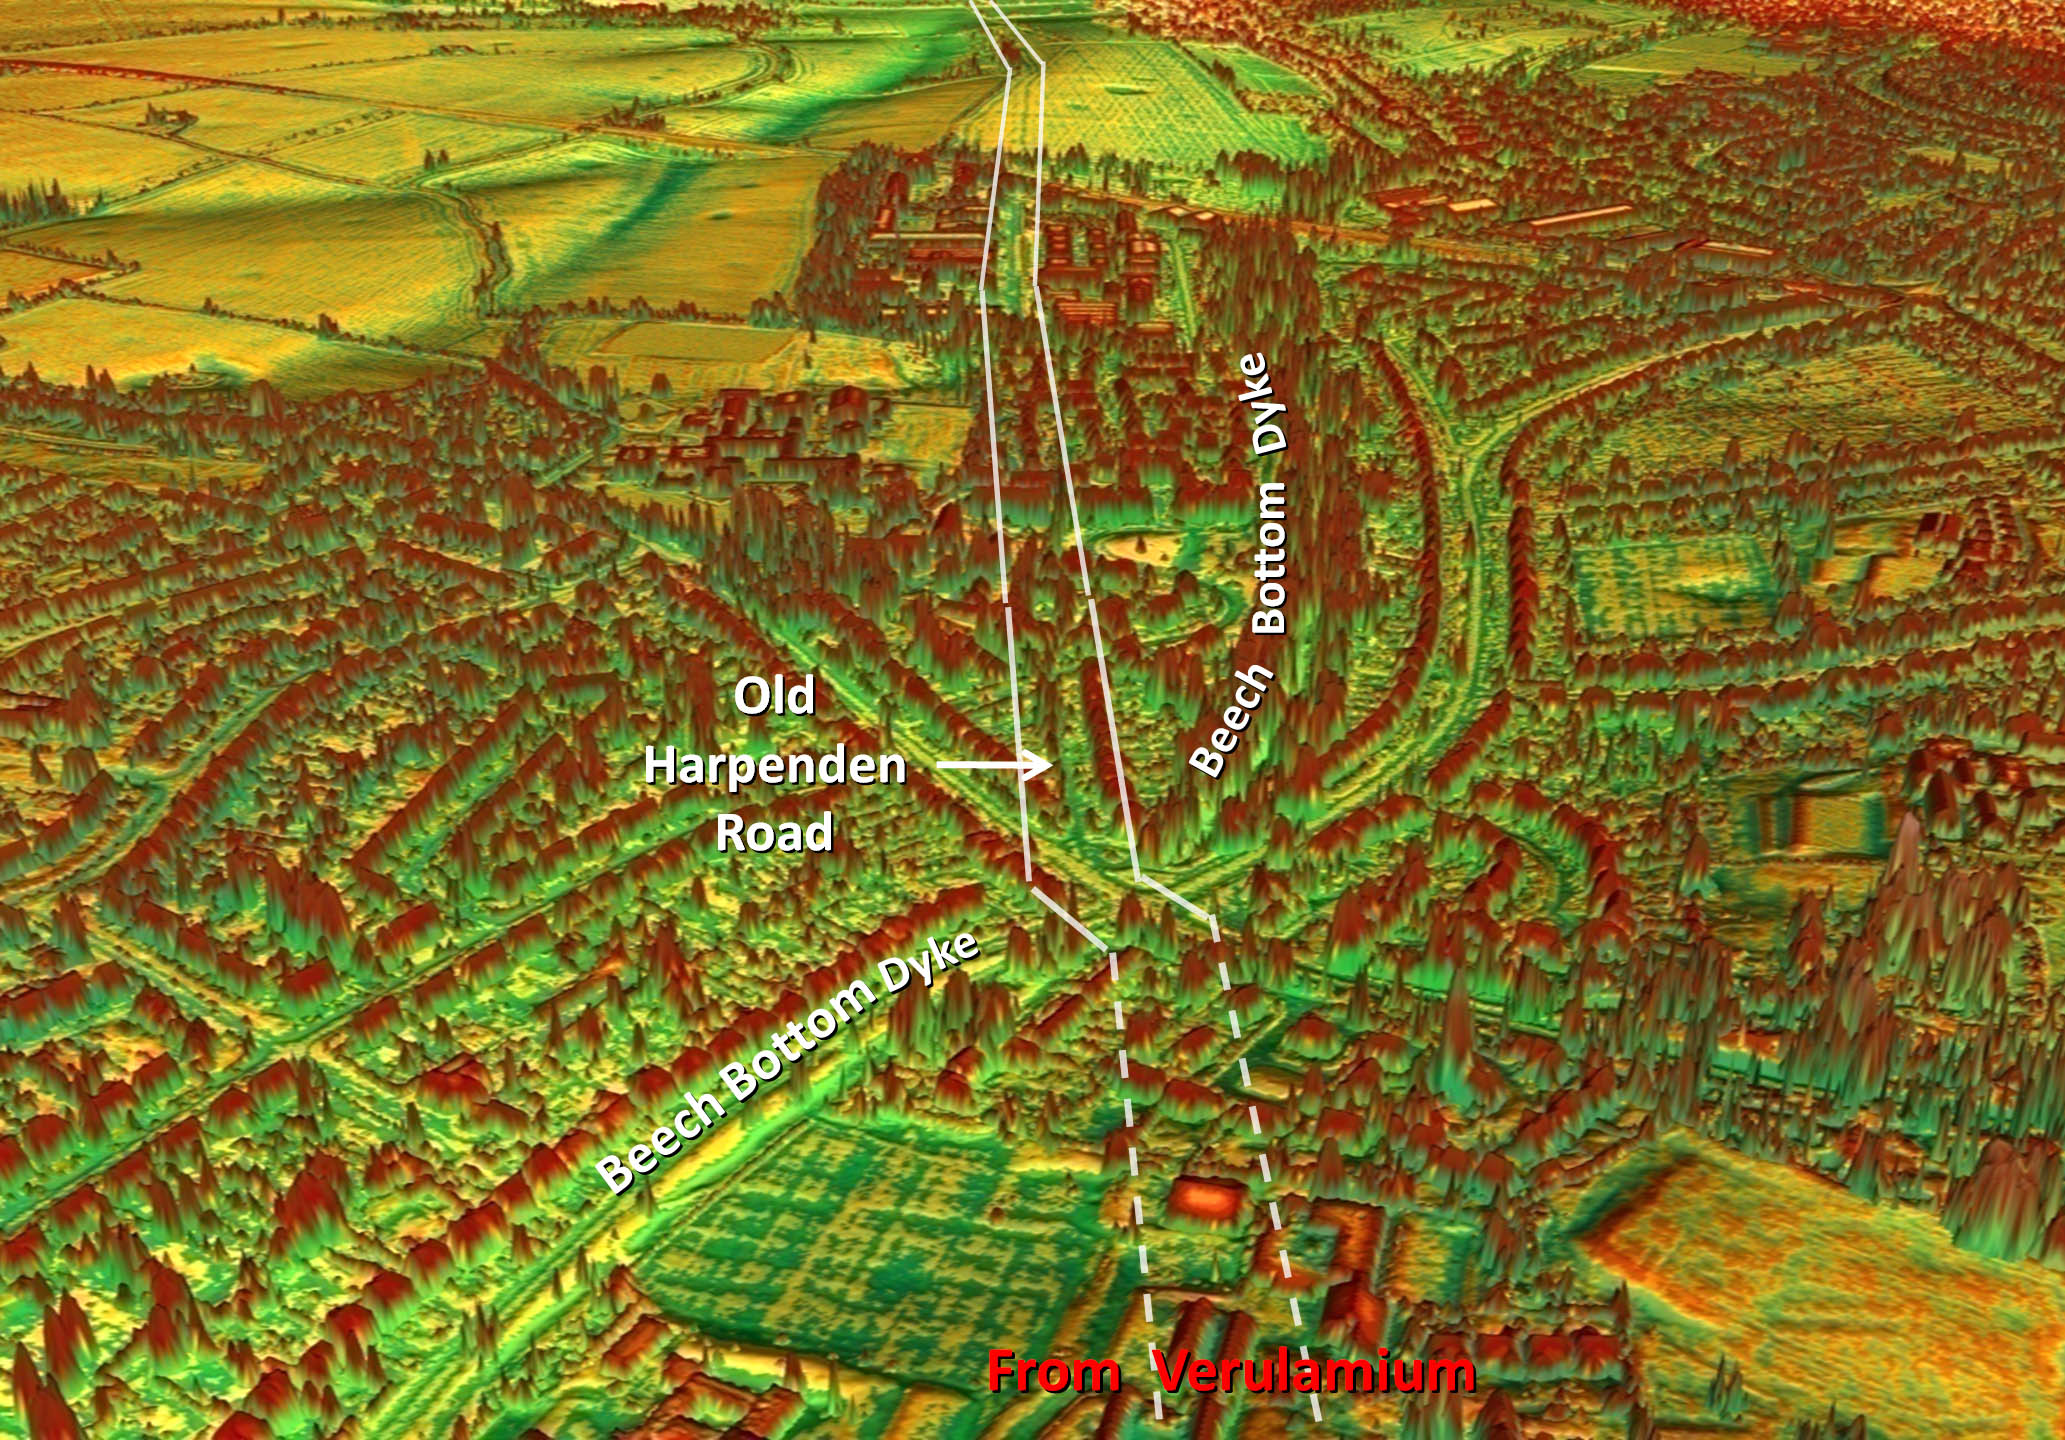
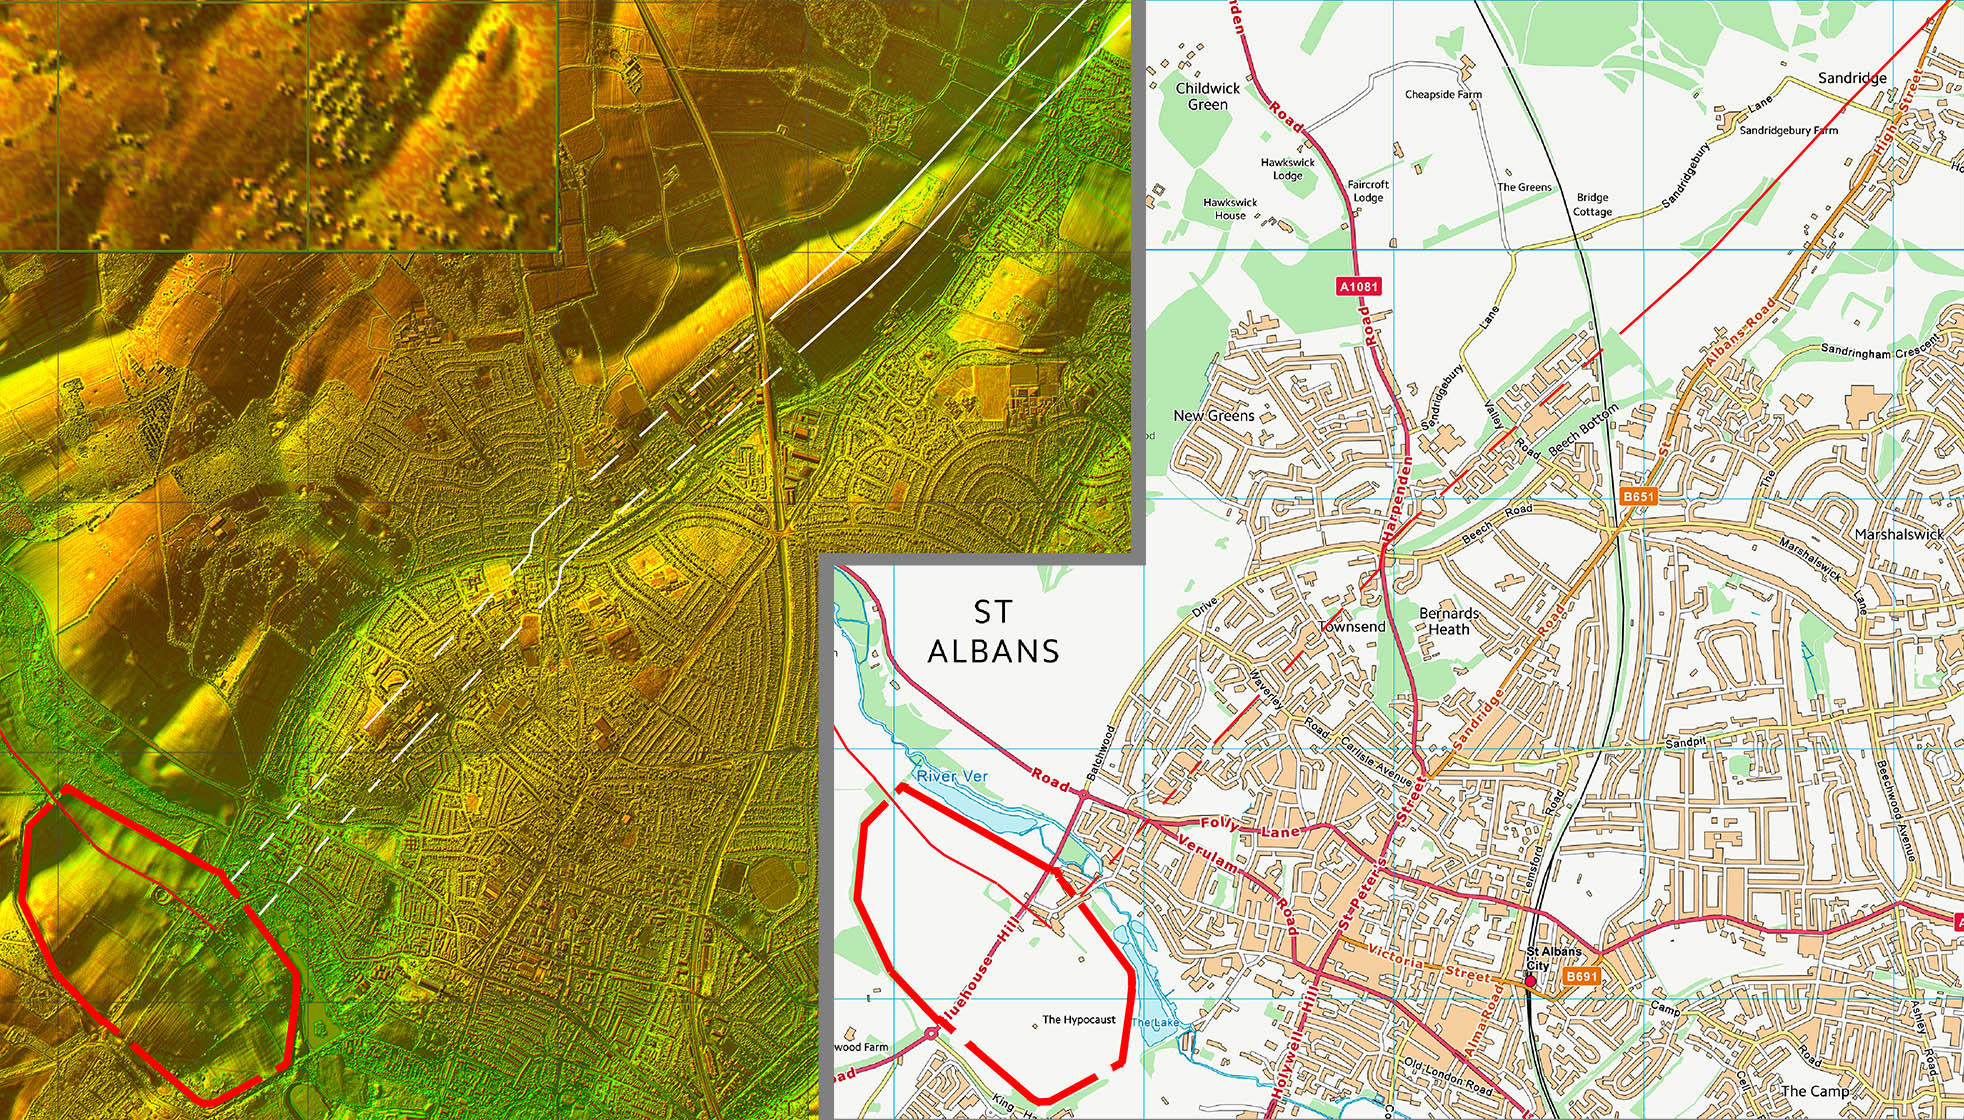
Oblique 3D Lidar Image - Beech Bottom Dyke
Our road would have to cross Beech Bottom Dyke, a massive iron-age pre-Roman ditch. The only possible evidence for a crossing of the Dyke was at Harpenden Road - no others are visible. This was therefore the most likely spot where the Roman’s crossed over. Aligning with this point is Old Harpenden Road |
Click for larger view |
 |
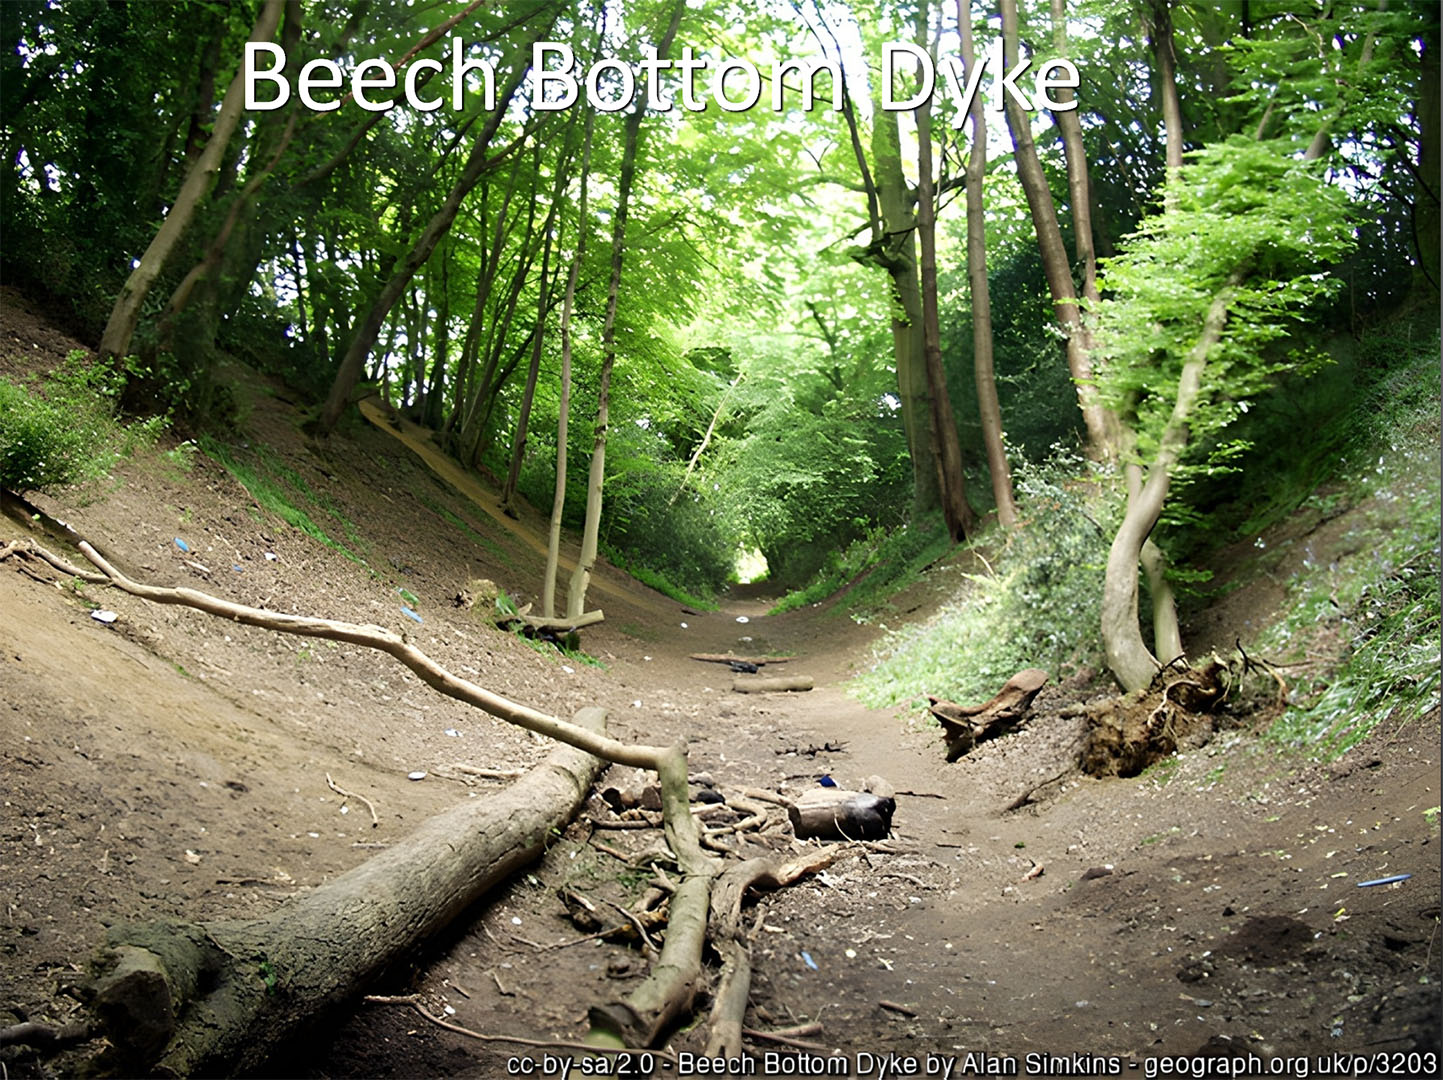
Beech Bottom Dyke
The massive pre- Roman Beech Bottom Dyke. The is evidence in only one place for a crossing point - Harpenden Road. |
Click for larger view |
 |
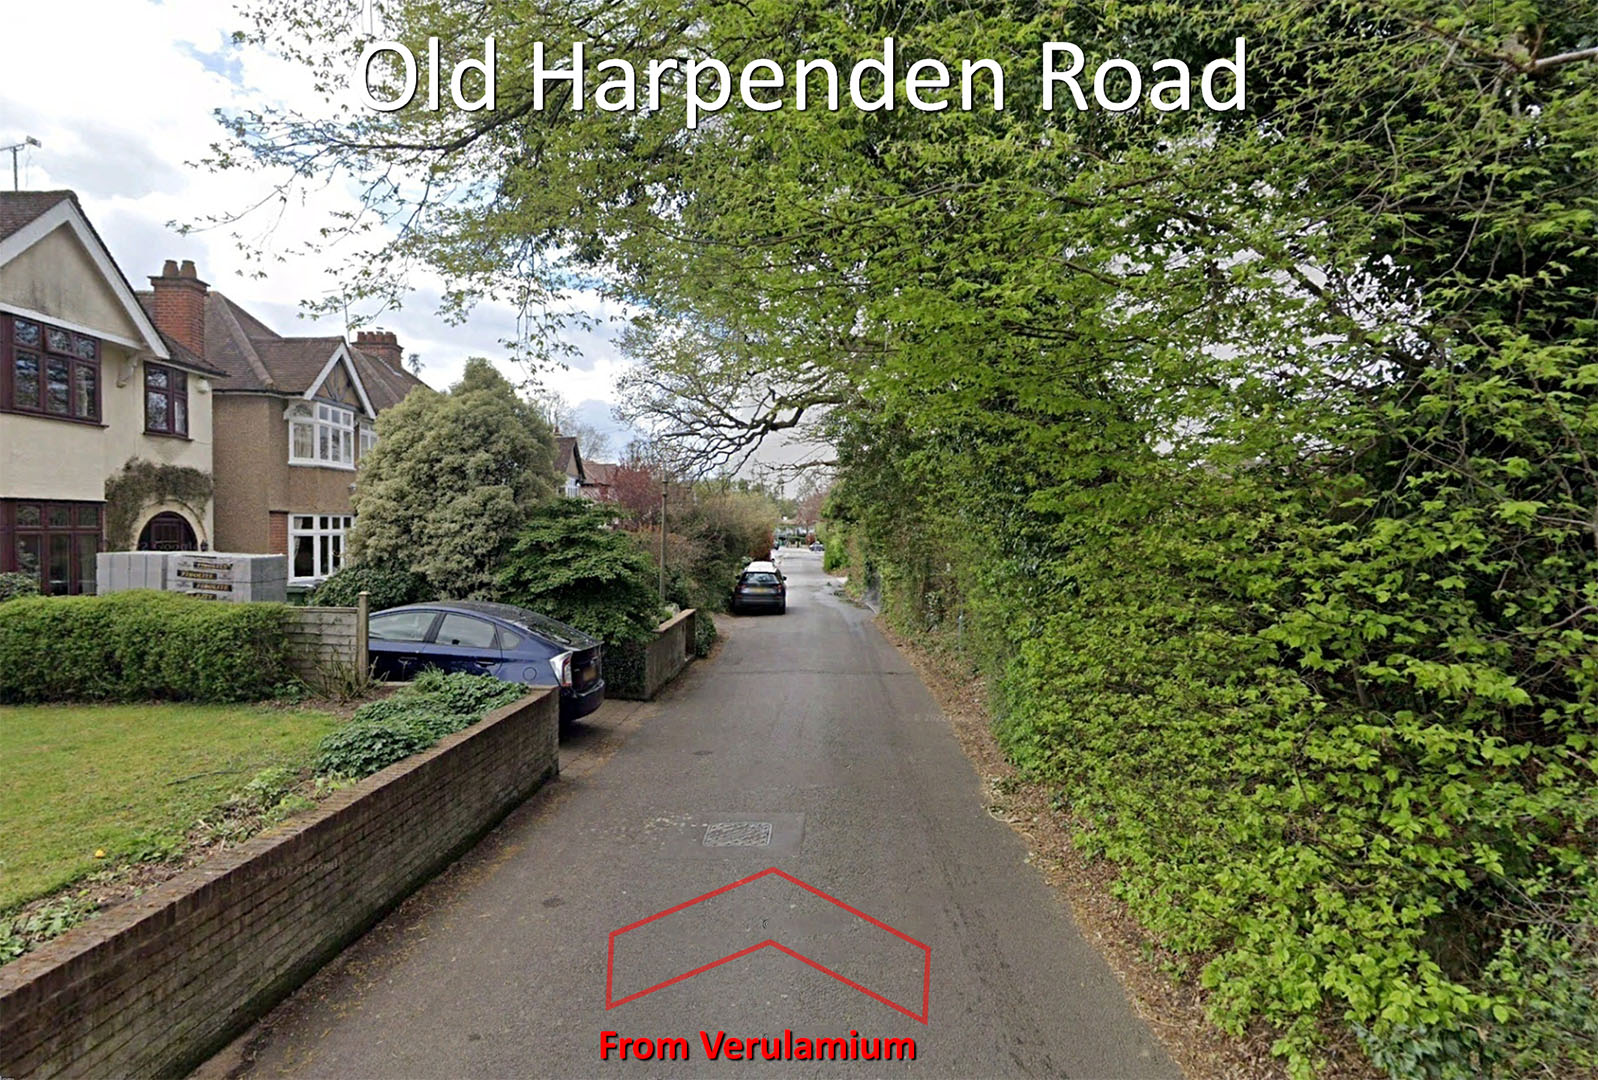
Old Harpenden Road - "Captured" Road
This is the old Harpenden Road before a modern bypass. It has all the hallmarks of a "captured" road. |
Click for larger view |
 |
Oblique 3D Lidar Image - Braughing/Baldock Junction
It would appear that the road to Braughing was the earlier with the road to Baldock a later branch off it. |
Click for larger view |
 |
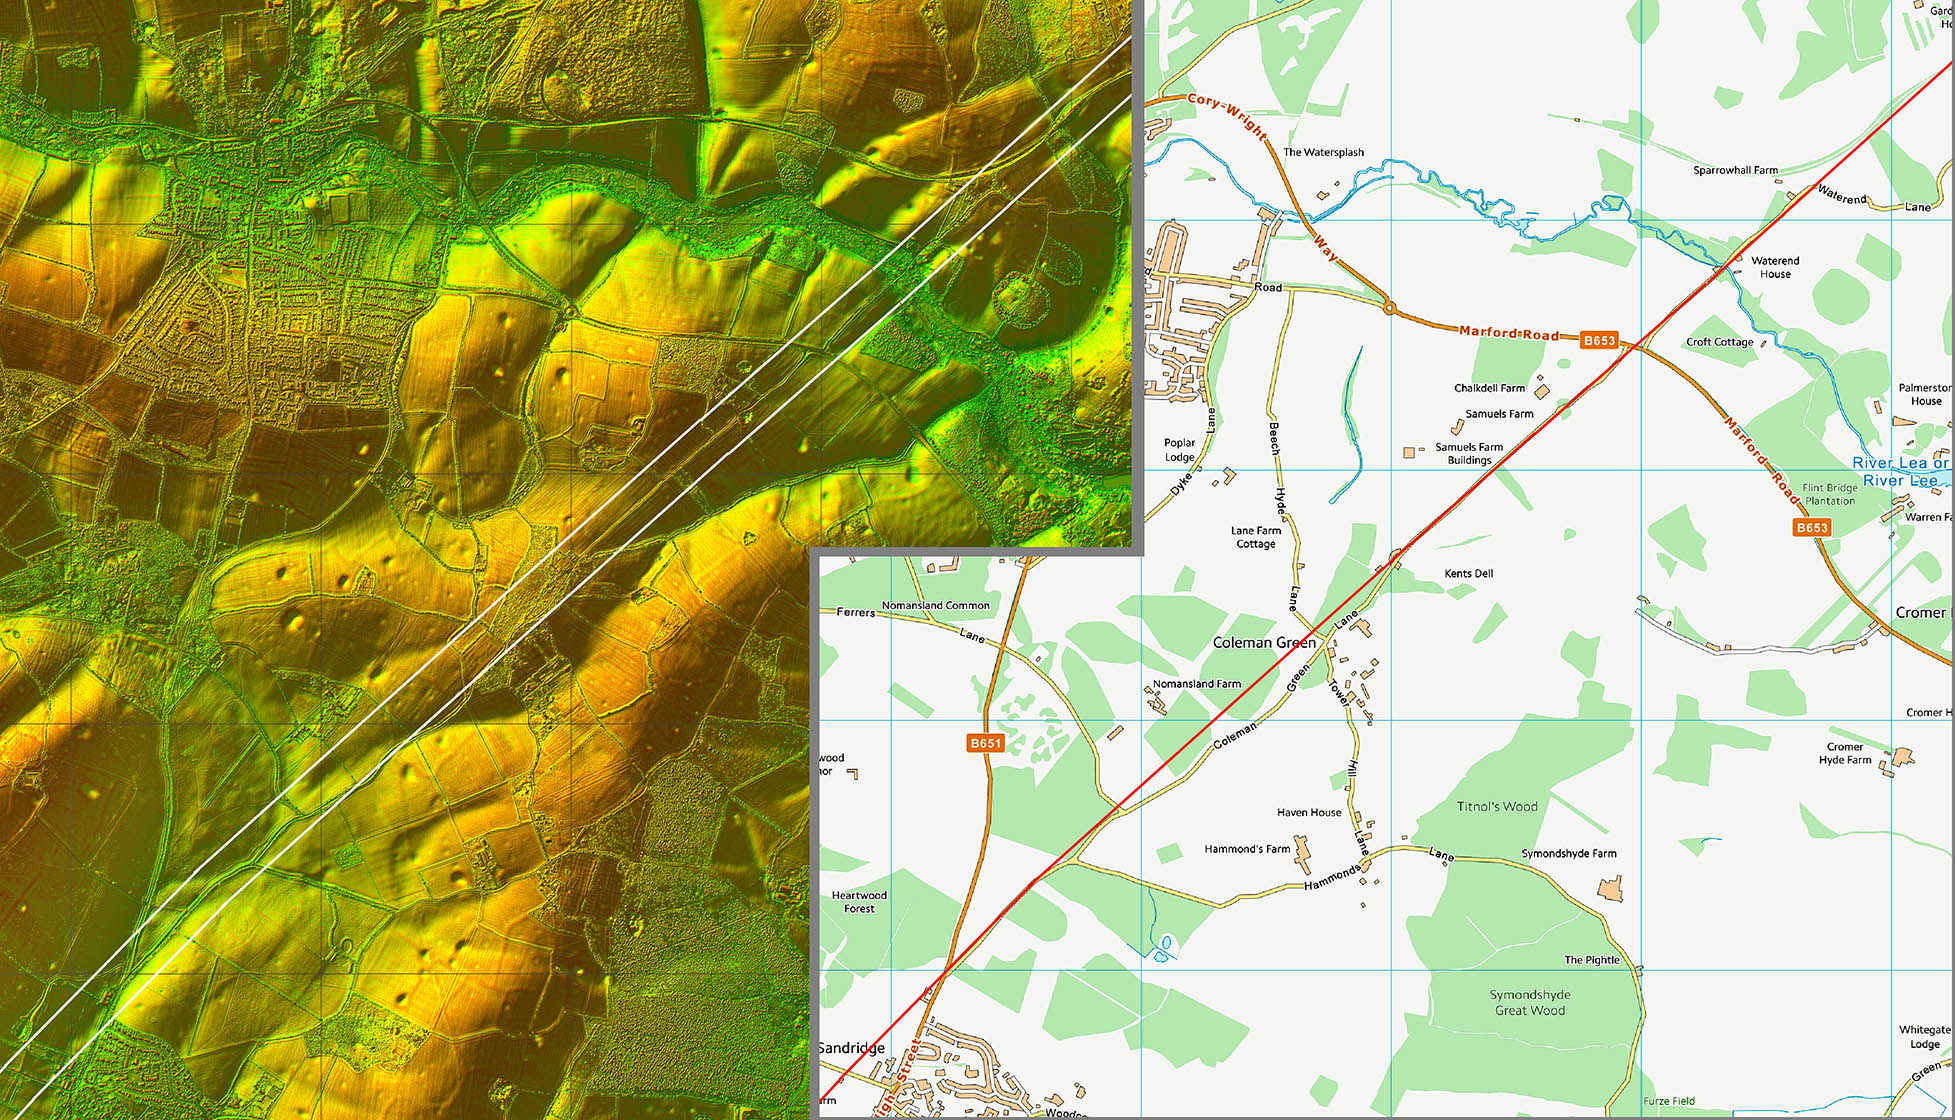
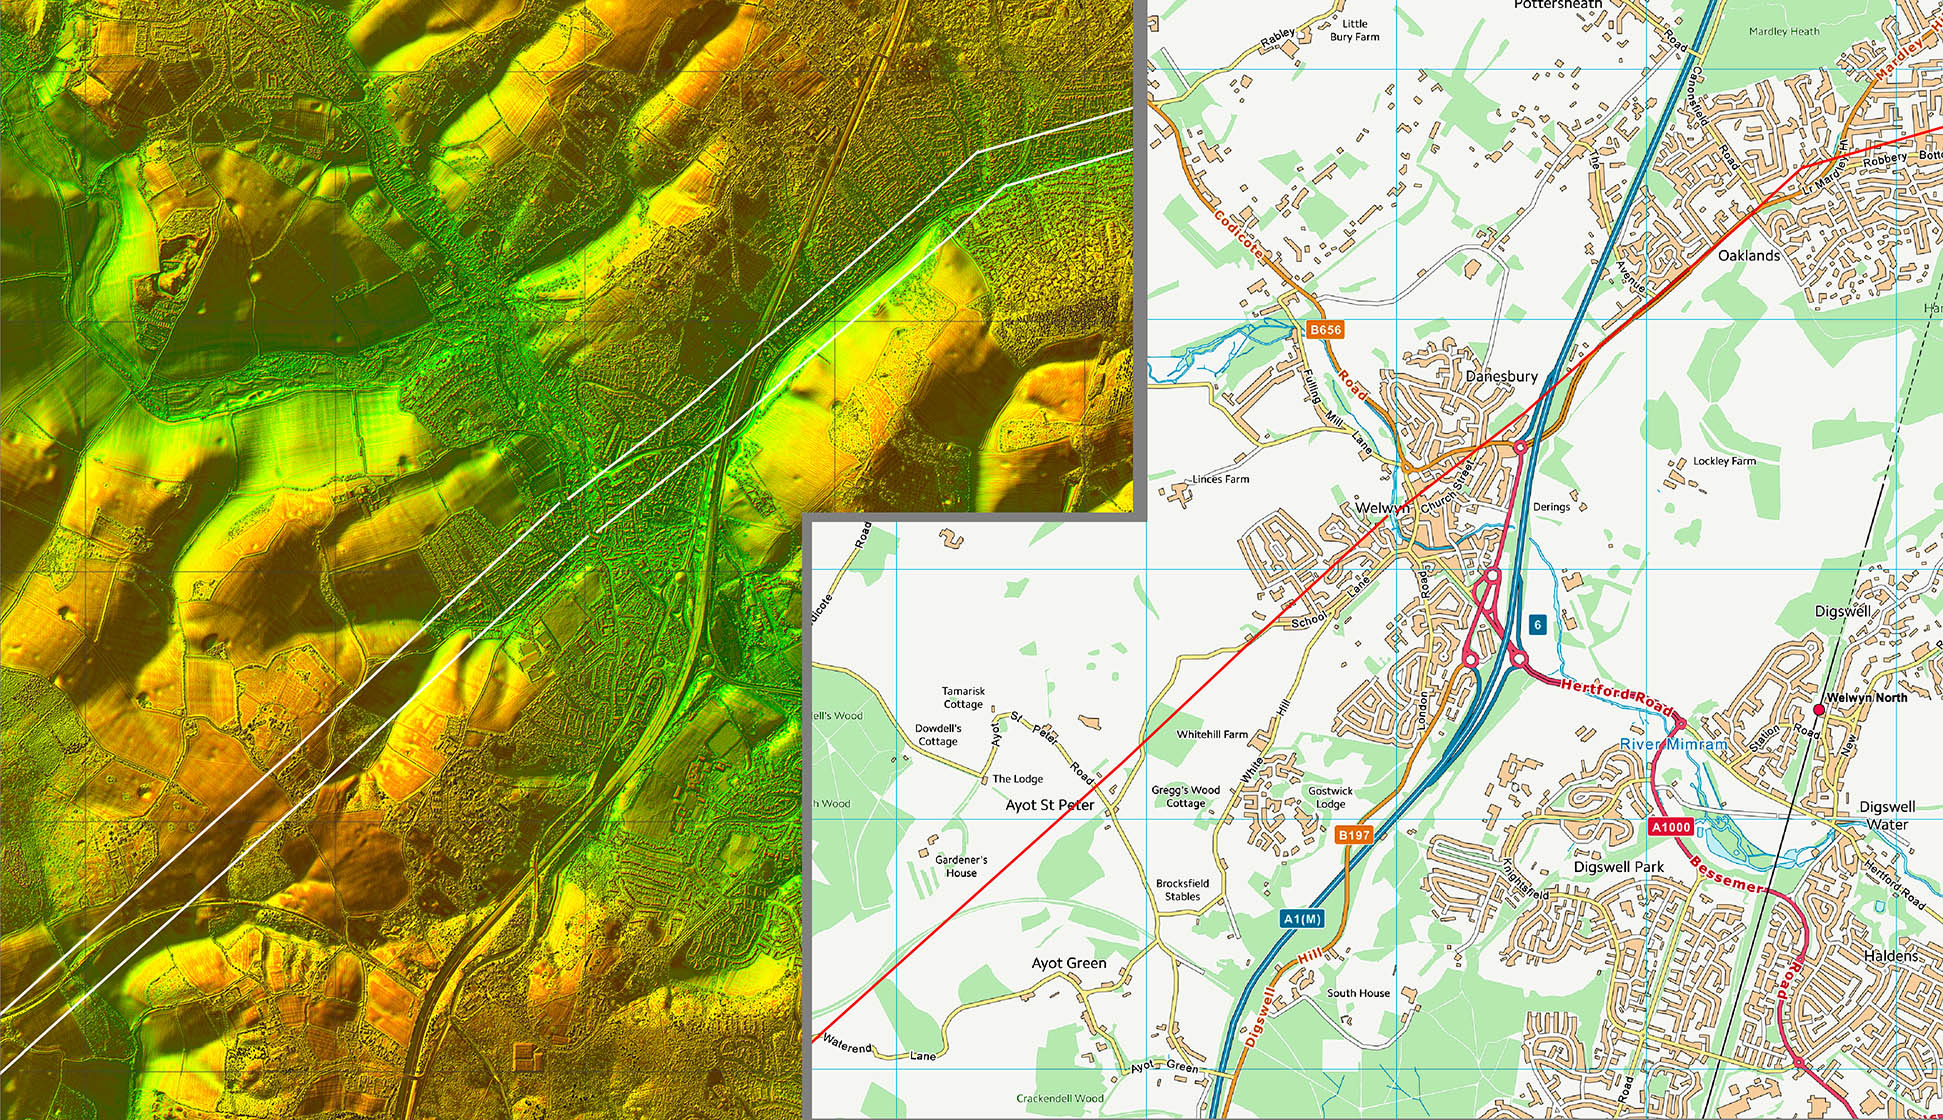
Oblique 3D Lidar Image - Either side of Welwyn
The road probably targeted Welwyn which would explain the change of direction there. |
Click for larger view |
 |
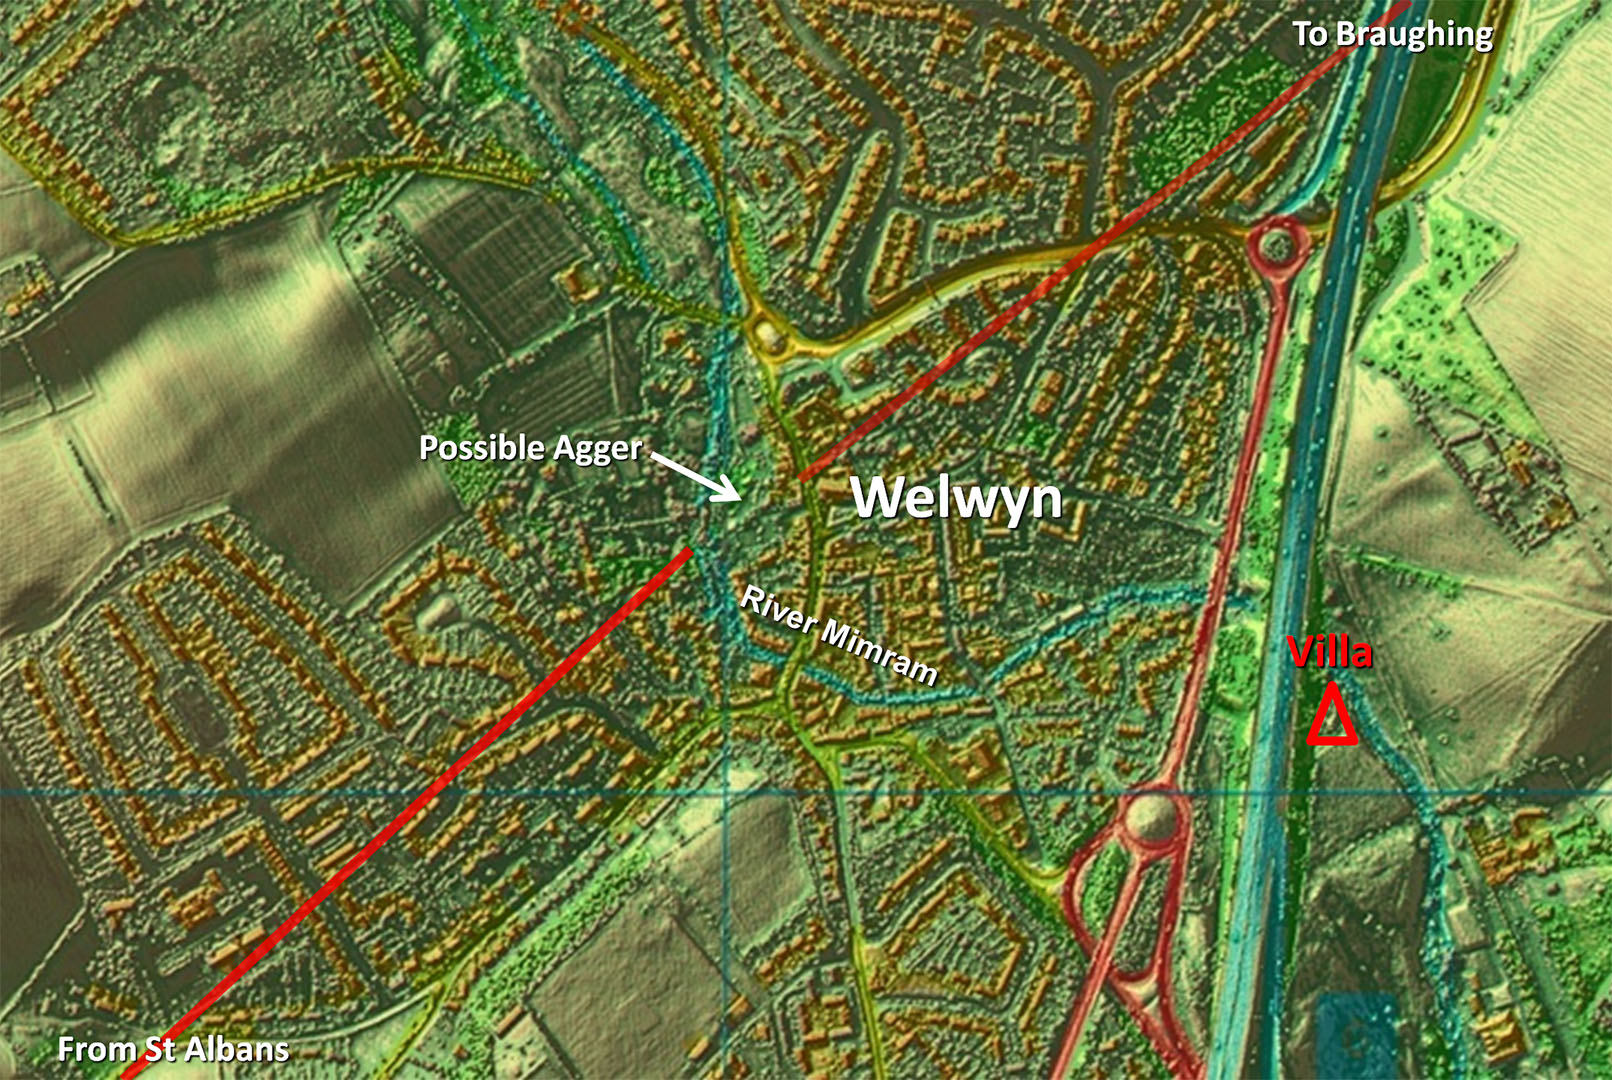
Lidar Image - Welwyn
It is interpolation across Welwyn but this possible agger feature by the River Mimram is on line. |
Click for larger view |
 |
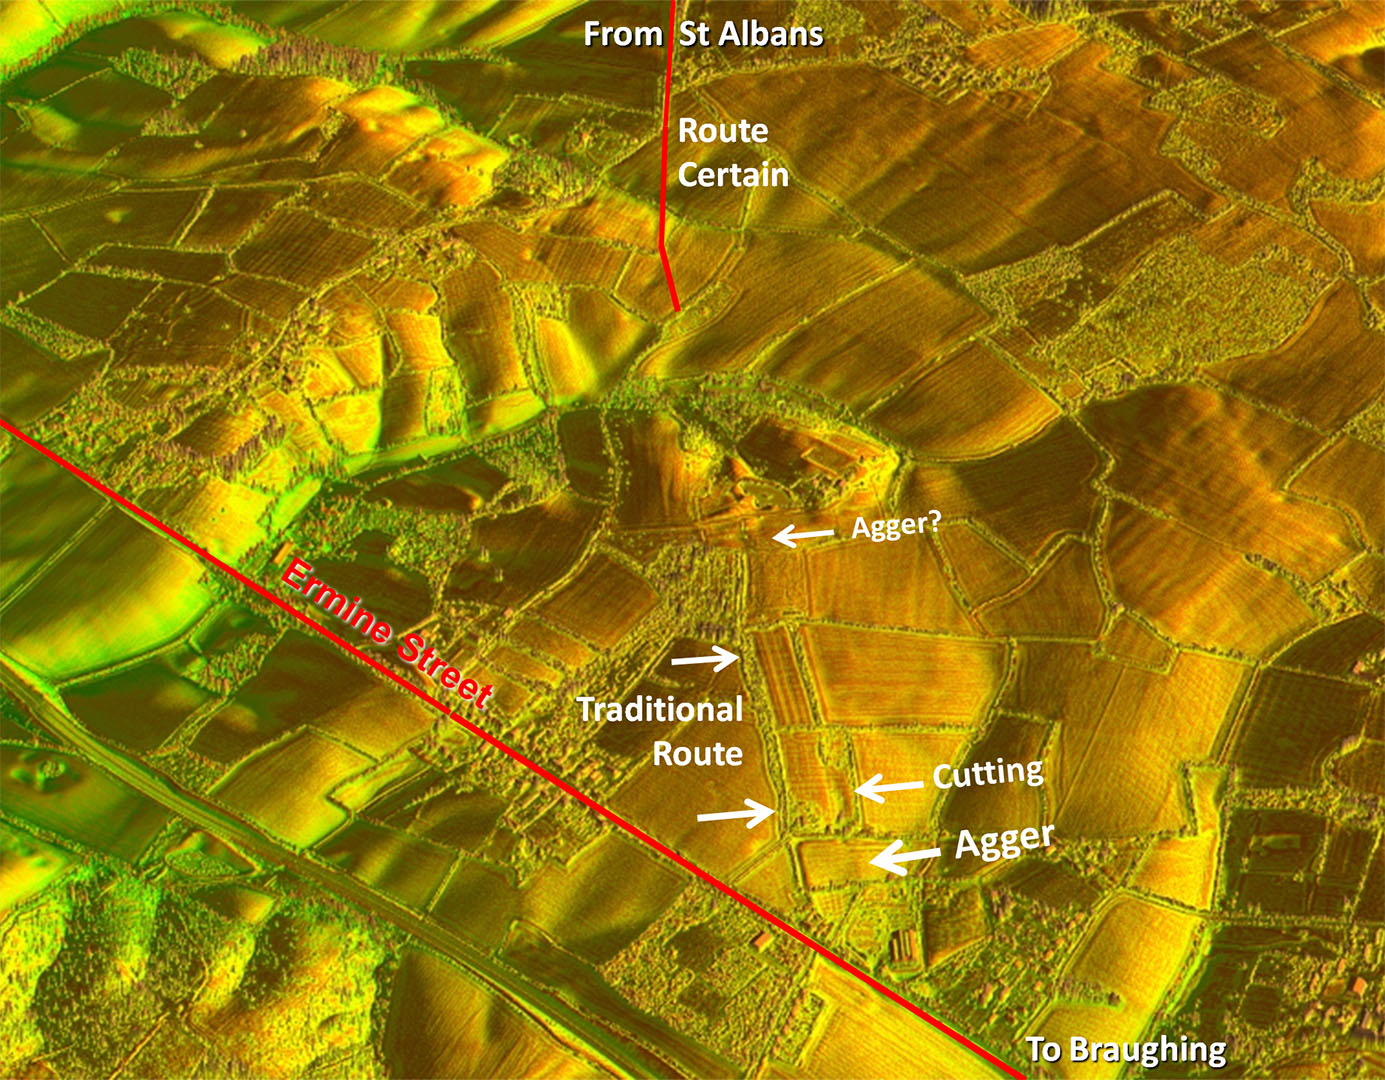
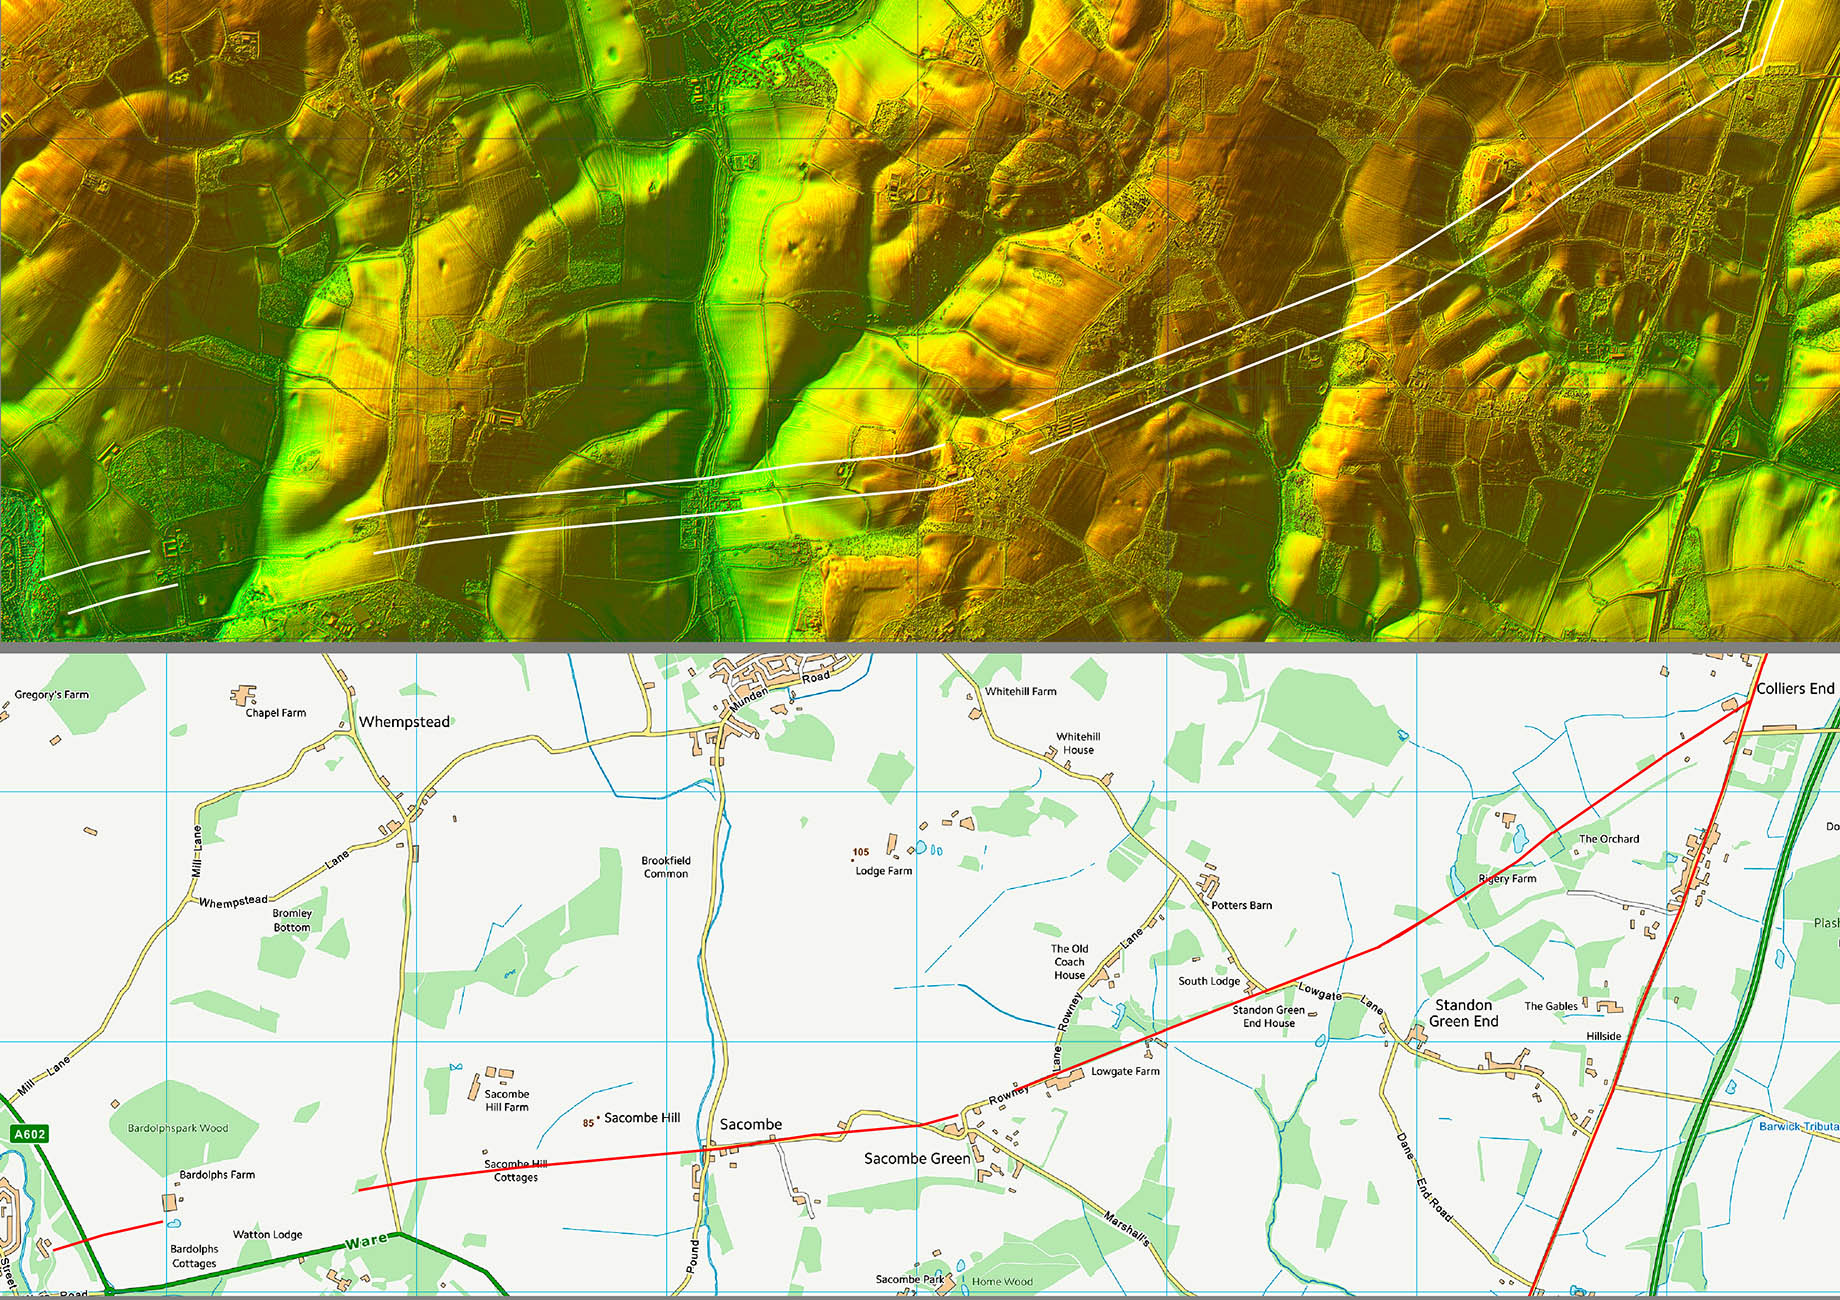
Oblique 3D Lidar Image - Route to Ermine Street
The final section where our road joined Ermine Street appears to be further north (right) than the traditional line there. |
Click for larger view |
 |
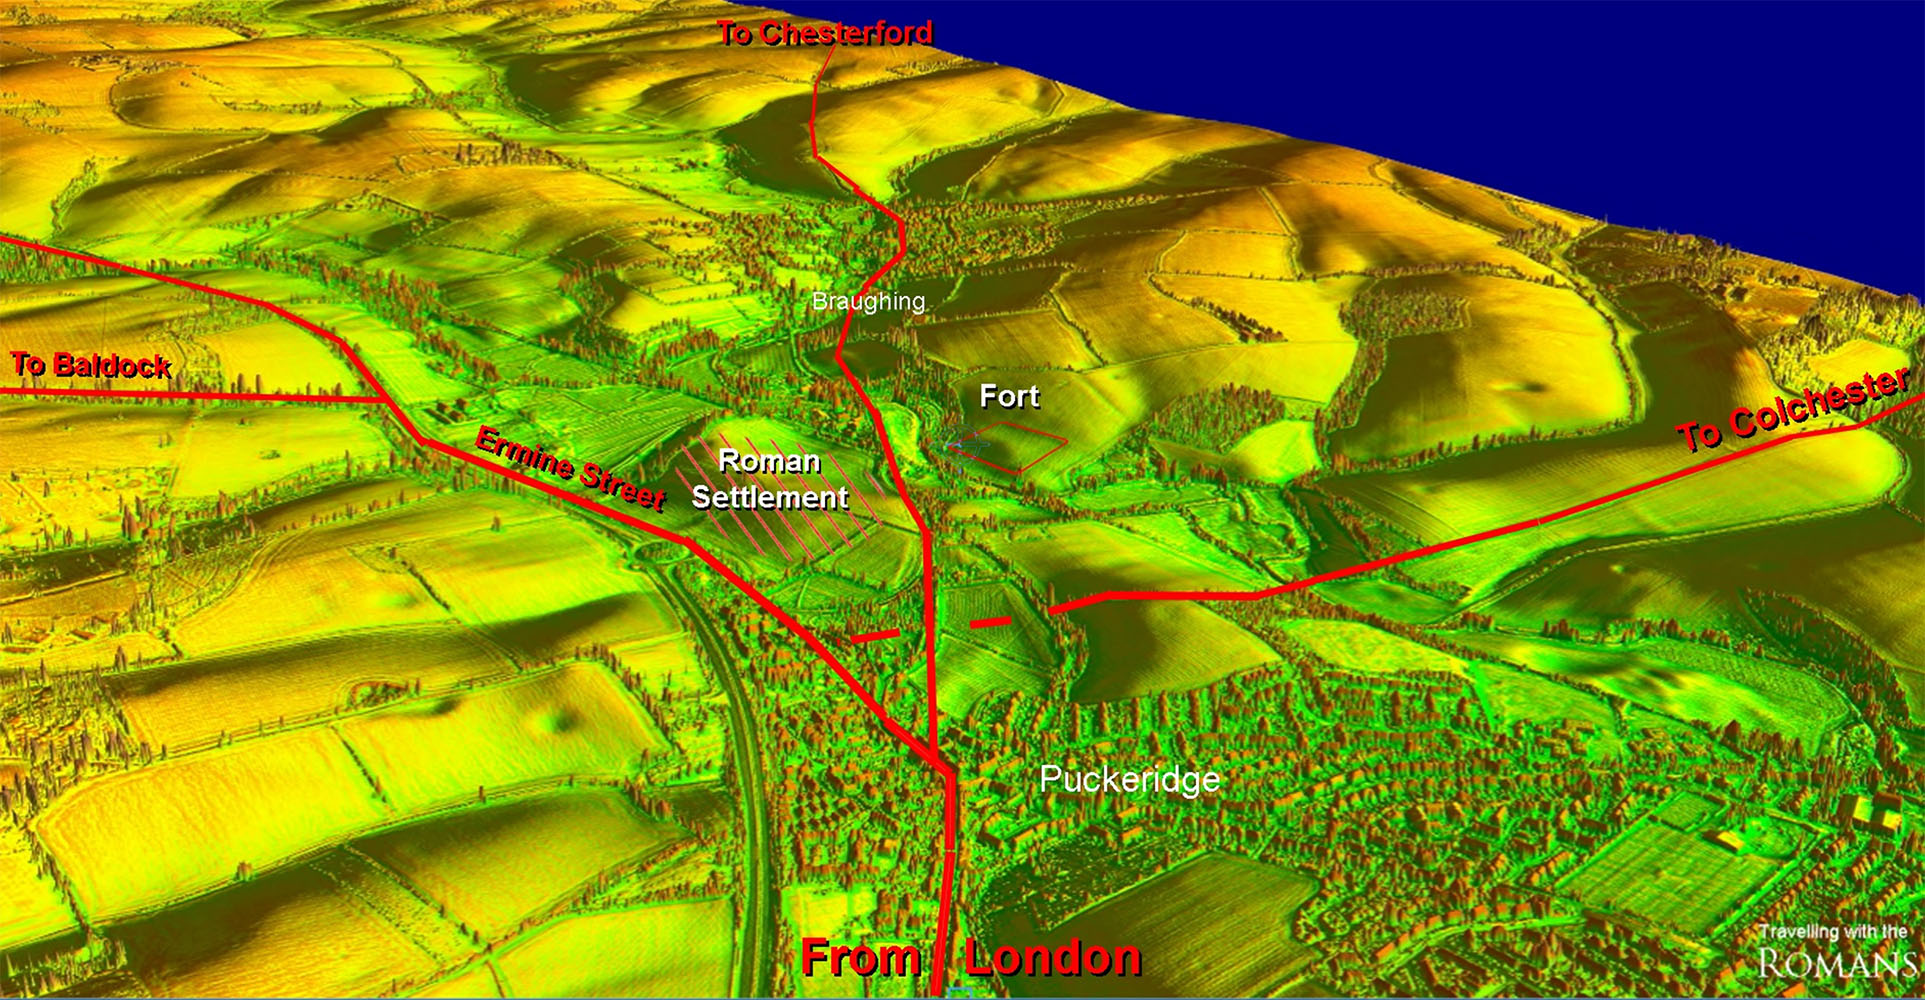
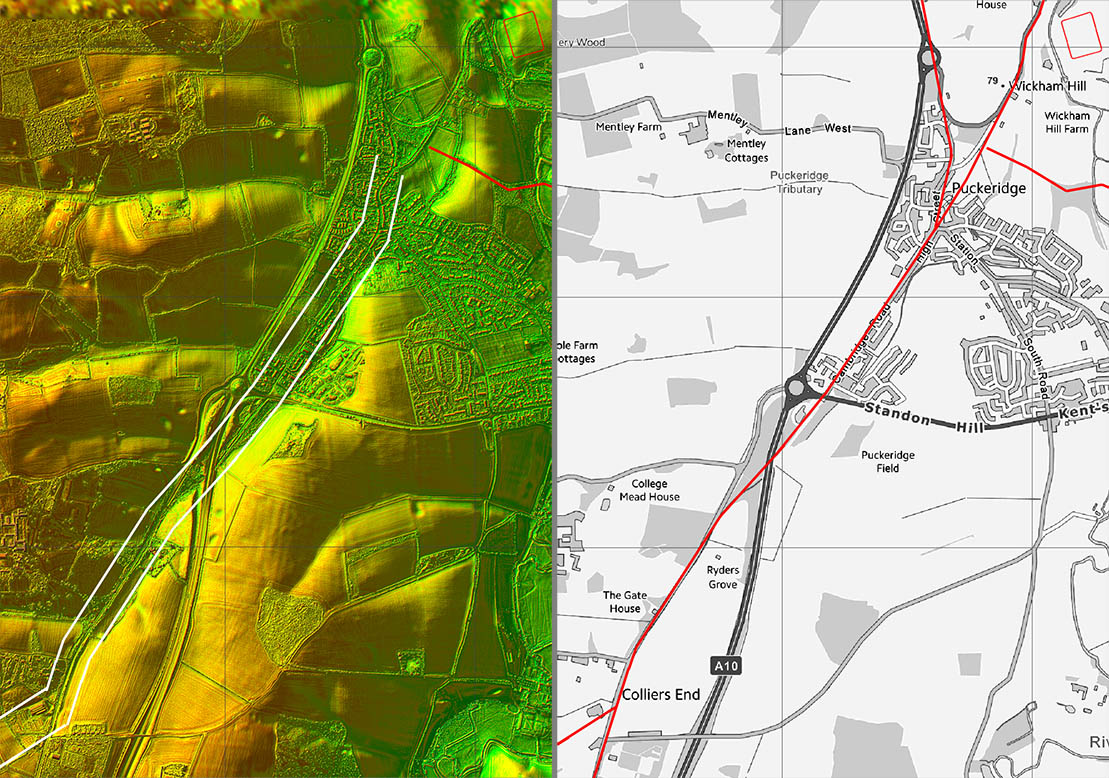
Oblique 3D Lidar Image - Braughing
The important road junction and settlement of Braughing - sometimes called Puckeridge but actually in the parish of Braughing. Note the early fort which seems to be set out relative to the road to Chesterford. Was this the original earliest route?
Note Braughing is pronounced "Braff-in". |
Click for larger view |
 |
| Route Map 1 |
Click for larger view |
 |
| Route Map 2 |
Click for larger view |
 |
| Route Map 3 |
Click for larger view |
 |
| Route Map 4 |
Click for larger view |
 |
Route Map 5
I have shown the "corrected" route for the junction with Ermine Street. |
Click for larger view |
 |
| Route Map 6 |
Click for larger view |
 |